- Made by AppCoda
- Contact us / Support
- Tweet this book
- Preface
- 1. Building Adaptive User Interfaces
- 2. Creating Table View Sections and Index list with Diffable Data Source
- 3. Animating Table View Cells
- 4. Working with JSON and Codable
- 5. How to Integrate the Twitter and Facebook SDK for Social Sharing
- 6. Working with Email and Attachments
- 7. Sending SMS and MMS Using MessageUI Framework
- 8. How to Get Direction and Draw Route on Maps
- 9. Search Nearby Points of Interest Using Local Search
- 10. Audio Recording and Playback
- 11. Scan QR Code Using AVFoundation Framework
- 12. Working with URL Schemes
- 13. Building a Full Screen Camera with Gesture-based Controls
- 14. Video Capturing and Playback Using AVKit
- 15. Displaying Banner Ads using Google AdMob
- 16. Working with Custom Fonts
- 17. Working with AirDrop, UIActivityViewController and Uniform Type Identifiers
- 18. Building Grid Layouts Using Collection Views and Diffable Data Source
- 19. Interacting with Collection Views
- 20. Adaptive Collection Views Using UITraitCollection and Compositional Layout
- 21. Building a Weather Widget Using WidgetKit
- 22. Building Slide Out Sidebar Menus Using Objective-C Libraries
- 23. View Controller Transitions and Animations
- 24. Building a Slide Down Menu
- 25. Self Sizing Cells and Dynamic Type
- 26. XML Parsing, RSS and Expandable Table View Cells
- 27. Applying a Blurred Background Using UIVisualEffect
- 28. Using Touch ID and Face ID For Authentication
- 29. Building a Carousel-Like User Interface
- 30. Working with Parse
- 31. Parsing CSV and Preloading a SQLite Database Using Core Data
- 32. Connecting Multiple Annotations with Polylines and Routes
- 33. Using CocoaPods in Swift Projects
- 34. Building a Simple Sticker App
- 35. Building iMessage Apps Using Messages Framework
- 36. Building Custom UI Components Using IBDesignable and IBInspectable
- 37. Using Firebase for User Authentication
- 38. Google and Facebook Authentication Using Firebase
- 39. Using Firebase Database and Storage to Build an Instagram-like App
- 40. Building a Real-time Image Recognition App Using Core ML
- 41. Building AR Apps with ARKit and SpriteKit
- 42. Working with 3D Objects in Augmented Reality Using ARKit and SceneKit
- 43. Use Create ML to Train Your Own Machine Learning Model for Image Recognition
- 44. Building a Sentiment Classifier Using Create ML to Classify User Reviews
- 45. Working with Image Tracking Using ARKit
- Published with GitBook
Chapter 3
Animating Table View Cells

When you read this chapter, I assume you already knew how to use UITableView to present data. If not, go back and read the Beginning iOS Programming with Swift book.
The UITableView class provides a powerful way to present information in table form, and it is one of the most commonly used components in iOS apps. Whether you're building a productivity app, to-do app, or social app, you would make use of table views in one form or another. The default implementation of UITableView is preliminary and only suitable for basic apps. To differentiate one's app from the rest, you usually provide customizations for the table views and table cells in order to make the app stand out.
In this chapter, I will show you a powerful technique to liven up your app by adding subtle animation. Thanks to the built-in APIs. It is super easy to animate a table view cell. Again, to demonstrate how the animation is done, we'll tweak an existing table-based app and add a subtle animation.
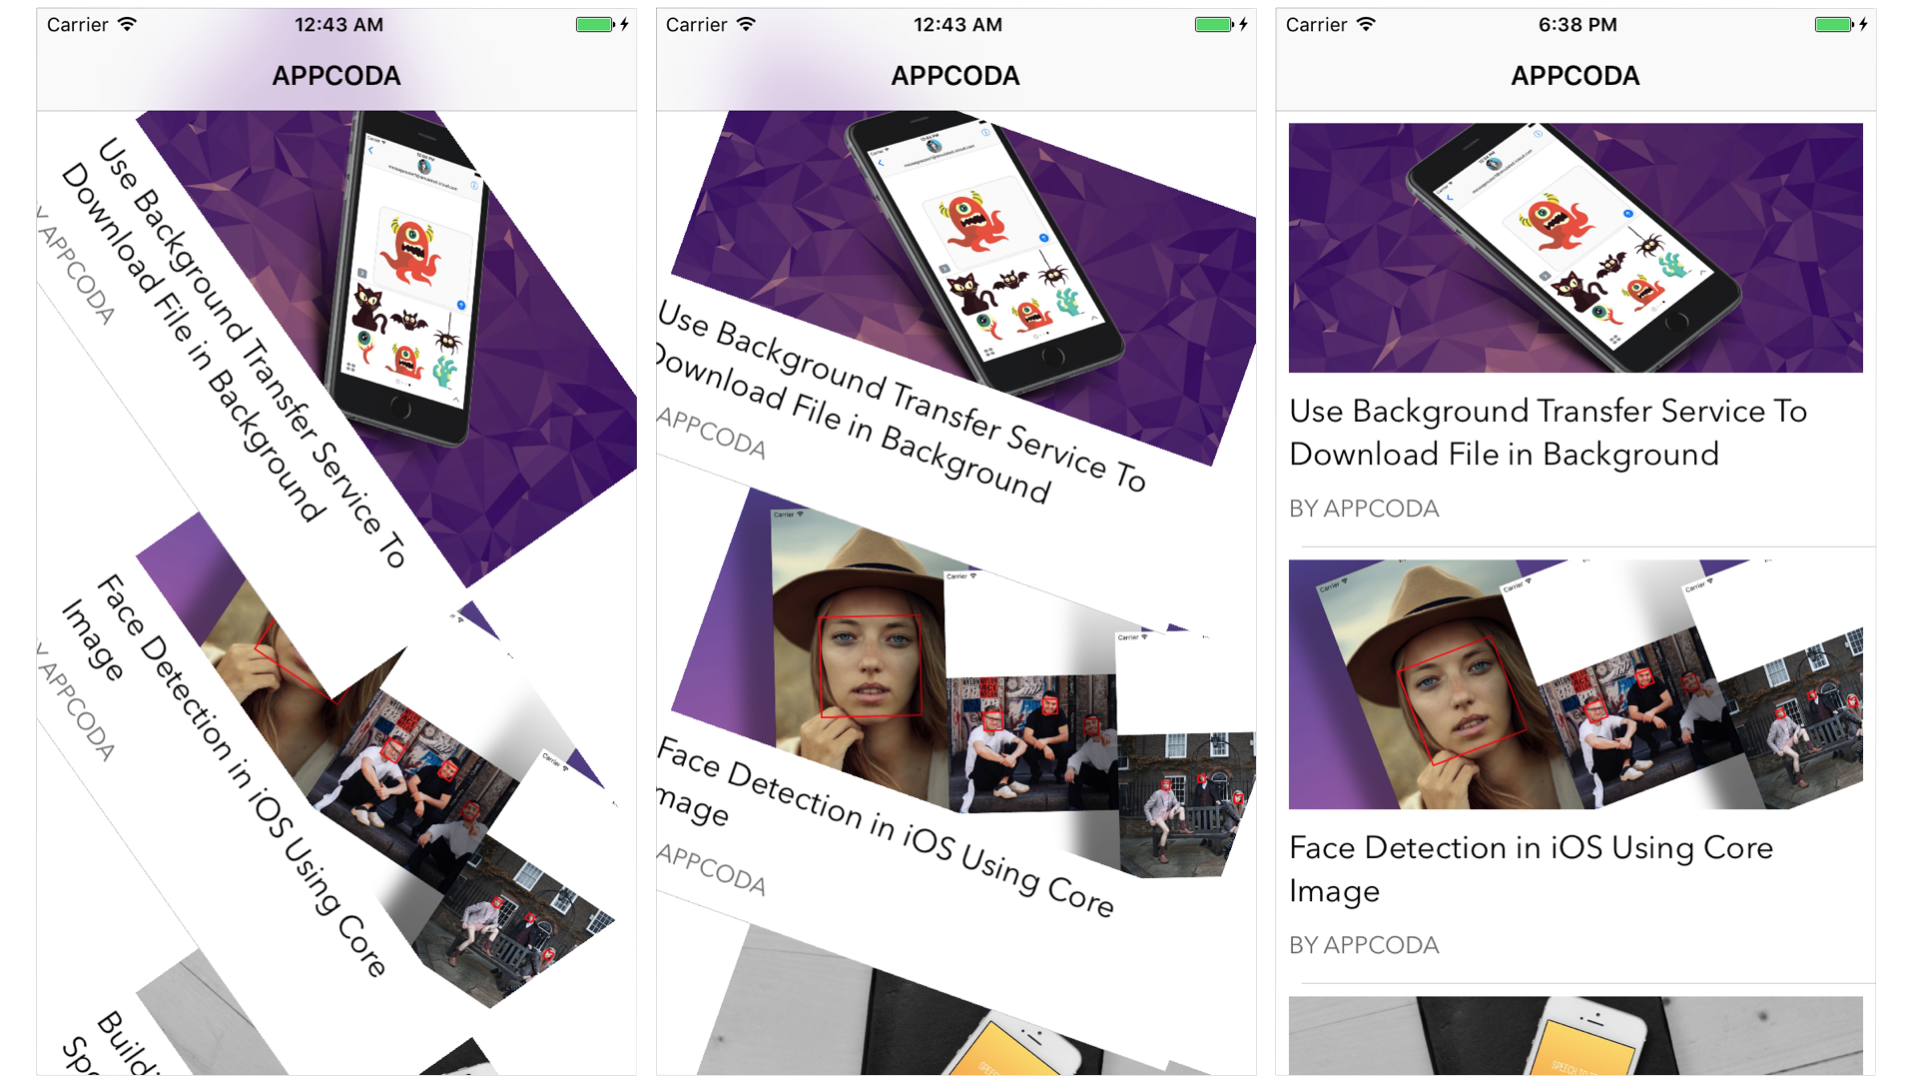
To start with, first download the project template from http://www.appcoda.com/resources/swift55/TableCellAnimationStarter.zip. After downloading, compile the app and make sure you can run it properly. It's just a very simple app displaying a list of articles.

Creating a Simple Fade-in Animation for Table View Cells
Let's start by tweaking the table-based app with a simple fade-in effect. So how can we add this subtle animation when the table row appears?
If you look into the documentation of the UITableViewDelegate protocol, you should find a method called tableView(_:willDisplay:forRowAt:):
optional func tableView(_ tableView: UITableView,
            willDisplay cell: UITableViewCell,
               forRowAt indexPath: IndexPath)
The method will be called right before a row is drawn. By implementing the method, you can customize the cell object and add your own animation before the cell is displayed. Here is what you need to create the fade-in effect. Insert the code snippet in ArticleTableViewController.swift:
override func tableView(_ tableView: UITableView, willDisplay cell: UITableViewCell, forRowAt indexPath: IndexPath) {

    // Define the initial state (Before the animation)
    cell.alpha = 0

    // Define the final state (After the animation)
    UIView.animate(withDuration: 1.0, animations: { cell.alpha = 1 })
}
Core Animation provides iOS developers with an easy way to create animation. All you need to do is define the initial and final state of the visual element. Core Animation will then figure out the required animation between these two states.
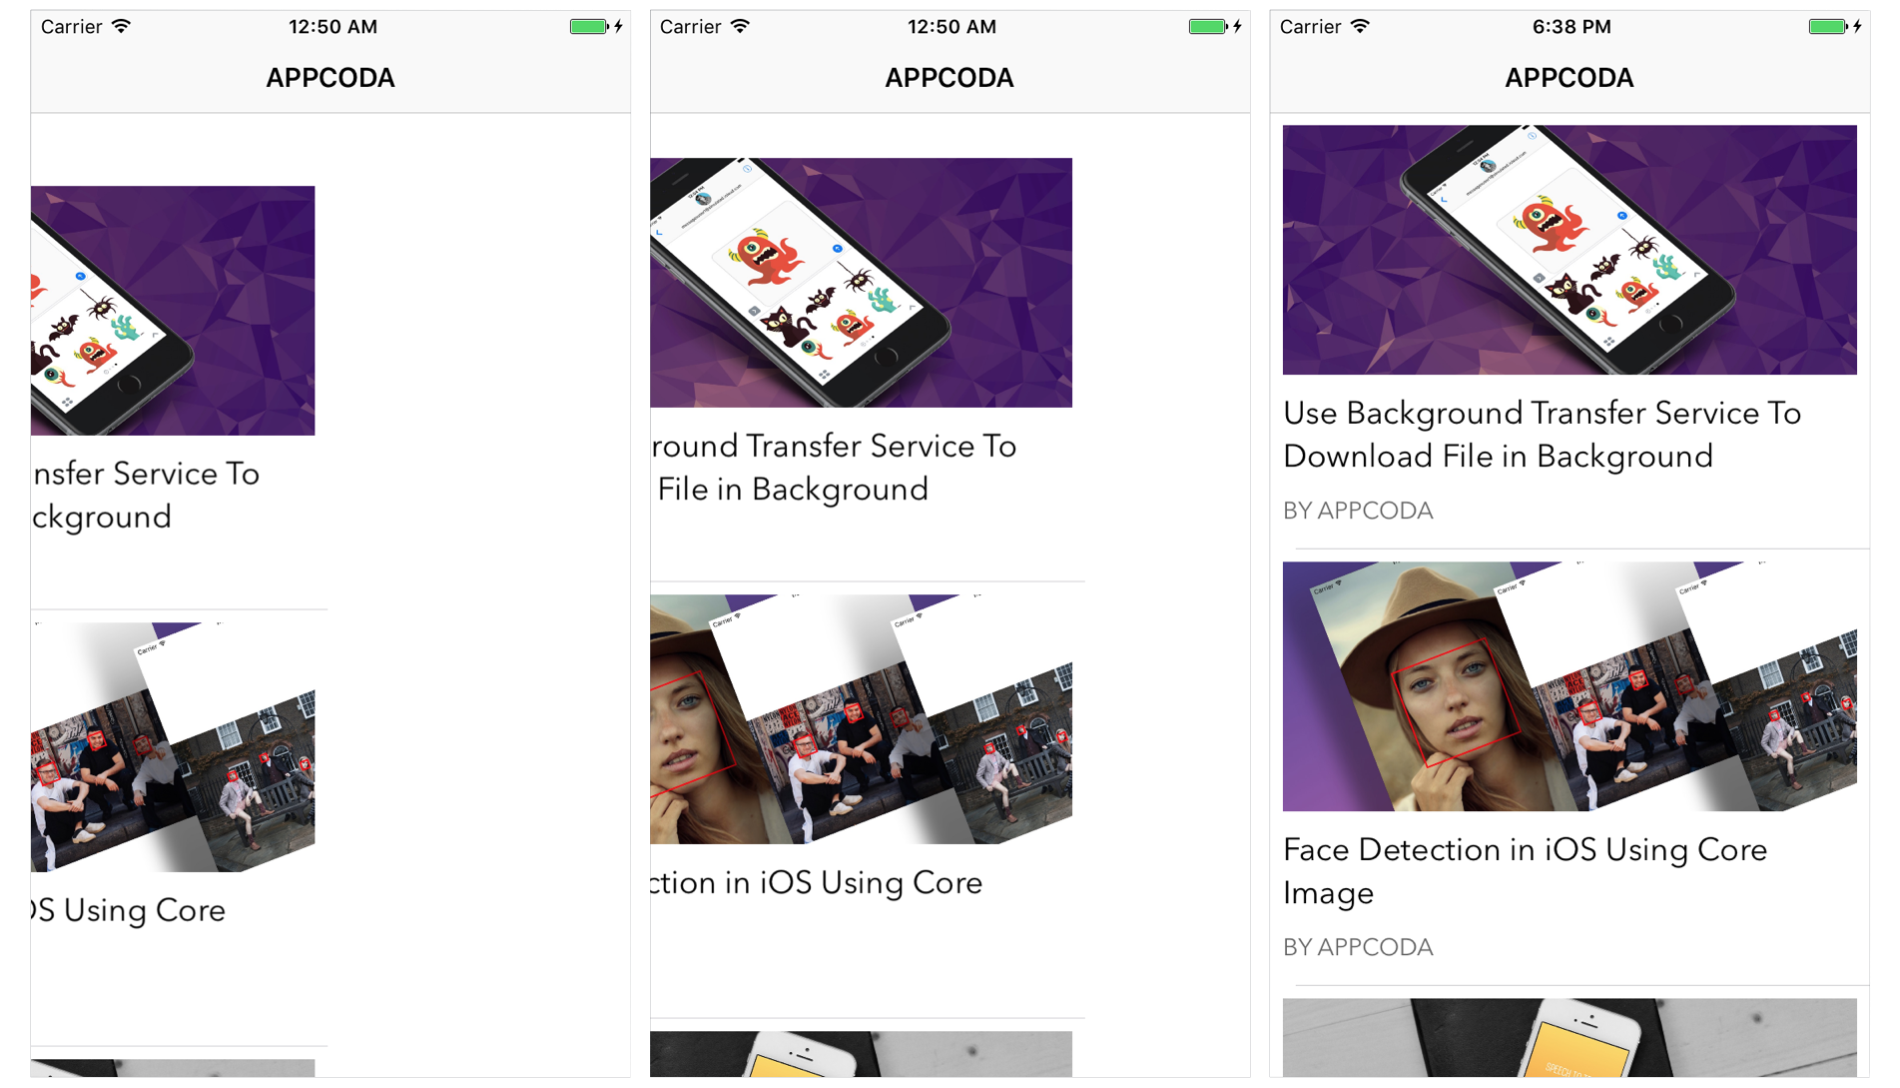
In the code above, we first set the initial alpha value of the cell to 0, which represents total transparency. Then we begin the animation; set the duration to 1 second and define the final state of the cell, which is completely opaque. This will automatically create a fade-in effect when the table cell appears.
You can now compile and run the app. Scroll through the table view and enjoy the fade-in animation.
Creating a Rotation Effect Using CATransform3D
Easy, right? With a few lines of code, your app looks a bit different than a standard table-based app. The tableView(_:willDisplay:forRowAt:) method is the key to table view cell animation. You can implement whichever type of animation in the method.
The fade-in animation is an example. Now let's try to implement another animation using CATransform3D. Don't worry, you just need a few lines of code.
To add a rotation effect to the table cell, update the method like this:
override func tableView(_ tableView: UITableView, willDisplay cell: UITableViewCell, forRowAt indexPath: IndexPath) {

    // Define the initial state (Before the animation)
    let rotationAngleInRadians = 90.0 * CGFloat(Double.pi/180.0)
    let rotationTransform = CATransform3DMakeRotation(rotationAngleInRadians, 0, 0, 1)
    cell.layer.transform = rotationTransform

    // Define the final state (After the animation)
    UIView.animate(withDuration: 1.0, animations: { cell.layer.transform = CATransform3DIdentity })
}
Same as before, we define the initial and final state of the transformation. The general idea is that we first rotate the cell by 90 degrees clockwise and then bring it back to the normal orientation which is the final state.
Okay, but how can we rotate a table cell by 90 degrees clockwise?
The key is to use the CATransform3DMakeRotation function to create the rotation transform. The function takes four parameters:
- Angle in radians - this is the angle of rotation. As the angle is in radian, we first need to convert the degrees to radians.
- X-axis - this is the axis that goes from the left of the screen to the right of the screen.
- Y-axis - this is the axis that goes from the top of the screen to the bottom of the screen.
- Z-axis - this is the axis that points directly out of the screen.
Since the rotation is around the Z axis, we set the value of this parameter to 1, while leaving the value of the X axis and Y axis at 0. Once we create the transform, it is assigned to the cell's layer.
Next, we start the animation with the duration of 1 second. The final state of the cell is set to CATransform3DIdentity, which will reset the cell to the original position.
Okay, hit Run to test the app!
Quick Tip: You may wonder what CATransform3D is. It is actually a structure representing a matrix. Performing transformation in 3D space such as rotation involves some matrices calculation. I’ll not go into the details of matrices calculation. If you want to learn more, you can check out http://www.opengl-tutorial.org/beginners-tutorials/tutorial-3-matrices/.
Creating a Fly-in Effect using CATransform3DTranslate
Does the rotation effect look cool? You can further tweak the animation to make it even better. Try to change the tableView(_:willDisplay:forRowAt:) method and replace the initialization of rotationTransform with the following line of code:
let rotationTransform = CATransform3DTranslate(CATransform3DIdentity, -500, 100, 0)
The line of code simply translates or shifts the position of the cell. It indicates the cell is shifted to the left (negative value) by 500 points and down (positive value) by 100 points. There is no change in the Z axis.
Now you're ready to test the app again. Hit the Run button and play around with the fly-in effect.
Your Exercise
For now, the cell animation is shown every time you scroll through the table, whether you're scrolling down or up the table view. Though the animation is nice, your user will find it annoying if the animation is displayed too frequently. You may want to display the animation only when the cell first appears. Try to modify the existing project and add that restriction.
Summary
In this chapter, I just showed you the basics of table cell animation. Try to change the values of the transform and see what effects you get.
For reference, you can download the complete Xcode project from http://www.appcoda.com/resources/swift55/TableCellAnimation.zip. The solution of the exercise is included in the project.