- Made by AppCoda
- Contact us / Support
- Tweet this book
- Preface
- 1. Building Adaptive User Interfaces
- 2. Creating Table View Sections and Index list with Diffable Data Source
- 3. Animating Table View Cells
- 4. Working with JSON and Codable
- 5. How to Integrate the Twitter and Facebook SDK for Social Sharing
- 6. Working with Email and Attachments
- 7. Sending SMS and MMS Using MessageUI Framework
- 8. How to Get Direction and Draw Route on Maps
- 9. Search Nearby Points of Interest Using Local Search
- 10. Audio Recording and Playback
- 11. Scan QR Code Using AVFoundation Framework
- 12. Working with URL Schemes
- 13. Building a Full Screen Camera with Gesture-based Controls
- 14. Video Capturing and Playback Using AVKit
- 15. Displaying Banner Ads using Google AdMob
- 16. Working with Custom Fonts
- 17. Working with AirDrop, UIActivityViewController and Uniform Type Identifiers
- 18. Building Grid Layouts Using Collection Views and Diffable Data Source
- 19. Interacting with Collection Views
- 20. Adaptive Collection Views Using UITraitCollection and Compositional Layout
- 21. Building a Weather Widget Using WidgetKit
- 22. Building Slide Out Sidebar Menus Using Objective-C Libraries
- 23. View Controller Transitions and Animations
- 24. Building a Slide Down Menu
- 25. Self Sizing Cells and Dynamic Type
- 26. XML Parsing, RSS and Expandable Table View Cells
- 27. Applying a Blurred Background Using UIVisualEffect
- 28. Using Touch ID and Face ID For Authentication
- 29. Building a Carousel-Like User Interface
- 30. Working with Parse
- 31. Parsing CSV and Preloading a SQLite Database Using Core Data
- 32. Connecting Multiple Annotations with Polylines and Routes
- 33. Using CocoaPods in Swift Projects
- 34. Building a Simple Sticker App
- 35. Building iMessage Apps Using Messages Framework
- 36. Building Custom UI Components Using IBDesignable and IBInspectable
- 37. Using Firebase for User Authentication
- 38. Google and Facebook Authentication Using Firebase
- 39. Using Firebase Database and Storage to Build an Instagram-like App
- 40. Building a Real-time Image Recognition App Using Core ML
- 41. Building AR Apps with ARKit and SpriteKit
- 42. Working with 3D Objects in Augmented Reality Using ARKit and SceneKit
- 43. Use Create ML to Train Your Own Machine Learning Model for Image Recognition
- 44. Building a Sentiment Classifier Using Create ML to Classify User Reviews
- 45. Working with Image Tracking Using ARKit
- Published with GitBook
Chapter 13
Building a Full Screen Camera with Gesture-based Controls
iOS provides two ways for developers to access the built-in camera for taking photos. The simple approach is to use UIImagePickerViewController, which I briefly covered in the Beginning iOS Programming book. This class is very handy and comes with a standard camera interface. Alternatively, you can control the built-in cameras and capture images using the AVFoundation framework. Compared to UIImagePickerViewController, AVFoundation framework is more complicated, but also far more flexible and powerful for building a fully custom camera interface.
In this chapter, we will see how to use the AVFoundation framework for capturing still images. You will learn a lot of stuff including:
- How to create a camera interface using the AVFoundation framework
- How to capture a still image using both the front-facing and back-facing camera
- How to use gesture recognizers to detect a swipe gesture
- How to provide a zoom feature for the camera app
- How to save an image to the camera roll
The core of AV Foundation media capture is an AVCaptureSession object. It controls the data flow between an input (e.g. back-facing camera) and an output (e.g. an image file). In general, to capture a still image using the AVFoundation framework, you'll need to:
- Get an instance of
AVCaptureDevicethat represents the underlying input device such as the back-facing camera - Create an instance of
AVCaptureDeviceInputwith the device - Create an instance of
AVCaptureStillImageOutputto manage the output to a still image - Use
AVCaptureSessionto coordinate the data flow from the input and the output - Create an instance of
AVCaptureVideoPreviewLayerwith the session to show a camera preview
If you still have questions at this point, no worries. The best way to learn any new concept is by trying it out - following along with the demo creation should help to clear up any confusion surrounding the AV Foundation framework.
Demo App
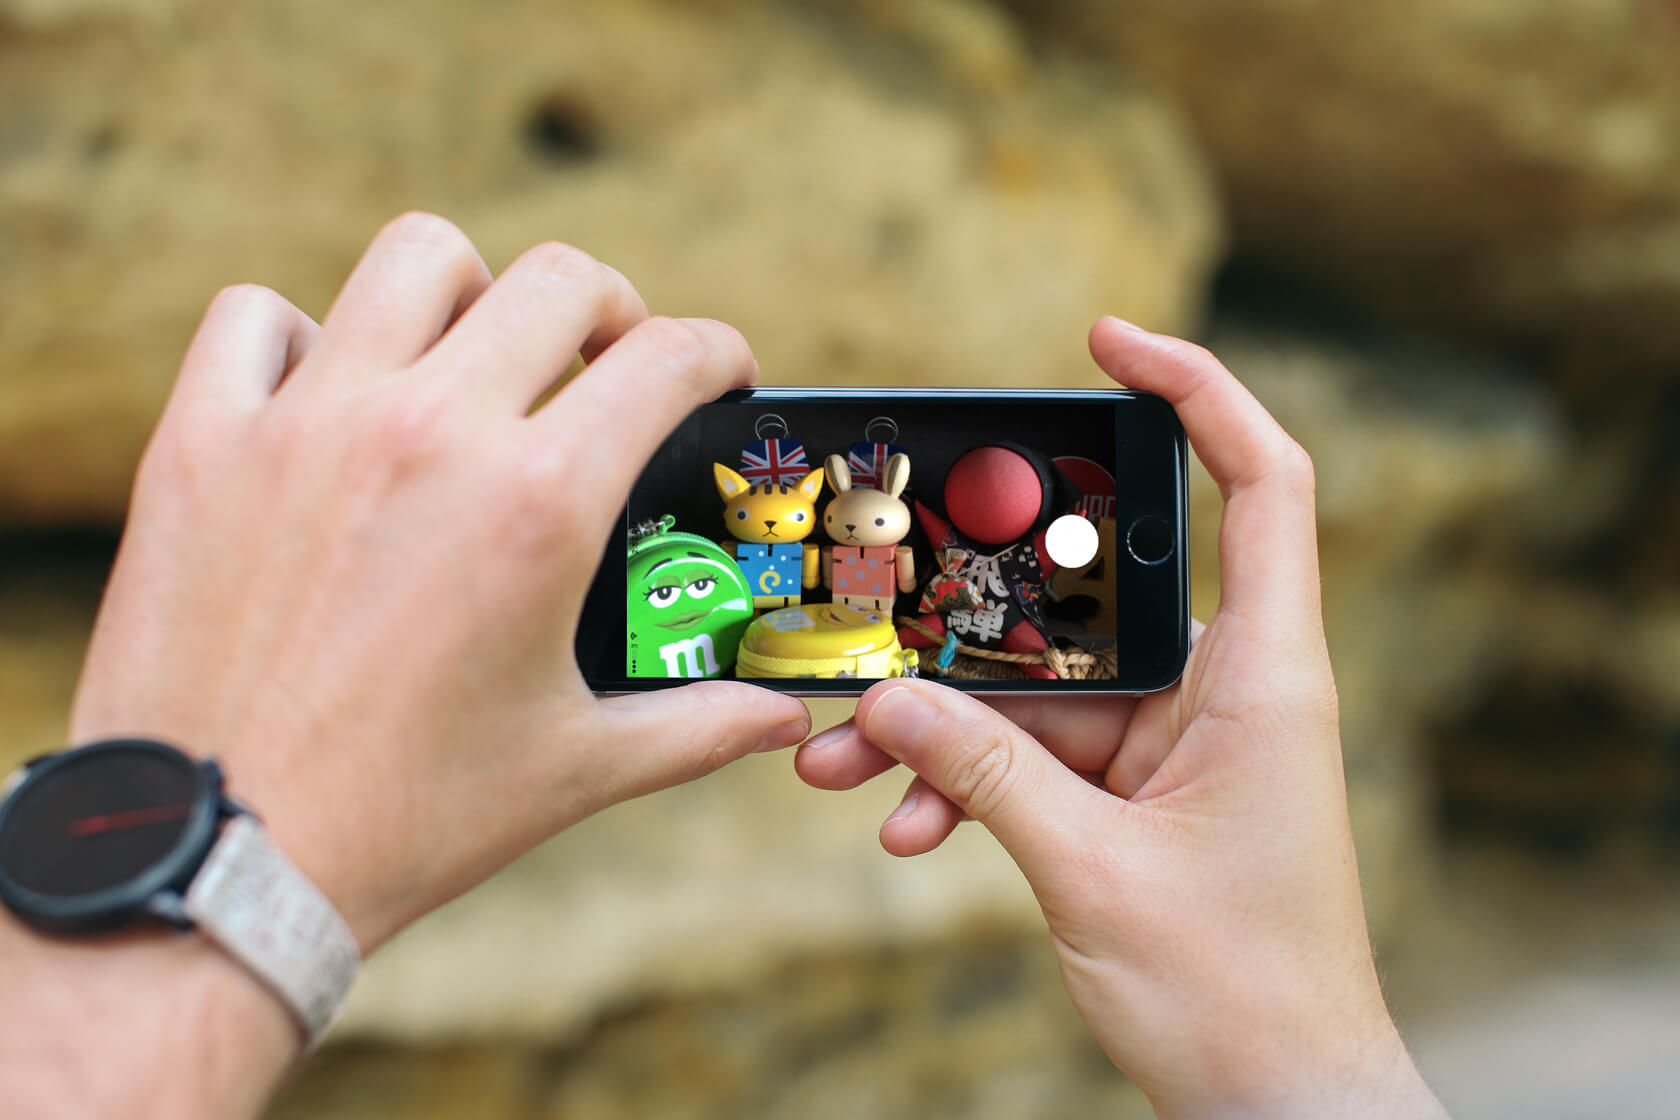
We're going to build a simple camera app that offers a full-screen experience and gesture-based controls. The app provides a minimalistic UI with a single capture button at the bottom of the screen. Users can swipe up the screen to switch between the front-facing and back-facing cameras. The camera offers up to 5x digital zoom. Users can swipe the screen from left to right to zoom in or from right to left to zoom out.
When the user taps the capture button, it should capture the photo in full resolution. Optionally, the user can save to the photo album.
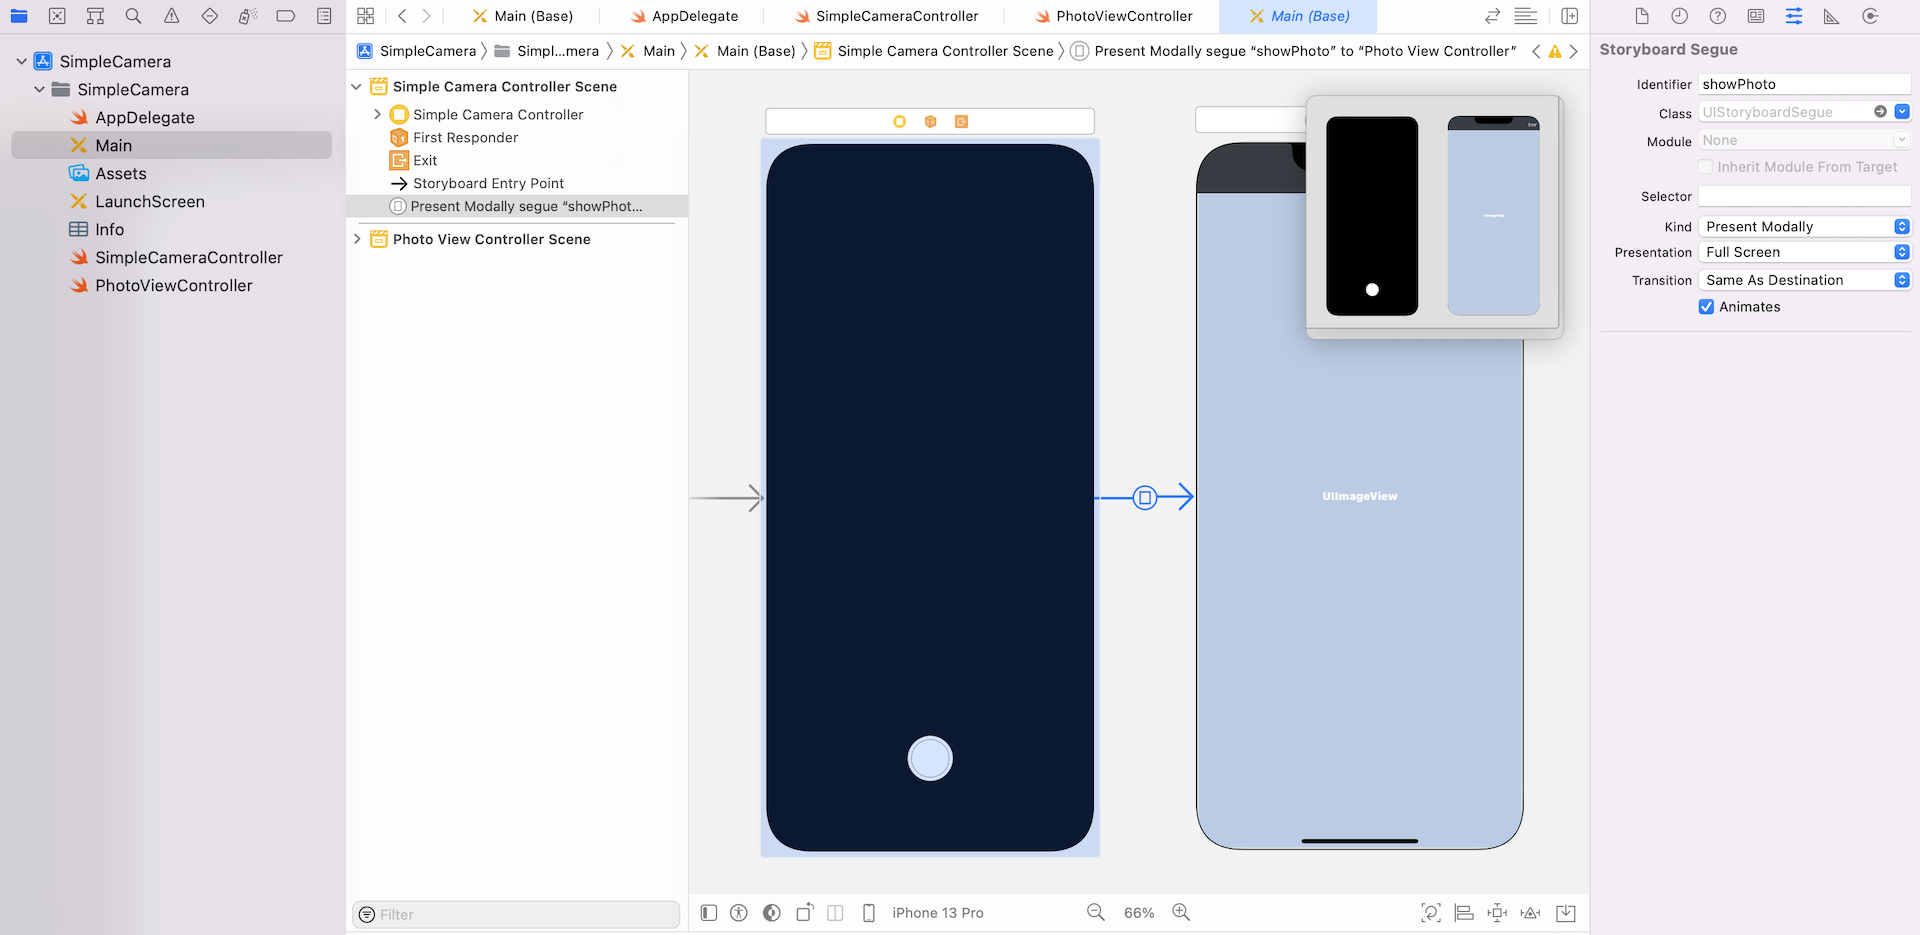
To begin, you can download the Xcode project template from http://www.appcoda.com/resources/swift55/SimpleCameraStarter.zip. The template includes a pre-built storyboard and custom classes. If you open the Storyboard, you will find two view controllers. The Simple Camera Controller is used to display the camera interface, while the Photo View Controller is designed for displaying a still image after taking the photo. Both view controllers are associated with the corresponding class. The Simple Camera Controller is connected with the SimpleCameraController class. When the capture button is tapped, it will call the capture action method.
The Photo View Controller is associated with the PhotoViewController class. The Save button is connected with the save action method, which is now without any implementation.
Configuring a Session
The heart of AVFoundation media capture is the AVCaptureSession object. Open SimpleCameraController.swift and declare a variable of the type AVCaptureSession:
let captureSession = AVCaptureSession()
Since the APIs is available in the AVFoundation framework, make sure you import the package in order to use it:
import AVFoundation
Create a configure() method to configure the session and insert the following code:
private func configure() {
    // Preset the session for taking photo in full resolution
    captureSession.sessionPreset = AVCaptureSession.Preset.photo
}
You use the sessionPreset property to specify the image quality and resolution you want. Here we preset it to AVCaptureSession.Preset.photo, which indicates a full photo resolution.
Selecting the Input Device
The next step is to find out the camera devices for taking photos. First, declare the following instance variables in the SimpleCameraController class:
var backFacingCamera: AVCaptureDevice?
var frontFacingCamera: AVCaptureDevice?
var currentDevice: AVCaptureDevice!
Since the camera app supports both front and back-facing cameras, we create two separate variables for storing the AVCaptureDevice objects. The currentDevice variable is used for storing the current device that is selected by the user.
Continue to insert the following code in the configure() method:
// Get the front and back-facing camera for taking photos
let deviceDiscoverySession = AVCaptureDevice.DiscoverySession(deviceTypes: [.builtInWideAngleCamera], mediaType: AVMediaType.video, position: .unspecified)

for device in deviceDiscoverySession.devices {
    if device.position == .back {
        backFacingCamera = device
    } else if device.position == .front {
        frontFacingCamera = device
    }
}

currentDevice = backFacingCamera

guard let captureDeviceInput = try? AVCaptureDeviceInput(device: currentDevice) else {
    return
}
In the AVFoundation framework, a physical device is abstracted by an AVCaptureDevice object. Apparently, an iPhone has more than one input (audio and video). The AVCaptureDevice.DiscoverySession class is designed to find all available capture devices matching a specific device type (such as a microphone or wide-angle camera), supported media types for capture (such as audio, video, or both), and position (front- or back-facing).
In the code snippet, we create a device discovery session to find the available capture devices that are capable of capturing video/still image (i.e. AVMediaType.video). The iPhone device now comes with several cameras: wide angle camera, telephoto, and true depth camera. Here we specify to find the cameras (i.e. .builtInWideAngleCamera) without a specific position.
With the cameras returned, we examine its position property to determine if it is a front-facing or back-facing camera. By default, the camera app uses the back-facing camera when it's first started. Thus, we set the currentDevice to the back-facing camera.
Lastly, we create an instance of AVCaptureDeviceInput with the current device so that you can capture data from the device.
Configuring an Output Device
With the input device configured, declare the following variable in the SimpleCameraController class for the device output:
var stillImageOutput: AVCapturePhotoOutput!
var stillImage: UIImage?
Insert the following code in the configure method:
// Configure the session with the output for capturing still images
stillImageOutput = AVCapturePhotoOutput()
Here we create an instance of AVCapturePhotoOutput for capturing still images. Introduced in iOS 10, this class supports the basic capture of still images, RAW-format capture, and Live Photos.
Coordinating the Input and Output using Session
Now that you have configured both input and output, you'll need to assign them to the capture session so that it can coordinate the flow of data between them. Continue to insert the following lines of code in the configure method:
// Configure the session with the input and the output devices
captureSession.addInput(captureDeviceInput)
captureSession.addOutput(stillImageOutput)
Creating a Preview Layer and Start the Session
You have now configured the AVCaptureSession object and are ready to present the camera preview. First, declare an instance variable:
var cameraPreviewLayer: AVCaptureVideoPreviewLayer?
And insert the following code in the configure method:
// Provide a camera preview
cameraPreviewLayer = AVCaptureVideoPreviewLayer(session: captureSession)
view.layer.addSublayer(cameraPreviewLayer!)
cameraPreviewLayer?.videoGravity = AVLayerVideoGravity.resizeAspectFill
cameraPreviewLayer?.frame = view.layer.frame

// Bring the camera button to front
view.bringSubviewToFront(cameraButton)
captureSession.startRunning()
You use the AVCaptureVideoPreviewLayer to display video as it is being captured by an input device. The layer is then added to the view's layer to display on the screen. The preview layer object provides a property named videoGravity that indicates how the video preview is displayed. In order to give a full-screen camera interface, we set it to AVLayerVideoGravity.resizeAspectFill. You're free to explore the other two options (AVLayerVideoGravity.resize and AVLayerVideoGravity.resizeAspect) and see how the camera interface is presented.
As you add the preview layer to the view, it should cover the camera button. To unhide the button, we simply bring it to the front. Lastly, we call the startRunning method of the session to start capturing data.
Before you test the app, insert the following line of code in the viewDidLoad() method to call the configure() method:
override func viewDidLoad() {
    super.viewDidLoad()

    configure()
}
There is one last thing you have to add. You will have to insert an entry in the Info.plist file to specify the reason why you need to access the camera. The message will be displayed to the user when the app is first used. It is mandatory to ask for the user's permission, otherwise, your app will not be able to access the camera.
SimpleCamera[569:412396] [access] This app has crashed because it attempted to access privacy-sensitive data without a usage description. The app's Info.plist must contain an NSCameraUsageDescription key with a string value explaining to the user how the app uses this data.
In the Info.plist file, insert a key named Privacy - Camera Usage Description and specify the reason (e.g. for capturing photos) in the value field.
That's it. If you compile and run the app on a real device, you should see the camera preview, though the camera button doesn't work yet.
Capture a Still Image
To capture a still image when the camera button is tapped, update the capture method of the SimpleCameraController.swift file to the following:
@IBAction func capture(sender: UIButton) {

    // Set photo settings
    let photoSettings = AVCapturePhotoSettings(format: [AVVideoCodecKey: AVVideoCodecType.jpeg])
    photoSettings.isAutoStillImageStabilizationEnabled = true
    photoSettings.isHighResolutionPhotoEnabled = true
    photoSettings.flashMode = .auto

    stillImageOutput.isHighResolutionCaptureEnabled = true
    stillImageOutput.capturePhoto(with: photoSettings, delegate: self)

}
To capture a photo using AVCapturePhotoOutput, the first thing you need to do is create an AVCapturePhotoSettings object to specify settings for the capture. For example, do you need to enable image stabilization? What's the flash mode? In the code above, we specify to capture the photo in high-resolution JPEG format with image stabilization enabled.
With the photo settings, you can then call the capturePhoto method to begin capturing the photo. The method takes in the photo settings and a delegate object. Once the photo is captured, it will call its delegate for further processing.
The delegate object, which is SimpleCameraController, should implement the AVCapturePhotoCaptureDelegate protocol. Again, we will create an extension to adopt the protocol. Insert the following code in the SimpleCameraController.swift file:
extension SimpleCameraController: AVCapturePhotoCaptureDelegate {
    func photoOutput(_ output: AVCapturePhotoOutput, didFinishProcessingPhoto photo: AVCapturePhoto, error: Error?) {
        guard error == nil else {
            return
        }

        // Get the image from the photo buffer
        guard let imageData = photo.fileDataRepresentation() else {
            return
        }

        stillImage = UIImage(data: imageData)
        performSegue(withIdentifier: "showPhoto", sender: self)
    }
}
When the capture is complete, the photoOutput(_:didFinishProcessingPhoto:error:) method is called. In the implementation, we first check if there is any error. The captured photo is embedded in the photo parameter. You can access the image data by calling the fileDataRepresentation() method. With the image data, we can construct the image by using UIImage.
Lastly, we invoke the showPhoto segue to display the still image in the Photo View Controller. So, remember to add the prepare(for:sender:) method in the SimpleCameraController class:
override func prepare(for segue: UIStoryboardSegue, sender: Any?) {
    // Get the new view controller using segue.destinationViewController.
    // Pass the selected object to the new view controller.
    if segue.identifier == "showPhoto" {
        let photoViewController = segue.destination as! PhotoViewController
        photoViewController.image = stillImage
    }
}
Now you're ready to test the app. Hit the Run button and test out the camera button. It should now work and be able to capture a still image.
Toggle between Front and Back Facing Camera Using Gestures
The camera app is expected to support both front and back-facing cameras. Instead of using a button for the switching, we will implement a gesture-based control. When a user swipes up the screen, the app toggles between the cameras. The iOS SDK provides various gesture recognizers for detecting common gestures such as tap and pinch. To recognize swiping gestures, you use the UISwipeGestureRecognizer class. First, let's declare an instance variable of the swipe recognizer:
var toggleCameraGestureRecognizer = UISwipeGestureRecognizer()
Then insert the following code in the configure() method:
// Toggle Camera recognizer
toggleCameraGestureRecognizer.direction = .up
toggleCameraGestureRecognizer.addTarget(self, action: #selector(toggleCamera))
view.addGestureRecognizer(toggleCameraGestureRecognizer)
The UISwipeGestureRecognizer object is capable of recognizing swiping gestures in one or more directions. Since we look for swipe-up gestures, we configure the recognizer for the .up direction only. You use the addTarget method to tell the recognizer what to do when the gesture is detected. Here we instruct it to call the toggleCamera method, which will be implemented shortly. Once you've configured the recognizer object, you have to attach it to a view; that is the view that receives touches. We simply call the addGestureRecognizer method of the view to attach the swipe recognizer.
Now create a new method called toggleCamera in the SimpleCameraController class:
@objc func toggleCamera() {
    captureSession.beginConfiguration()

    // Change the device based on the current camera
    guard let newDevice = (currentDevice?.position == AVCaptureDevice.Position.back) ? frontFacingCamera : backFacingCamera else {
        return
    }

    // Remove all inputs from the session
    for input in captureSession.inputs {
        captureSession.removeInput(input as! AVCaptureDeviceInput)
    }

    // Change to the new input
    let cameraInput:AVCaptureDeviceInput
    do {
        cameraInput = try AVCaptureDeviceInput(device: newDevice)
    } catch {
        print(error)
        return
    }

    if captureSession.canAddInput(cameraInput) {
        captureSession.addInput(cameraInput)
    }

    currentDevice = newDevice
    captureSession.commitConfiguration()
}
The method is used to toggle between front-facing and back-facing cameras. To switch the input device of a session, we first call the beginConfiguration method of the capture session. This indicates the start of the configuration change. Next, we determine the new device to use. Before adding the new device input to the session, you have to remove all existing inputs from the session. You can simply access the inputs property of the session to get the existing inputs. We simply loop through them and remove them from the session by calling the removeInput method.
Once all the inputs are removed, we add the new device input (i.e. front/back facing camera) to the session. Lastly, we call the commitConfiguration method of the session to commit the changes. Note that no changes are actually made until you invoke the method.
It's time to have a quick test. Run the app on a real iOS device. You should be able to switch between cameras by swiping up the screen.
Zoom in and Out
The camera app also provides a digital zoom feature that allows up to 5x magnification. Again, we will not use a button for controlling the zooming. Instead, the app allows users to zoom by using a swipe gesture. To zoom into a particular subject, just swipe the screen from left to right. To zoom out, swipe the screen from right to left.
In the SimpleCameraController class, declare two instance variables of UISwipeGestureRecognizer:
var zoomInGestureRecognizer = UISwipeGestureRecognizer()
var zoomOutGestureRecognizer = UISwipeGestureRecognizer()
Next, insert the following lines of code in the configure() method:
// Zoom In recognizer
zoomInGestureRecognizer.direction = .right
zoomInGestureRecognizer.addTarget(self, action: #selector(zoomIn))
view.addGestureRecognizer(zoomInGestureRecognizer)

// Zoom Out recognizer
zoomOutGestureRecognizer.direction = .left
zoomOutGestureRecognizer.addTarget(self, action: #selector(zoomOut))
view.addGestureRecognizer(zoomOutGestureRecognizer)
Here we define the direction property and the corresponding action method of the swipe gesture recognizers. I will not go into the details because the implementation is pretty much the same as that covered in the previous section.
Now create two new methods for zoomIn and zoomOut:
@objc func zoomIn() {
    if let zoomFactor = currentDevice?.videoZoomFactor {
        if zoomFactor < 5.0 {
            let newZoomFactor = min(zoomFactor + 1.0, 5.0)
            do {
                try currentDevice?.lockForConfiguration()
                currentDevice?.ramp(toVideoZoomFactor: newZoomFactor, withRate: 1.0)
                currentDevice?.unlockForConfiguration()
            } catch {
                print(error)
            }
        }
    }
}

@objc func zoomOut() {
    if let zoomFactor = currentDevice?.videoZoomFactor {
        if zoomFactor > 1.0 {
            let newZoomFactor = max(zoomFactor - 1.0, 1.0)
            do {
                try currentDevice?.lockForConfiguration()
                currentDevice?.ramp(toVideoZoomFactor: newZoomFactor, withRate: 1.0)
                currentDevice?.unlockForConfiguration()
            } catch {
                print(error)
            }
        }
    }
}
To change the zoom level of a camera device, all you need to do is adjust the videoZoomFactor property. The property controls the enlargement of images captured by the device. For example, a value of 2.0 doubles the size of an image. If it is set to 1.0, it resets to display a full field of view. You can directly modify the value of the property to achieve a zoom effect. However, to provide a smooth transition from one zoom factor to another, we use the ramp(toVideoZoomFactor:withRate:) method. By providing a new zoom factor and a rate of transition, the method delivers a smooth zooming transition.
With some basic understanding of the zooming effect, let's look further into both methods. In the zoomIn method, we first check if the zoom factor is larger than 5.0 (the camera app only supports up to 5x magnification.) If zooming is allowed, we then increase the zoom factor by 1.0. We use the min() function to ensure the new zoom factor does not exceed 5.0. To change a property of a capture device, you have to first call the lockForConfiguration method to acquire a lock of the device. Then we call the ramp(toVideoZoomFactor:withRate:) method with the new zoom factor to achieve the zooming effect. Once done, we release the lock by calling the unlockForConfiguration method.
The zoomOut method works pretty much the same as the zoomIn method. Instead of increasing the zoom factor, the method reduces the zoom factor when called. The minimum value of the zoom factor is 1.0; this is why we have to ensure the zoom factor is not set to any value less than 1.0.
Now hit the Run button to test the app on your iOS device. When the camera app is launched, try out the zoom feature by swiping the screen from left to right.
Saving Images to the Photo Album
The PhotoViewController class is used to display a still image captured by the device. For now, the image is stored in memory. You can't save the image to the built-in photo album because we haven't implemented the Save button yet. If you open the PhotoViewController.swift file, the save action method, which is connected to the Save button, is empty.
It is very simple to save a still image to the Camera Roll album. UIKit provides the following function to let you add an image to the user's Camera Roll album:
func UIImageWriteToSavedPhotosAlbum(_ image: UIImage, _ completionTarget: Any?, _ completionSelector: Selector?, _ contextInfo: UnsafeMutableRawPointer?)
So in the save method of the PhotoViewController class, insert a couple lines of code. Your save method should look like this:
@IBAction func save(sender: UIButton) {
    guard let imageToSave = image else {
        return
    }

    UIImageWriteToSavedPhotosAlbum(imageToSave, nil, nil, nil)
    dismiss(animated: true, completion: nil)
}
We first check if the image is ready to save. And then call the UIImageWriteToSavedPhotosAlbum function to save the still image to the camera roll, followed by dismissing the view controller.
Before you can build the project to test the app again, you have to edit a key in Info.plist. In iOS 14, you can no longer save photos to the album without user consent. To ask for the user's permission, add a new row in the Info.plist file. Set the key to Privacy - Photo Library Additions Usage Description, and the value to To save your photos. This is the message that explains why our app has to access the photo library, and it will be prompted when the app first tries to access photo library for saving photos.
Hit the Run button again to test the app. The Camera app should now be able to save photos to your photo album. To verify the result, you can open the stock Photos app to take a look. The photo should be saved in the album.
Congratulations! You've managed to use the AVFoundation framework and build a camera app for capturing photos. To further explore the framework, I recommend you check out the official documentation from Apple.
For reference, you can download the complete Xcode project from http://www.appcoda.com/resources/swift55/SimpleCamera.zip.