- Made by AppCoda
- Contact us / Support
- Tweet this book
- Preface
- 1. Building Adaptive User Interfaces
- 2. Creating Table View Sections and Index list with Diffable Data Source
- 3. Animating Table View Cells
- 4. Working with JSON and Codable
- 5. How to Integrate the Twitter and Facebook SDK for Social Sharing
- 6. Working with Email and Attachments
- 7. Sending SMS and MMS Using MessageUI Framework
- 8. How to Get Direction and Draw Route on Maps
- 9. Search Nearby Points of Interest Using Local Search
- 10. Audio Recording and Playback
- 11. Scan QR Code Using AVFoundation Framework
- 12. Working with URL Schemes
- 13. Building a Full Screen Camera with Gesture-based Controls
- 14. Video Capturing and Playback Using AVKit
- 15. Displaying Banner Ads using Google AdMob
- 16. Working with Custom Fonts
- 17. Working with AirDrop, UIActivityViewController and Uniform Type Identifiers
- 18. Building Grid Layouts Using Collection Views and Diffable Data Source
- 19. Interacting with Collection Views
- 20. Adaptive Collection Views Using UITraitCollection and Compositional Layout
- 21. Building a Weather Widget Using WidgetKit
- 22. Building Slide Out Sidebar Menus Using Objective-C Libraries
- 23. View Controller Transitions and Animations
- 24. Building a Slide Down Menu
- 25. Self Sizing Cells and Dynamic Type
- 26. XML Parsing, RSS and Expandable Table View Cells
- 27. Applying a Blurred Background Using UIVisualEffect
- 28. Using Touch ID and Face ID For Authentication
- 29. Building a Carousel-Like User Interface
- 30. Working with Parse
- 31. Parsing CSV and Preloading a SQLite Database Using Core Data
- 32. Connecting Multiple Annotations with Polylines and Routes
- 33. Using CocoaPods in Swift Projects
- 34. Building a Simple Sticker App
- 35. Building iMessage Apps Using Messages Framework
- 36. Building Custom UI Components Using IBDesignable and IBInspectable
- 37. Using Firebase for User Authentication
- 38. Google and Facebook Authentication Using Firebase
- 39. Using Firebase Database and Storage to Build an Instagram-like App
- 40. Building a Real-time Image Recognition App Using Core ML
- 41. Building AR Apps with ARKit and SpriteKit
- 42. Working with 3D Objects in Augmented Reality Using ARKit and SceneKit
- 43. Use Create ML to Train Your Own Machine Learning Model for Image Recognition
- 44. Building a Sentiment Classifier Using Create ML to Classify User Reviews
- 45. Working with Image Tracking Using ARKit
- Published with GitBook
Chapter 27
Applying a Blurred Background Using UIVisualEffect
It's been seven years now. I still remembered how Jonathan Ive described the user interface redesign of iOS 7. Other than "Flat" design, the mobile operating system introduced new types of depth in the words of the Apple's renowned design guru.
One of the ways to achieve depth is to use layering and translucency in the view hierarchy. The use of blurred backgrounds could be found throughout the mobile operating system. For instance, when you swipe up the Control Center, its background is blurred. Moreover, the blurring effect is dynamic and keeps changing with respect to the background image. At that time, Apple did not provide APIs for developers to create such stunning visual effects. To replicate the effects, developers were required to create their own solutions or make use of the third-party libraries.
From iOS 8 and onwards, Apple opened the APIs and provided a new method which makes it very easy to create translucent and blurring-style effects. It introduced a new visual effect API that lets developers apply visual effects to a view. You can now easily add blurring effect to an existing image.
In this chapter, I will go through the API with you. Again, we will build a simple app to see how to apply the blurring effect.
The Demo App
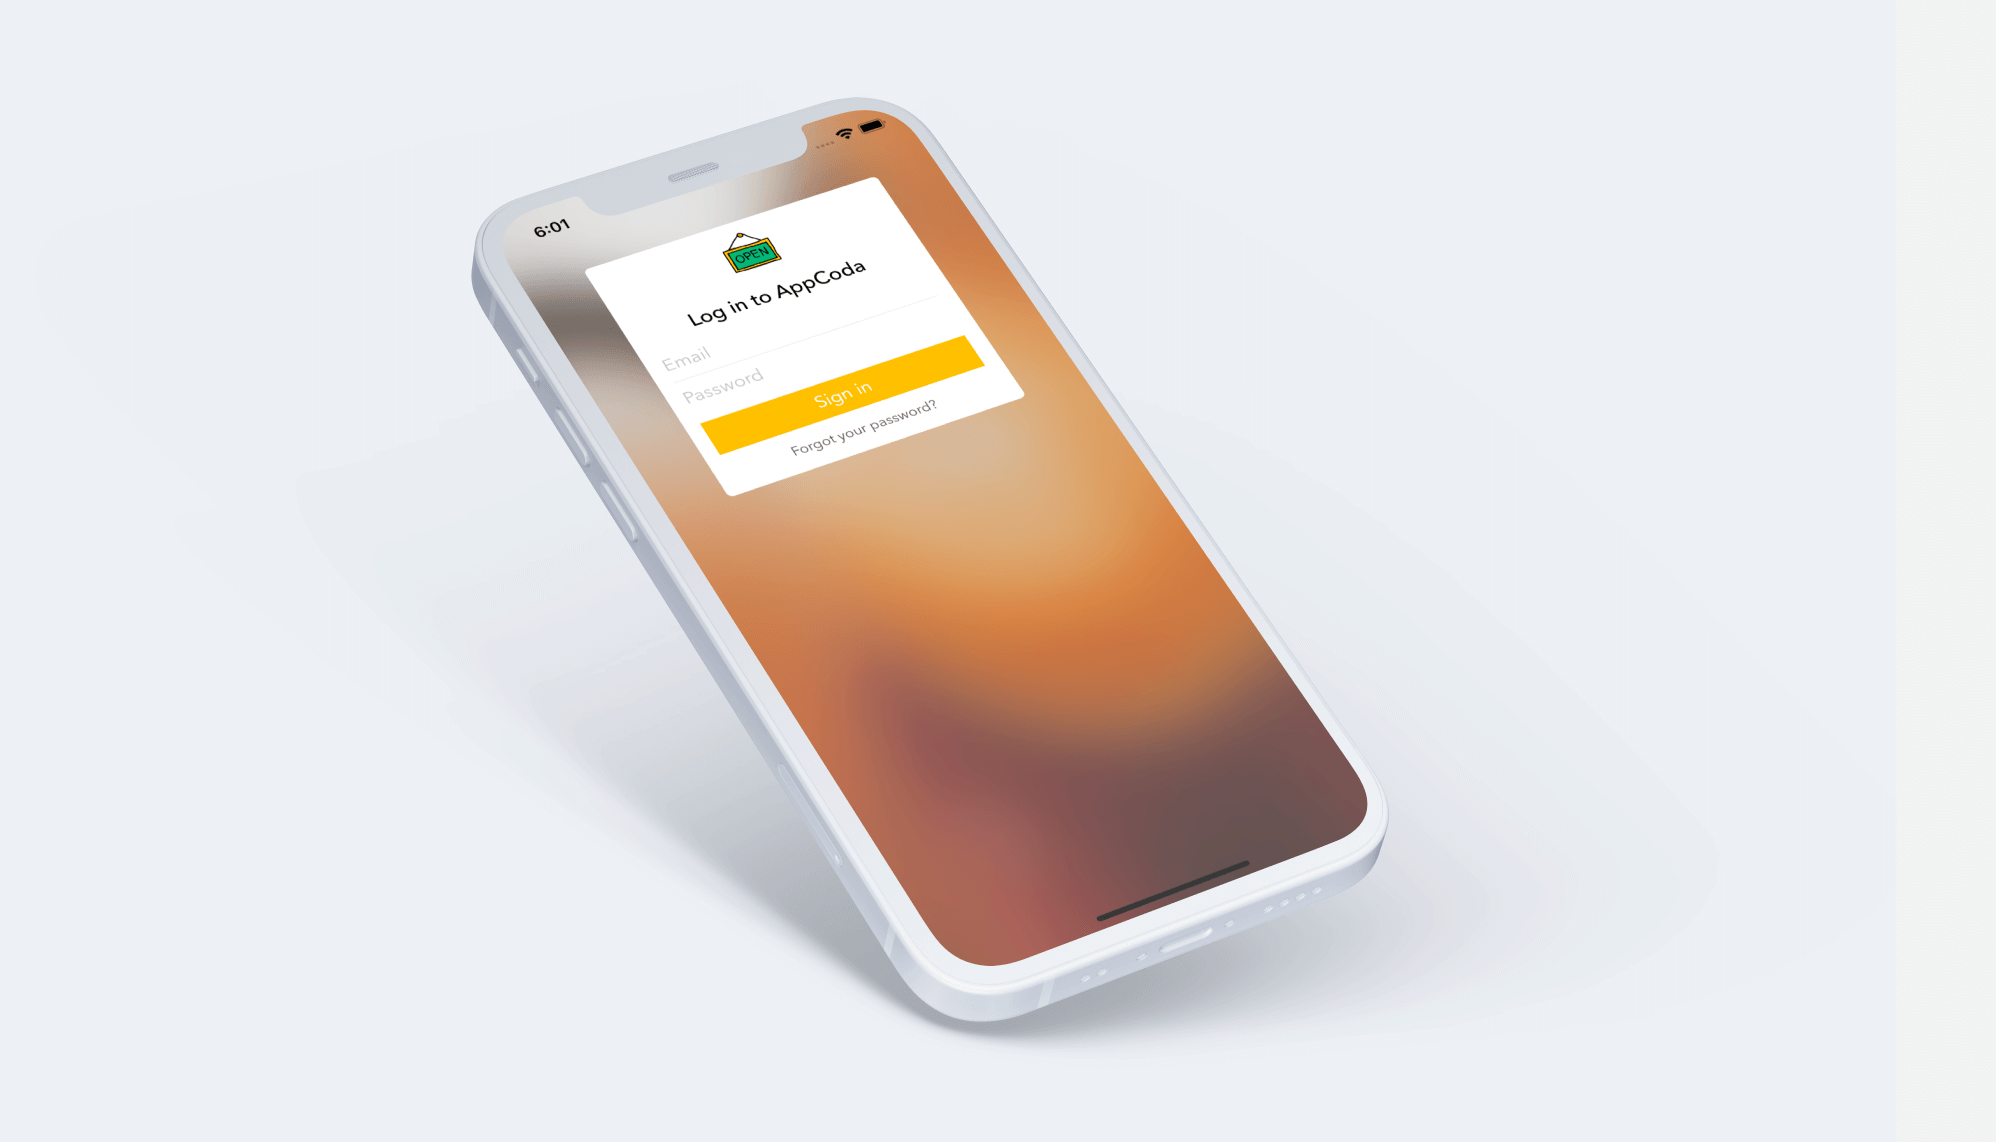
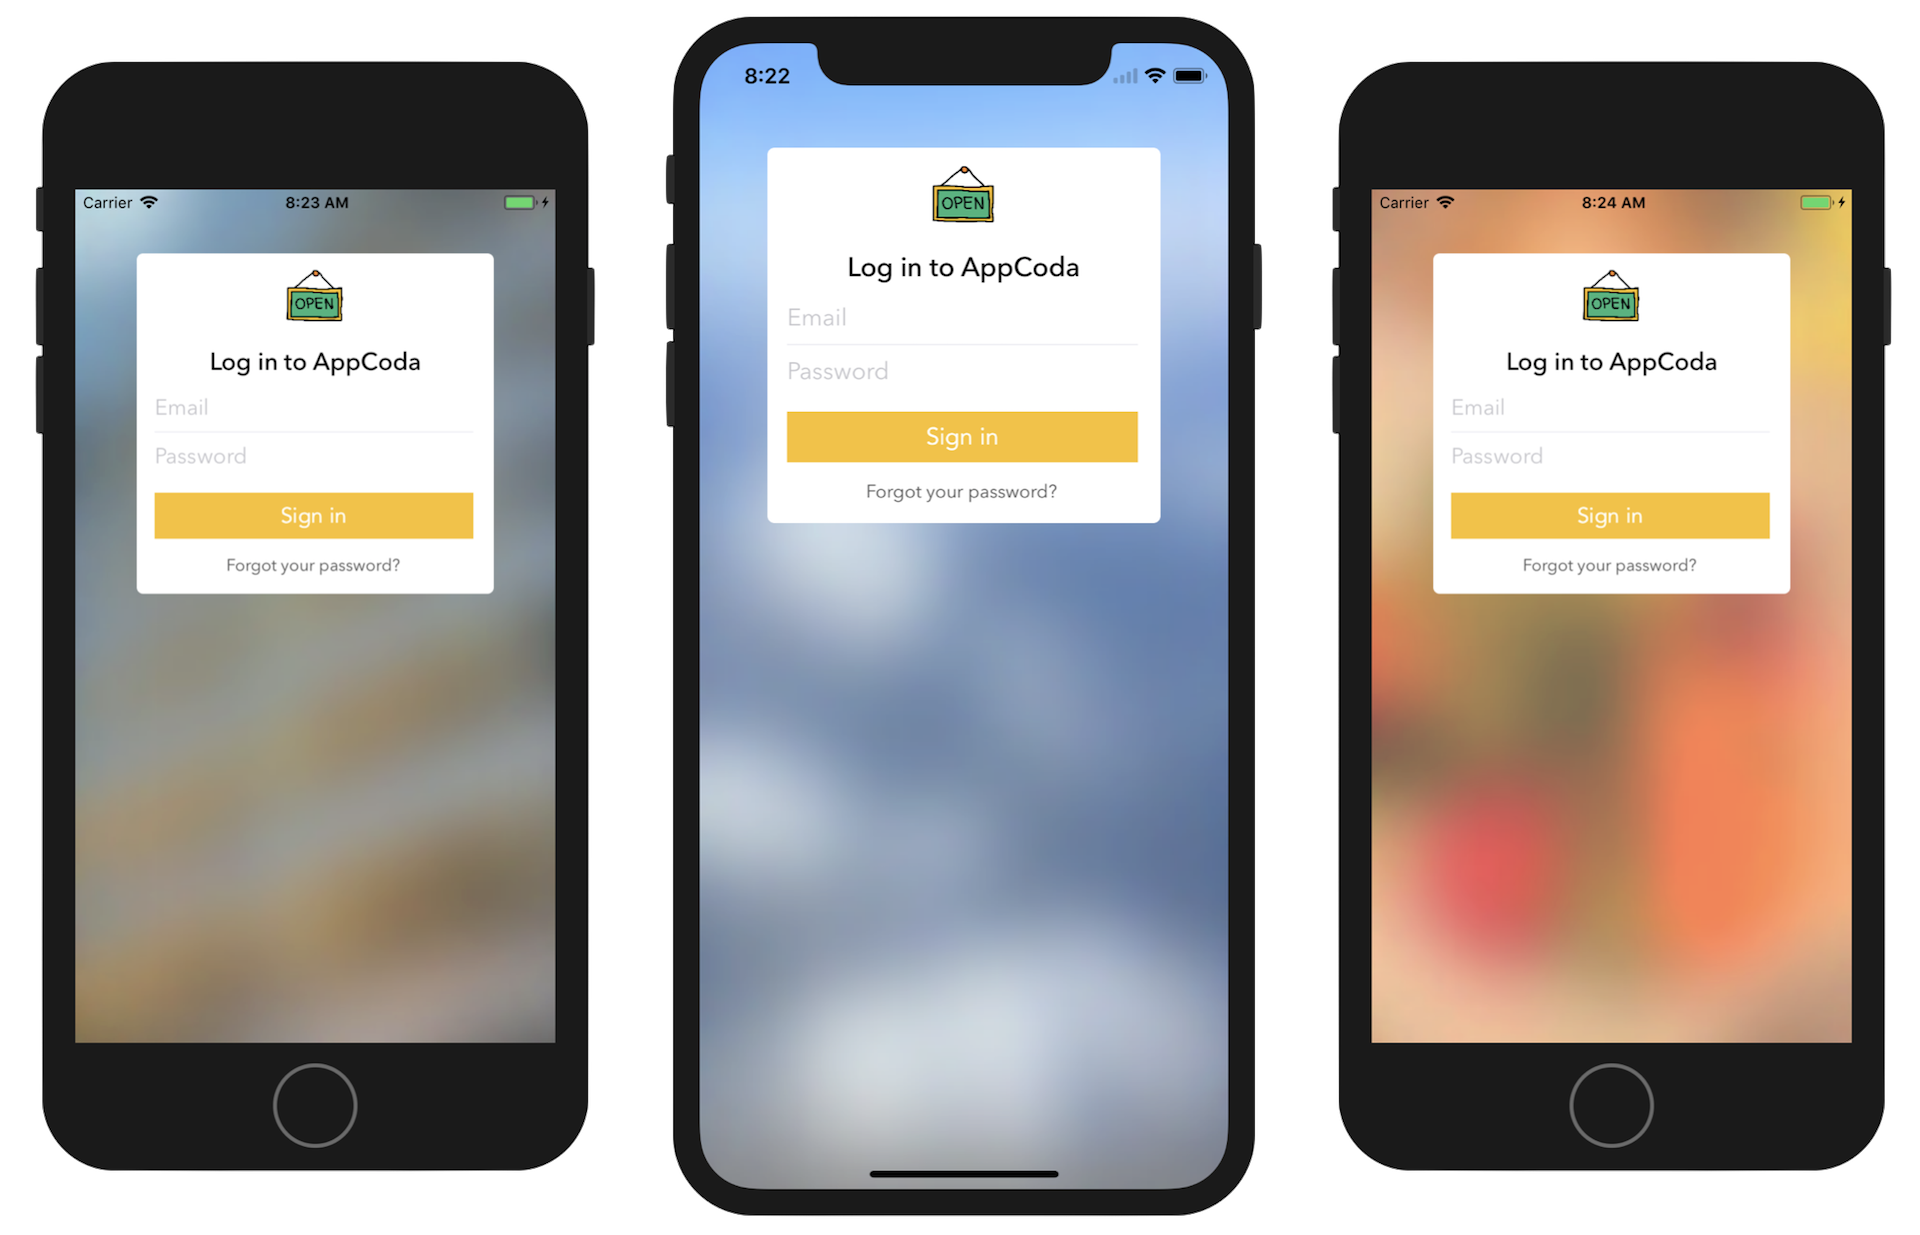
The demo app is not fully functional and primarily used for demonstrating the blurring effect. It will work like this: when launched, it randomly picks an image from its image set. The selected image, with blurring effect applied, is used as a background image for the login screen.
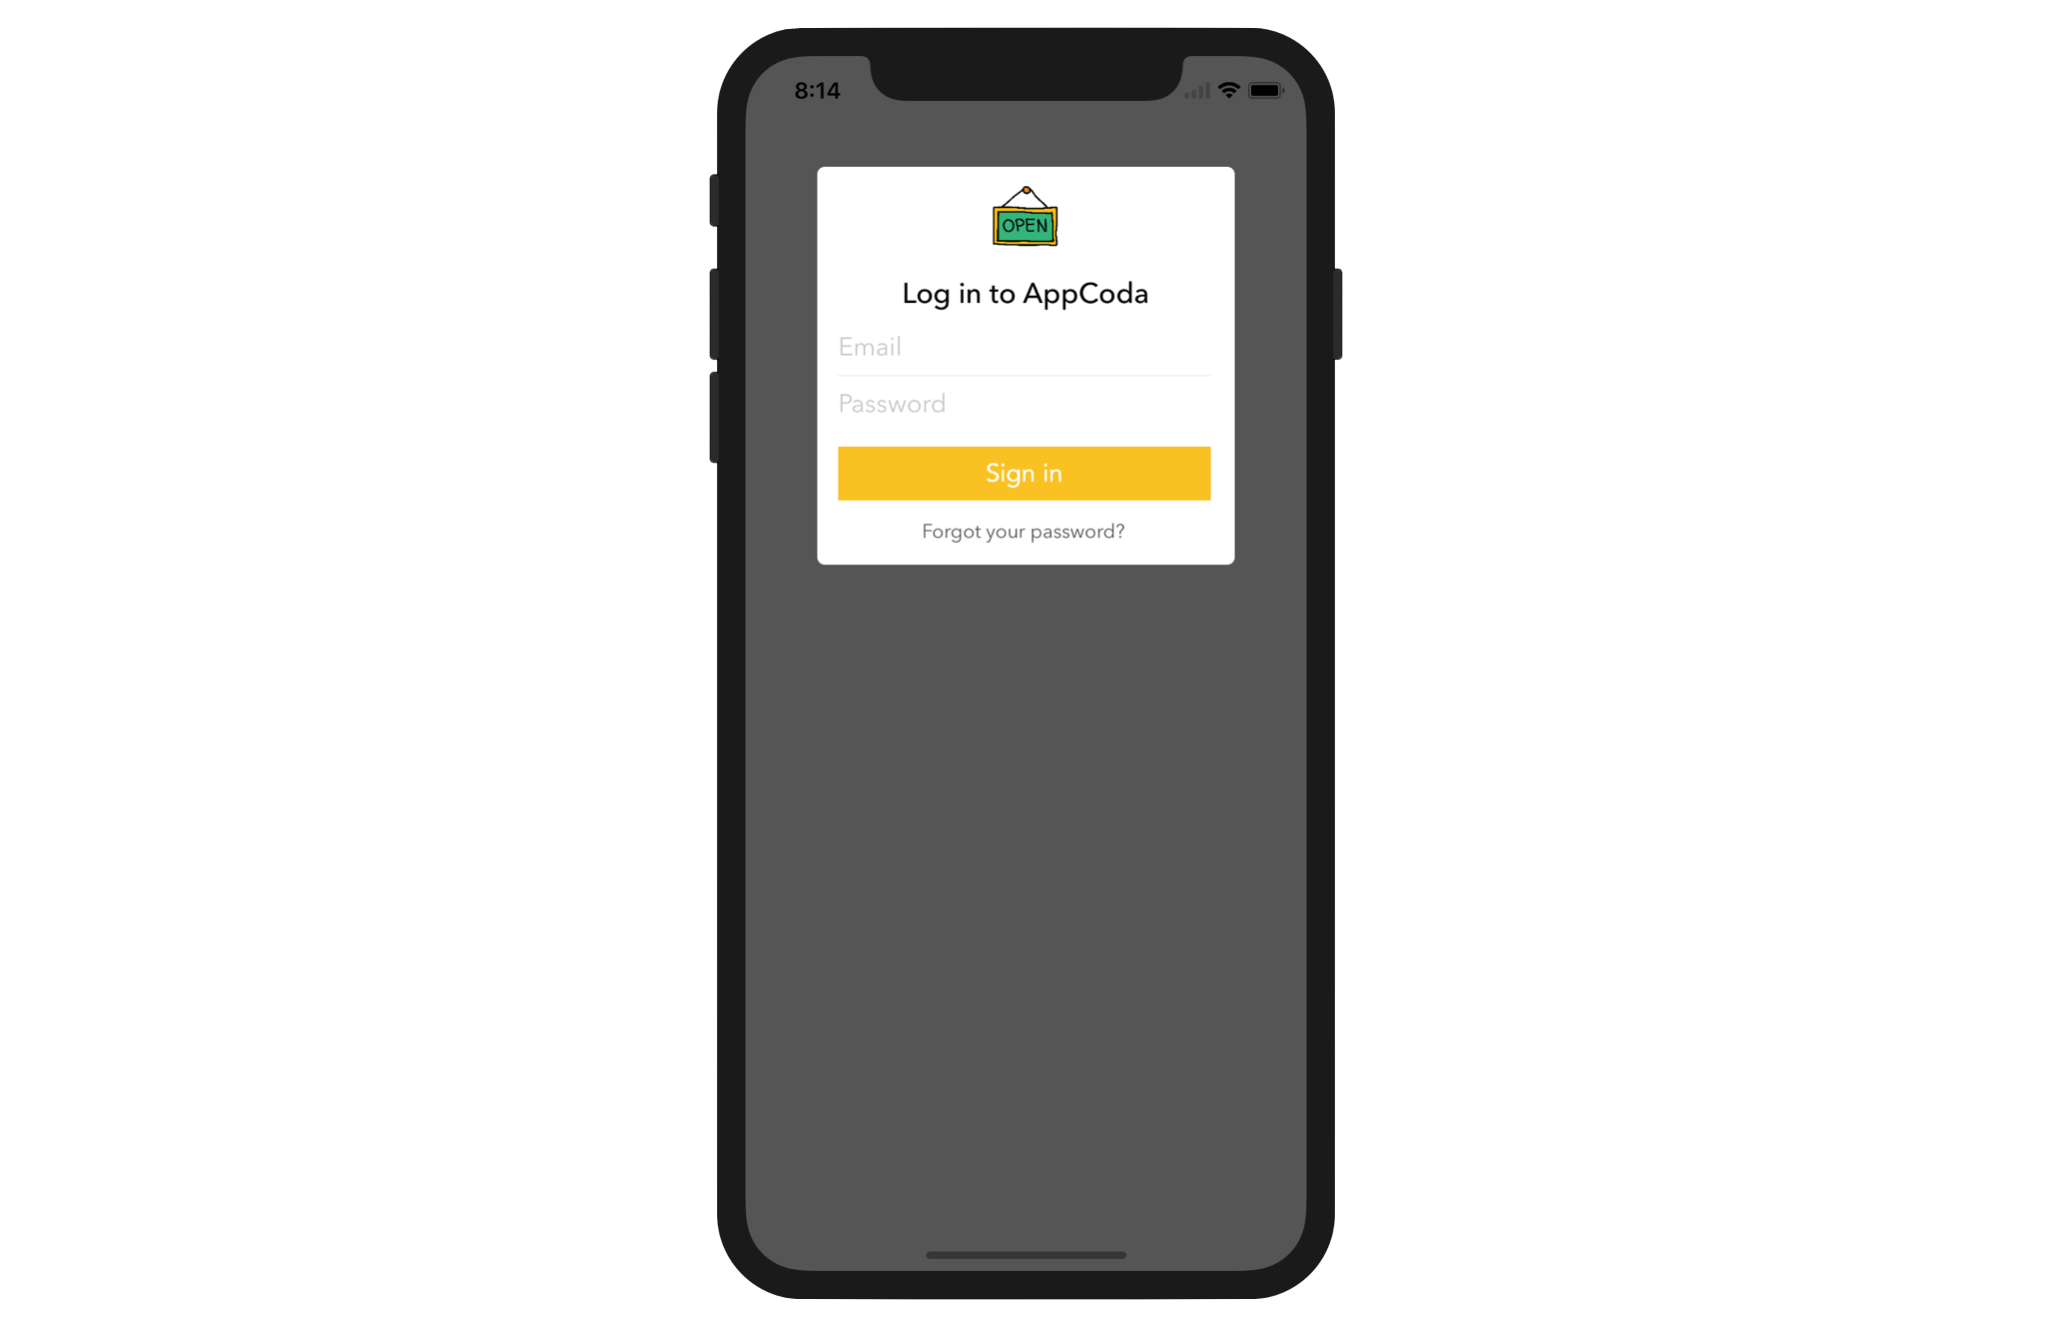
To keep your focus on learning the UIVisualEffect API, I have created the project template for you. Firstly, download the project from http://www.appcoda.com/resources/swift55/VisualEffectStarter.zip and have a trial run. The resulting app should look like the screenshot shown below. It now only displays a background view in gray. Next up, we will change it to an image background with a live blurring effect.
Understanding UIVisualEffect and UIVisualEffectView
The iOS SDK provides two UIKit classes for applying visual effects:
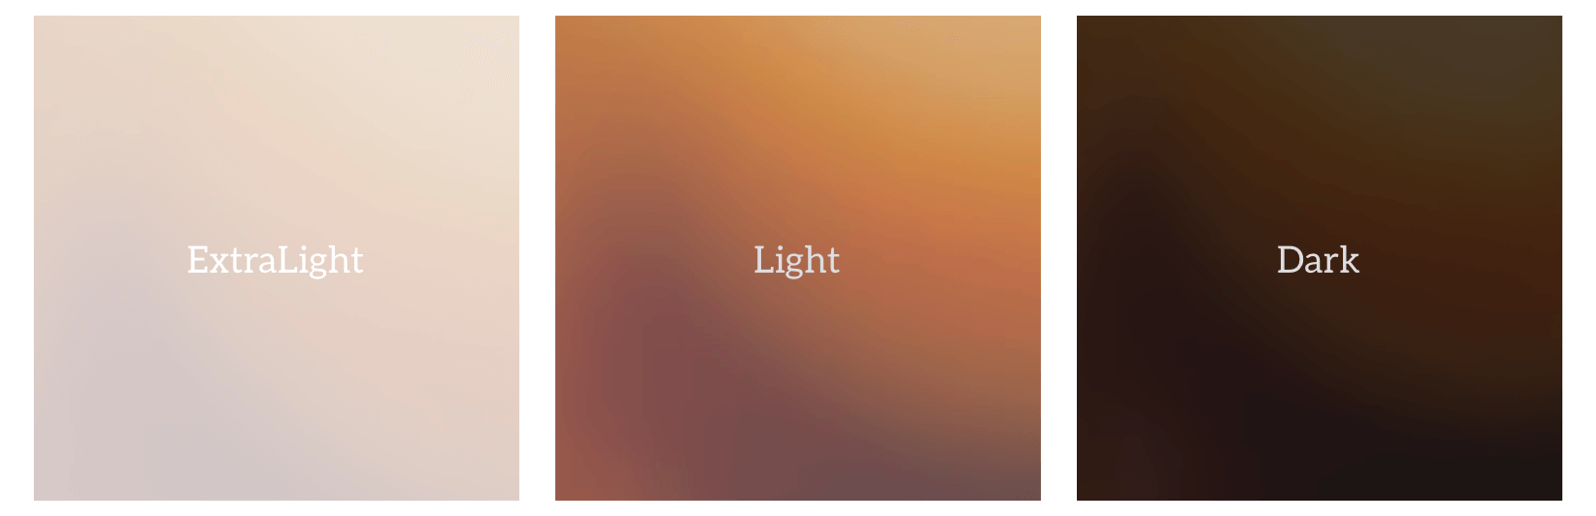
UIVisualEffect- There are only two kinds of visual effects including blur and vibrant. TheUIBlurEffectclass is used to apply a blurring effect to the content layered behindUIVisualEffectView. A blur effect comes with three types of style: ExtraLight, Light and Dark. TheUIVibrantEffectclass is designed for adjusting the color of the content, such that the element (e.g. label) inside a blurred view looks sharper.
UIVisualEffectView- This is the view that actually applies the visual effect. The class takes in aUIVisualEffectobject as a parameter. Depending on the parameter passed, it performs a blur or vibrant effect to the existing view.
To apply a blurring effect, you first create a UIBlurEffect object like this:
let blurEffect = UIBlurEffect(style: UIBlurEffect.Style.light)
Here we create a blurring effect with a Light style. Once you have created the visual effect, you initialize a UIVisualEffectView object like this:
let blurEffectView = UIVisualEffectView(effect: blurEffect)
Suppose you have a UIImageView object serving as a background view; you can simply add the blurEffectView to the view hierarchy using the addSubView method and the background view will be blurred:
backgroundImageView.addSubview(blurEffectView)
Now that you have some ideas about the visual effect API, let’s continue to work on the demo app.
Adding a Background Image View
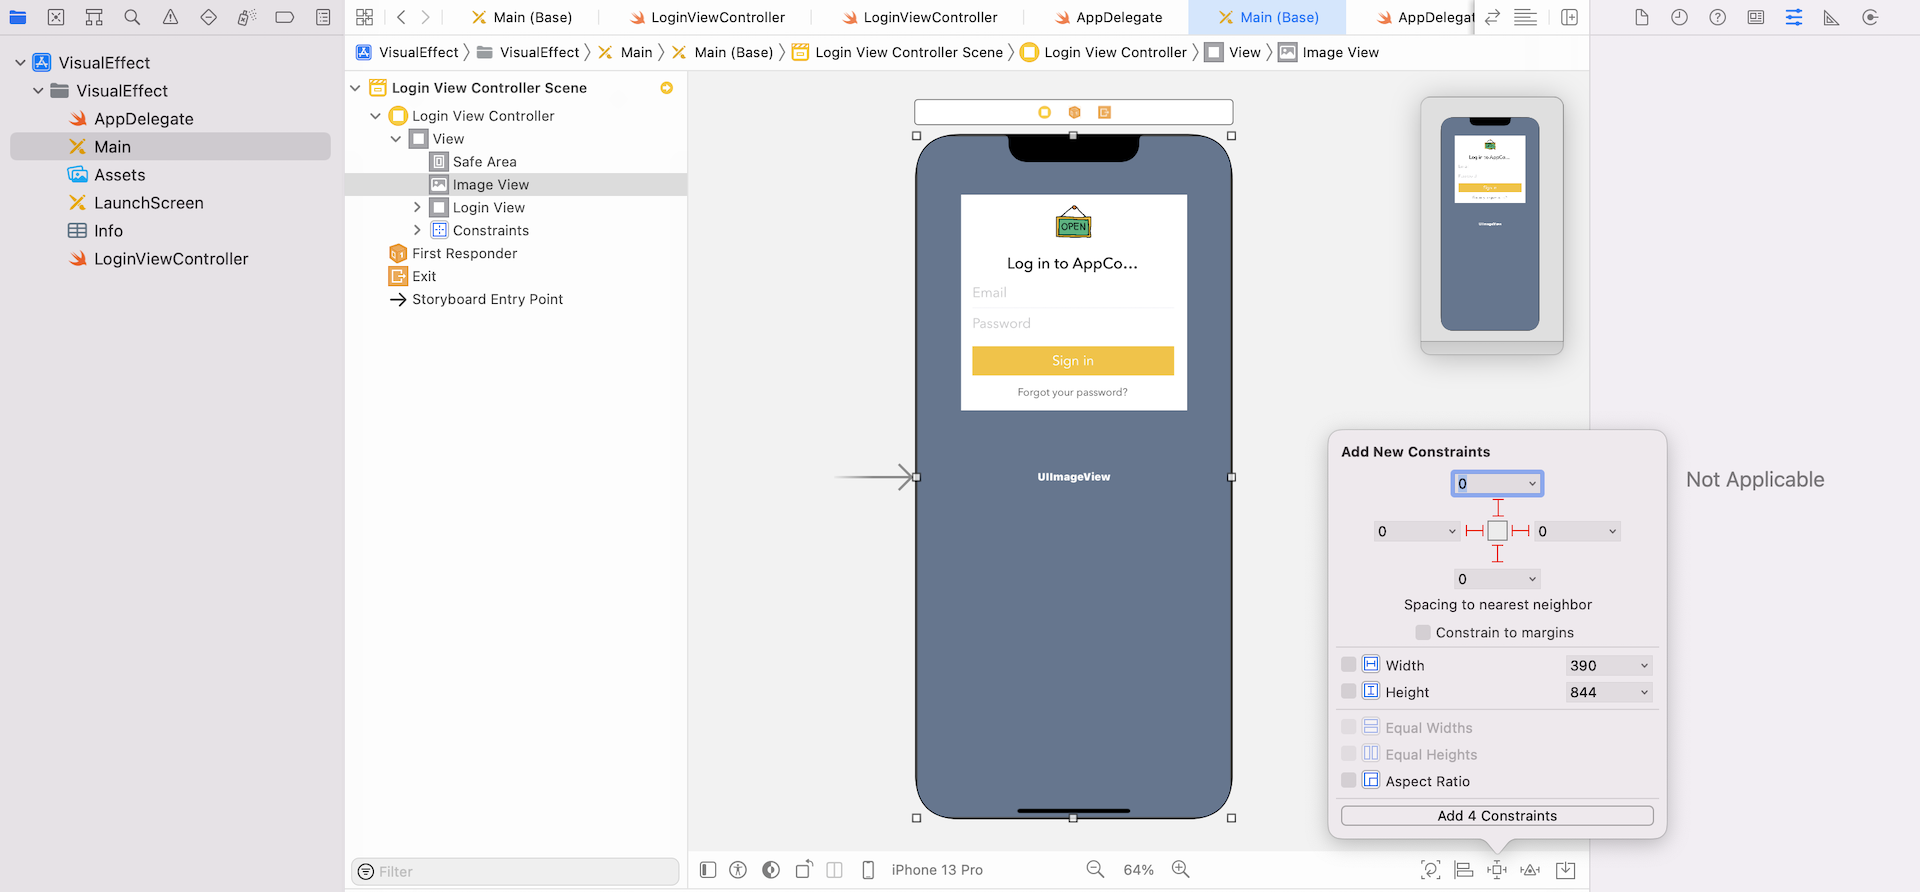
First, open Main.storyboard and make sure you use iPhone 12/12 Pro as the device. Drag an image view to the view controller. As this image view is used as a background image, make sure you put the image view beneath the login view. You can refer to the document outline view and make sure the image view is placed above the login view. Resize it to cover the whole view. In the Attribute inspector, set the content mode of the image view to Scale to Fill.

Once you have added the image view, select it and add the auto layout constraints. Click the pin button, and set the space value for each side to zero. Make sure you uncheck Constrain to margins and then click Add 4 constraints.
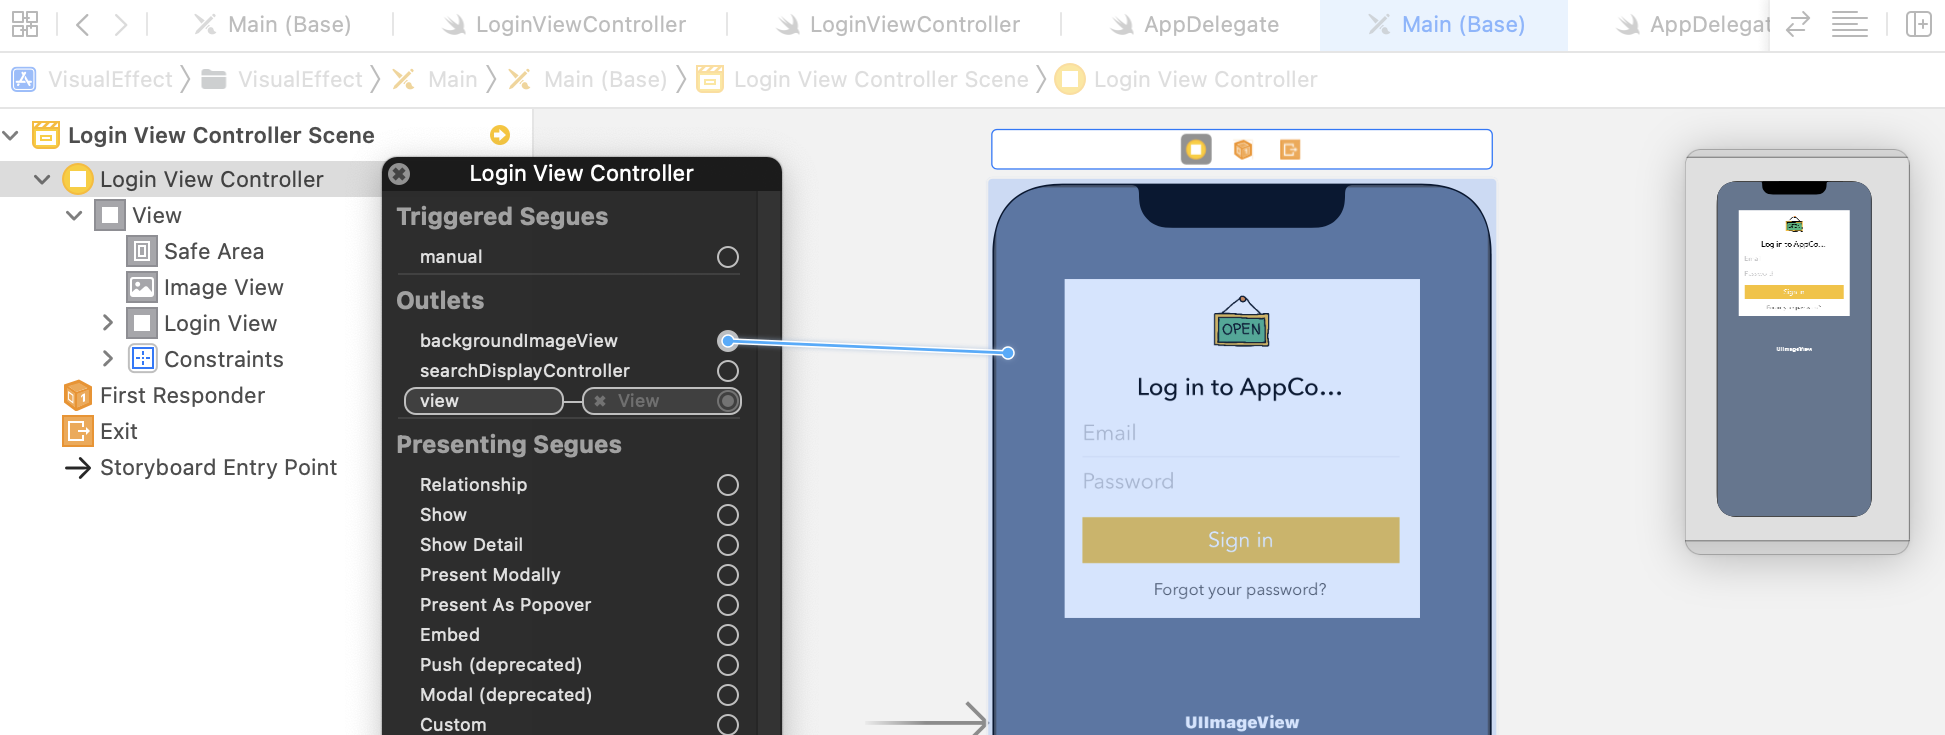
Next, go to the LoginViewController.swift file and add an outlet variable for the background image view:
@IBOutlet var backgroundImageView: UIImageView!
Now go back to the storyboard and establish a connection between the outlet variable and the image view.
Applying a Blurring Effect
The project template already includes five background images. Every time the app is loaded, it will randomly pick one and use it as the background image. Now declare the following array in LoginViewController.swift:
private let imageSet = ["cloud", "coffee", "food", "pmq", "temple"]
Also, declare a variable to hold the UIVisualEffectView object:
private var blurEffectView: UIVisualEffectView?
Next, update the viewDidLoad method with the following code:
override func viewDidLoad() {
    super.viewDidLoad()

    // Randomly pick an image
    let selectedImageIndex = Int.random(in: 0..<imageSet.count)

    // Apply blurring effect
    backgroundImageView.image = UIImage(named: imageSet[selectedImageIndex])
    let blurEffect = UIBlurEffect(style: UIBlurEffect.Style.light)
    blurEffectView = UIVisualEffectView(effect: blurEffect)
    blurEffectView?.frame = view.bounds
    backgroundImageView.addSubview(blurEffectView!)
}
To pick an image randomly, we use the random() method of Int to generate a random number. By passing the value 0..<imageSet.count, the method returns a value between 0 and 4. The rest of the code is similar to what we have discussed in the previous section. You are free to configure other blurring styles such as Dark.
To ensure the blur effect works in landscape mode, we have to update the frame property when the device's orientation changes. Insert the following method in the class:
override func traitCollectionDidChange(_ previousTraitCollection: UITraitCollection?) {
    blurEffectView?.frame = view.bounds
}
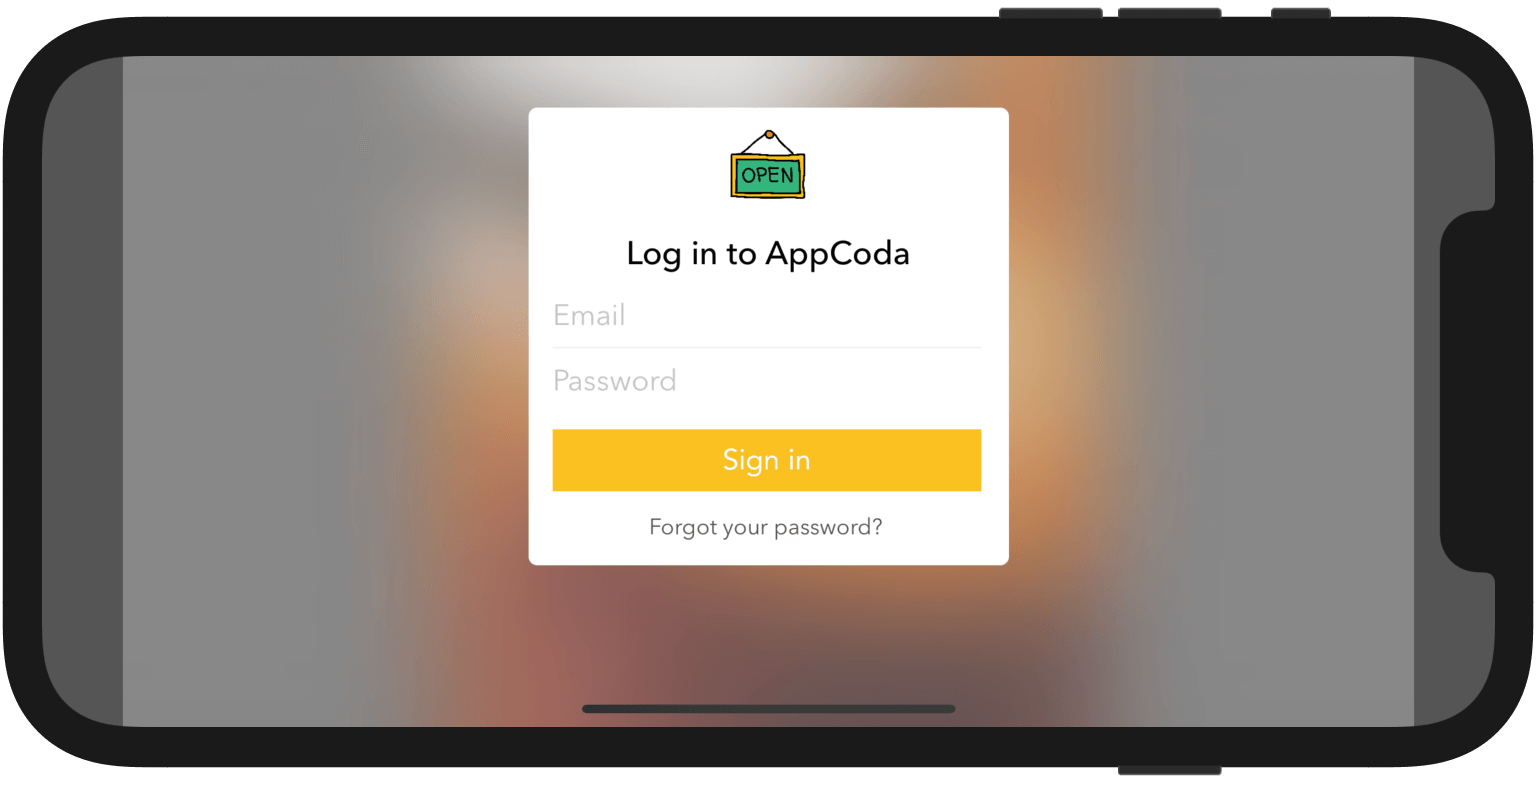
When the orientation is altered, the traitCollectionDidChange method will be called. We then update the frame property accordingly. Now run the project and see what you get. If you followed everything correctly, your app will display a blurred background.
Have you tried to turn the simulator sideway? The blurred background works pretty well on those iPhone model with a home button. However, for those new iPhone models without a home button, you should notice a gray bar on the side.
As you may know, there is a layout concept known as Safe Area. When we add the spacing constraints for the background image view (see figure 27.5), each side of the view is pinned to the layout guide of the safe area.
To fix the layout issue, select the Background Image View.leading = Safe Area.leading constraint in the document outline. Go to the Attributes inspector, change the Second Item option from Safe Area to Superview.
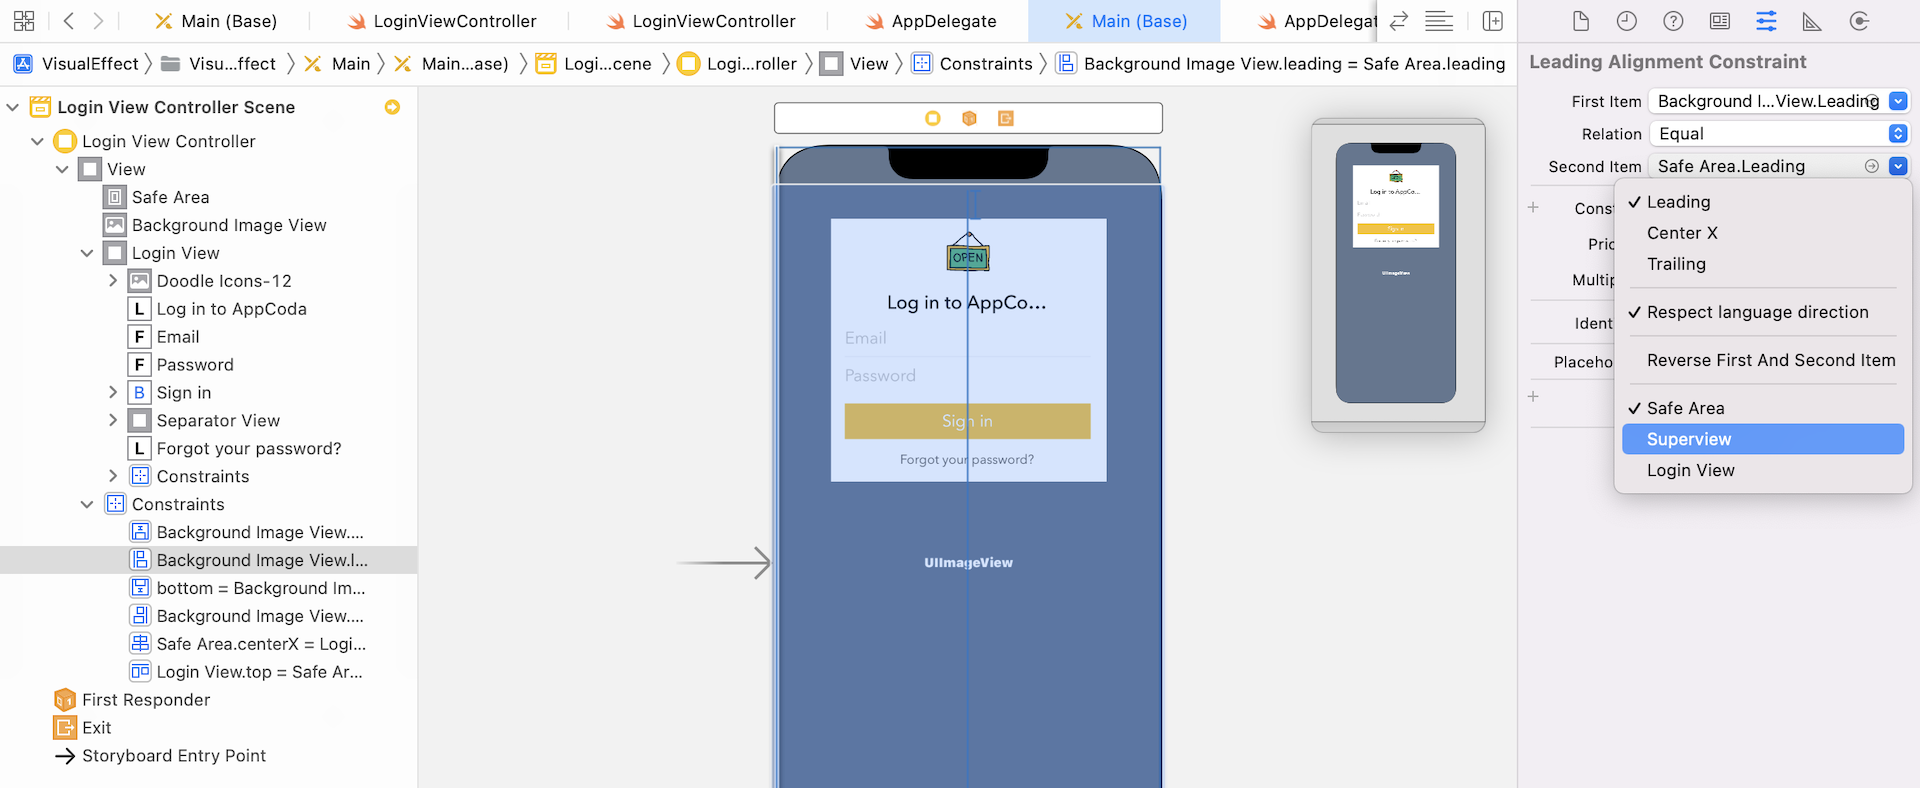
Repeat the same procedures for the trailing, top, and bottom constraints such that the Second Item option is changed to Superview. In other words, we want the background image view extends beyond the safe area.
Now run the app again on iPhone 13/13 Pro. The blurred background should look good even the device is in landscape mode.
For reference, you can download the final project from http://www.appcoda.com/resources/swift55/VisualEffect.zip.