- Made by AppCoda
- Contact us / Support
- Tweet this book
- Preface
- 1. Building Adaptive User Interfaces
- 2. Creating Table View Sections and Index list with Diffable Data Source
- 3. Animating Table View Cells
- 4. Working with JSON and Codable
- 5. How to Integrate the Twitter and Facebook SDK for Social Sharing
- 6. Working with Email and Attachments
- 7. Sending SMS and MMS Using MessageUI Framework
- 8. How to Get Direction and Draw Route on Maps
- 9. Search Nearby Points of Interest Using Local Search
- 10. Audio Recording and Playback
- 11. Scan QR Code Using AVFoundation Framework
- 12. Working with URL Schemes
- 13. Building a Full Screen Camera with Gesture-based Controls
- 14. Video Capturing and Playback Using AVKit
- 15. Displaying Banner Ads using Google AdMob
- 16. Working with Custom Fonts
- 17. Working with AirDrop, UIActivityViewController and Uniform Type Identifiers
- 18. Building Grid Layouts Using Collection Views and Diffable Data Source
- 19. Interacting with Collection Views
- 20. Adaptive Collection Views Using UITraitCollection and Compositional Layout
- 21. Building a Weather Widget Using WidgetKit
- 22. Building Slide Out Sidebar Menus Using Objective-C Libraries
- 23. View Controller Transitions and Animations
- 24. Building a Slide Down Menu
- 25. Self Sizing Cells and Dynamic Type
- 26. XML Parsing, RSS and Expandable Table View Cells
- 27. Applying a Blurred Background Using UIVisualEffect
- 28. Using Touch ID and Face ID For Authentication
- 29. Building a Carousel-Like User Interface
- 30. Working with Parse
- 31. Parsing CSV and Preloading a SQLite Database Using Core Data
- 32. Connecting Multiple Annotations with Polylines and Routes
- 33. Using CocoaPods in Swift Projects
- 34. Building a Simple Sticker App
- 35. Building iMessage Apps Using Messages Framework
- 36. Building Custom UI Components Using IBDesignable and IBInspectable
- 37. Using Firebase for User Authentication
- 38. Google and Facebook Authentication Using Firebase
- 39. Using Firebase Database and Storage to Build an Instagram-like App
- 40. Building a Real-time Image Recognition App Using Core ML
- 41. Building AR Apps with ARKit and SpriteKit
- 42. Working with 3D Objects in Augmented Reality Using ARKit and SceneKit
- 43. Use Create ML to Train Your Own Machine Learning Model for Image Recognition
- 44. Building a Sentiment Classifier Using Create ML to Classify User Reviews
- 45. Working with Image Tracking Using ARKit
- Published with GitBook
Chapter 28
Using Touch ID and Face ID For Authentication
With the debut of iPhone X in late 2017, iOS now supports two types of authentication mechanism: Touch ID and Face ID.
Let's first talk about the Touch ID.
Touch ID is Apple's biometric fingerprint authentication technology, which was first seen on the iPhone 5s in 2013. As of today, the feature is available on most iOS devices including iPhones and iPads. Touch ID is built into the home button and very simple to use. Once the steel ring surrounding the home button detects your finger, the Touch ID sensor immediately reads your fingerprint, analyses it, and provides you access to your phone.
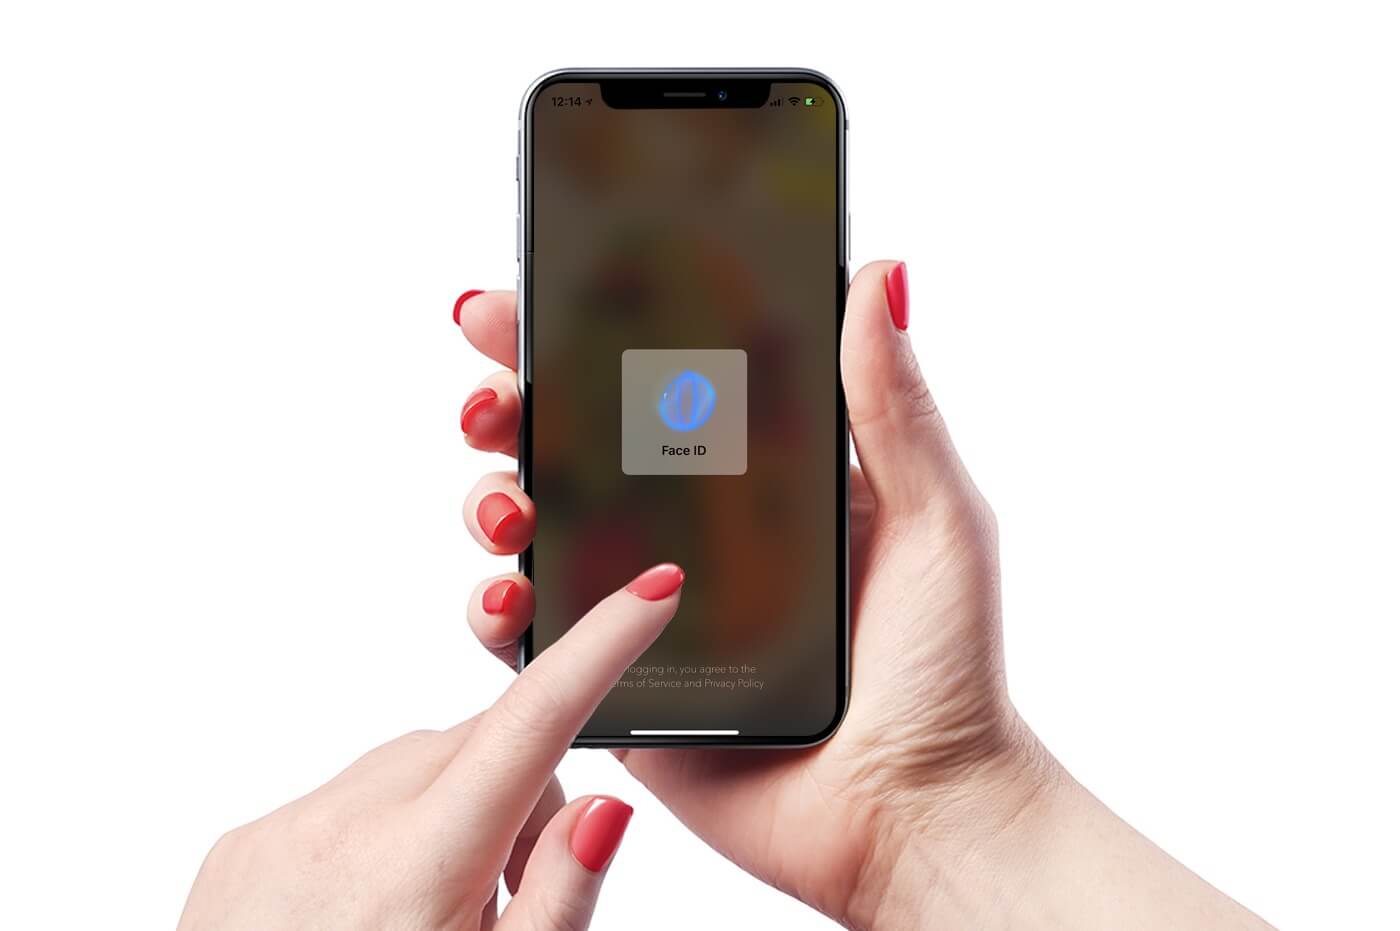
Along with the release of iPhone X in November 2017, Apple began to move away from Touch ID to Face ID, which uses your face for authentication. By simply glancing at your iPhone, Face ID securely unlocks the device.
Quick note:To learn more about Face ID, you can refer to this link.Similar to Touch ID, you can also use this new authentication mechanism to authorize purchases from the App Store and payments with Apple Pay. Security and privacy are the two biggest concerns for the fingerprint sensor and the Face ID data. According to Apple, your device does not store any images of your fingerprints; the scan of your fingerprint is translated into a mathematical representation, which is encrypted and stored in the Secure Enclave system on chip (SoC). The fingerprint data is used by the Secure Enclave only for fingerprint verifications; even the iOS itself has no way of accessing the fingerprint data. To safeguard the Face ID data, which is a mathematical representation of your face, Apple applied the same way they did with Touch ID. The Face ID data is encrypted and protected by the Security Enclave.
Quick note:To learn more about Secure Enclave, you can refer to the Apple's Platform Security document.
The Local Authentication Framework
Back in iOS 7, Apple did not allow developers to get hold of the APIs to implement Touch ID authentication in their own apps. With every major version release of iOS, Apple ships along a great number of new technologies and frameworks. Starting from iOS 10, Apple released the public APIs for Touch ID authentication. And from iOS 11 and onwards, the APIs support both Touch ID and Face ID, depending on the authentication mechanism the device is using. Therefore, you can now integrate your apps with fingerprint or Face authentication, potentially replacing passwords or PINs.
The usage of the Touch ID or Face ID is based on the framework, named Local Authentication. The framework provides methods to prompt a user to authenticate. It offers a ton of opportunities for developers. You can use Touch ID or Face ID authentication for login, or authorize secure access to sensitive information within an app.
The heart of the Local Authentication framework is the LAContext class, which provides two methods:
canEvaluatePolicy(_:error:)- this method evaluates the given authentication policy to see if we can proceed with the authentication. At the time of this writing,deviceOwnerAuthenticationWithBiometrics(i.e. Touch ID & Face ID) anddeviceOwnerAuthenticationare the two available policies. The former policy indicates the device owner must use Touch ID / Face ID for authentication. On the other hand, the latter policy indicates the device owner can authenticate using biometry or the device password. In other words, the device owner is asked to authenticate through Touch ID (or Face ID) first if it is available and enabled. Otherwise, the user is asked to enter the device passcode.evaluatePolicy(_:localizedReason:reply:)- when this method is invoked, it presents an authentication dialog to the user, requesting a finger scan. The authentication is performed asynchronously. When it finishes, the reply block will be called along with the authentication result. If the authentication fails, it returns you aLAErrorobject indicating the reason for the failure.
Enough of the theories. It is time for us to work on a demo app. In the process, you will fully understand how to use Local Authentication framework.
Touch ID Demo App
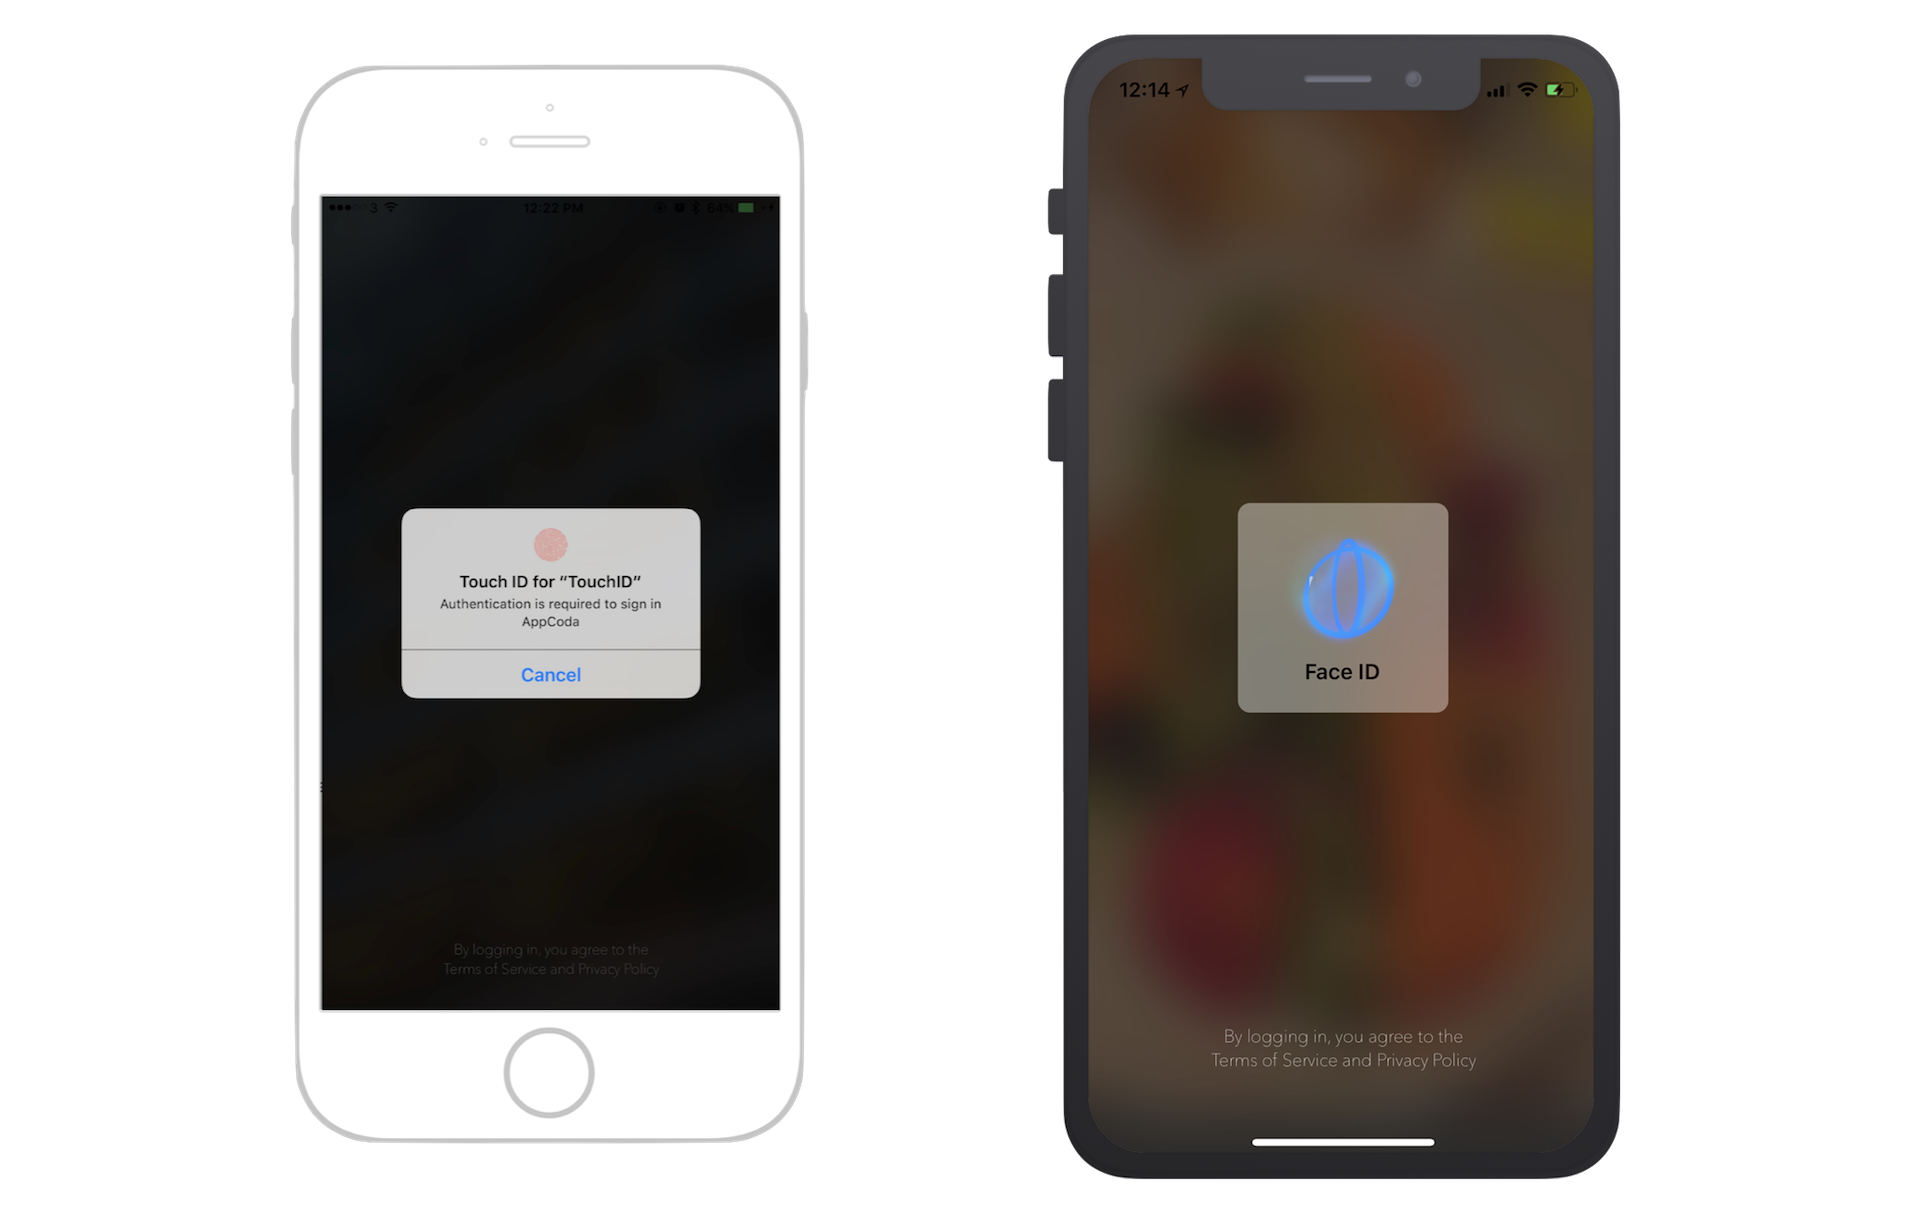
To begin with, you can download the project template from http://www.appcoda.com/resources/swift55/TouchIDStarter.zip. If you run the project, you will have a demo app displaying a login dialog. What we are going to do is replace the password authentication with Touch ID or Face ID. If the authentication is successful, the app will show you the Home screen. However, the fingerprint or face authentication is not always successful. The user may use a device without Touch ID or Face ID support, or has disabled the feature. In some cases, the user may opt for password authentication, or simply cancel the authentication prompt. It is crucial that you handle all these exceptional cases. So this is how the app works:
- When it is first launched, the app presents a Touch ID dialog and requests a finger scan. For iPhone with Face ID enabled, the user just needs to look at the iPhone and then the app will automatically perform the authentication.
- For whatever reasons the authentication fails or the user chooses to use a password, the app will display a login dialog and falls back to password-based authentication.
- When the authentication is successful, the app will display the Home screen.

The project template is very similar to the demo app we built in the previous chapter. I just added a new method named showLoginDialog in LoginViewController.swift to create a simple slide-down animation for the dialog.
Okay, let's get started building the demo app.
Designing the User Interface
The project template comes with a prebuilt storyboard that includes the login view controller and the table view controller of the Home screen; however, there is no connection between them. The very first thing we have to do is connect the login view controller with the navigation controller of the Home screen using a segue.
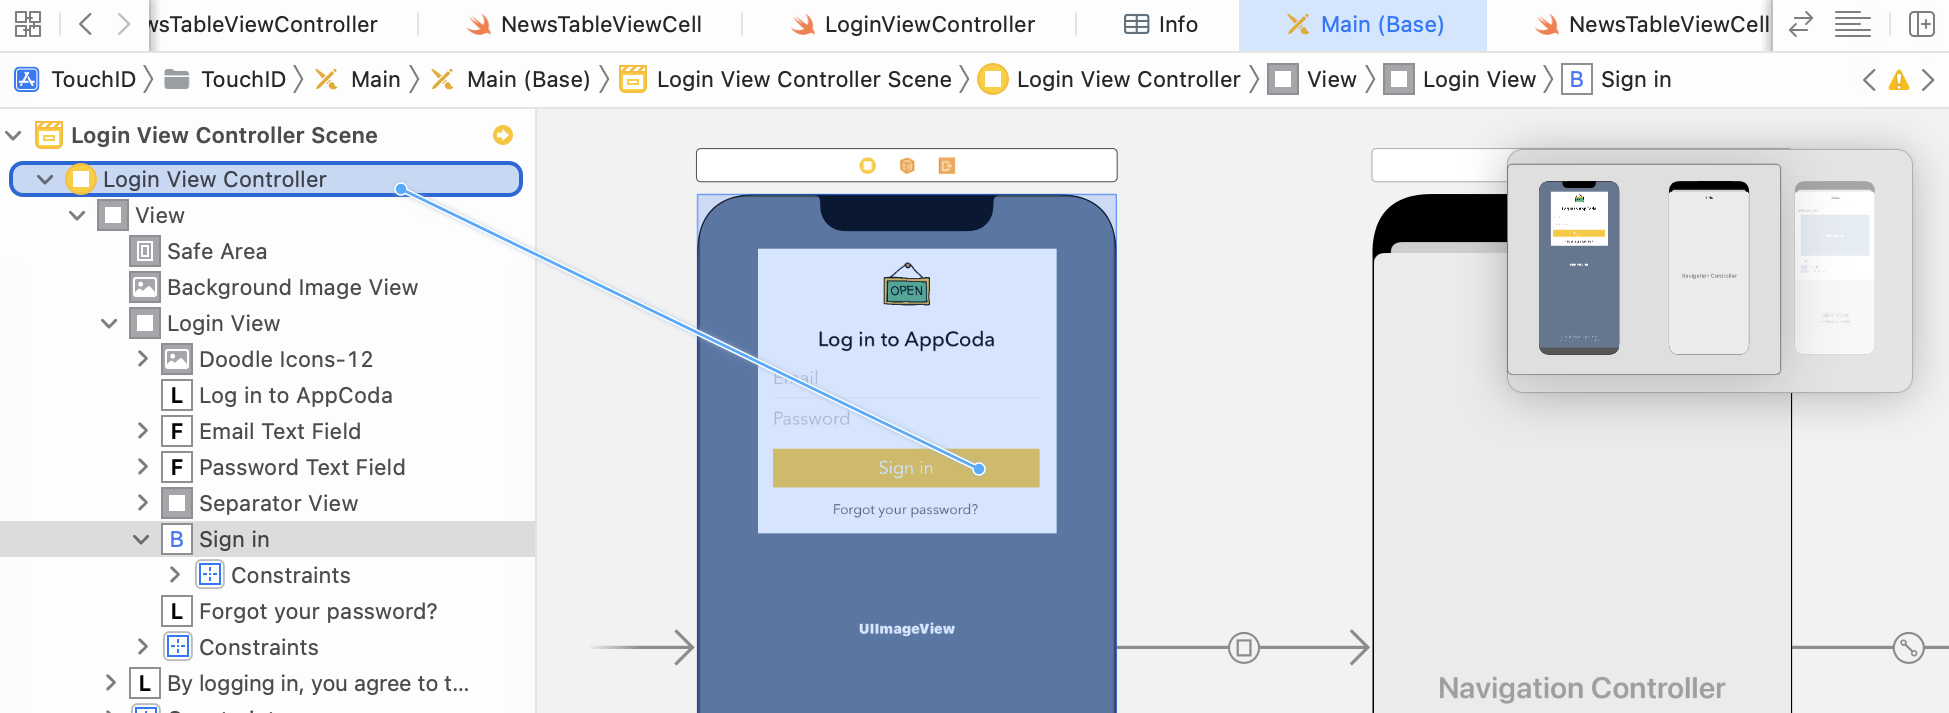
Control-drag from the Login View Controller to the Navigation Controller. When prompted, select present modally for the segue option.
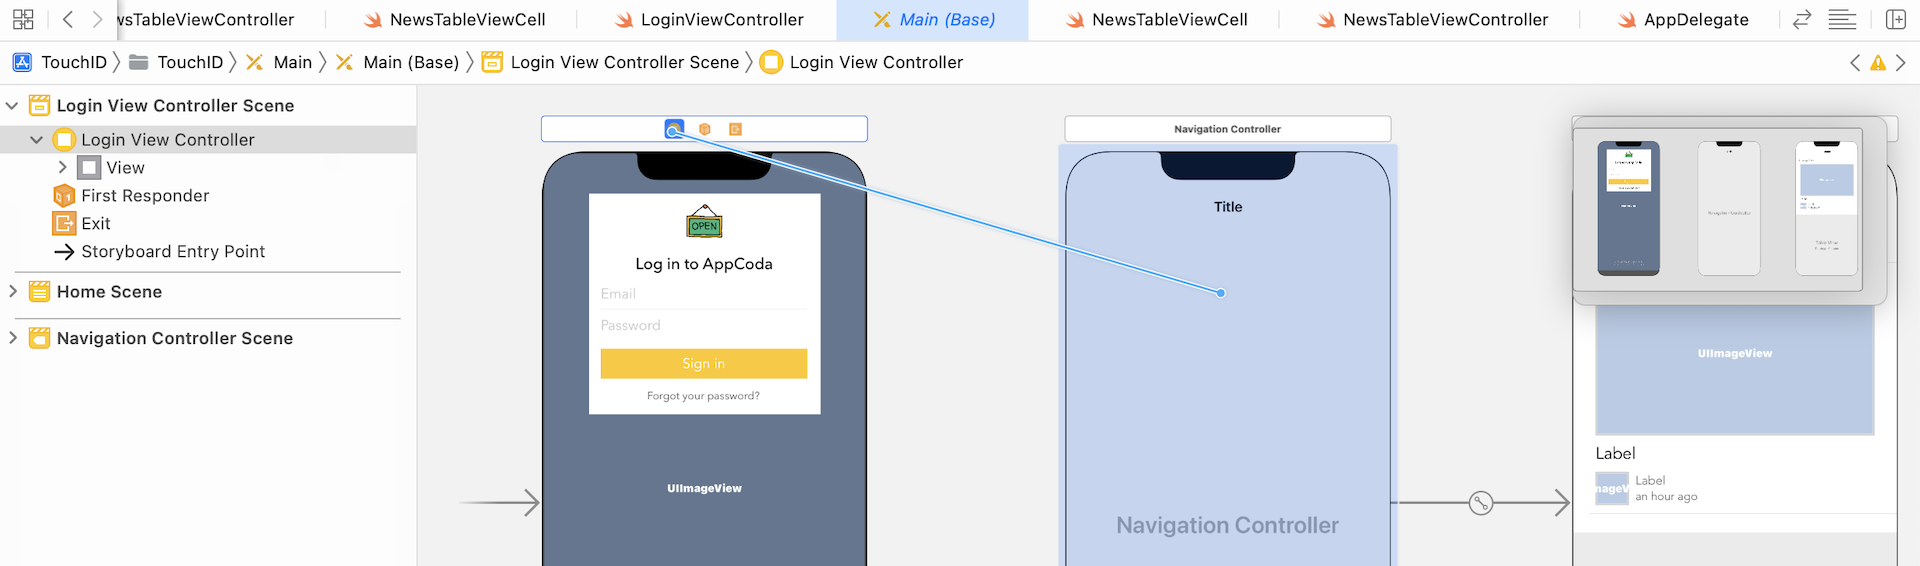
Typically, we use the default transition (i.e. slide-up). This time, let's change it to Cross Dissolve. Select the segue and go to the Attributes inspector. Change the transition option from Default to Cross Dissolve. Also, set the identifier to showHomeScreen. Later, we will perform the segue programmatically.
Using Local Authentication Framework
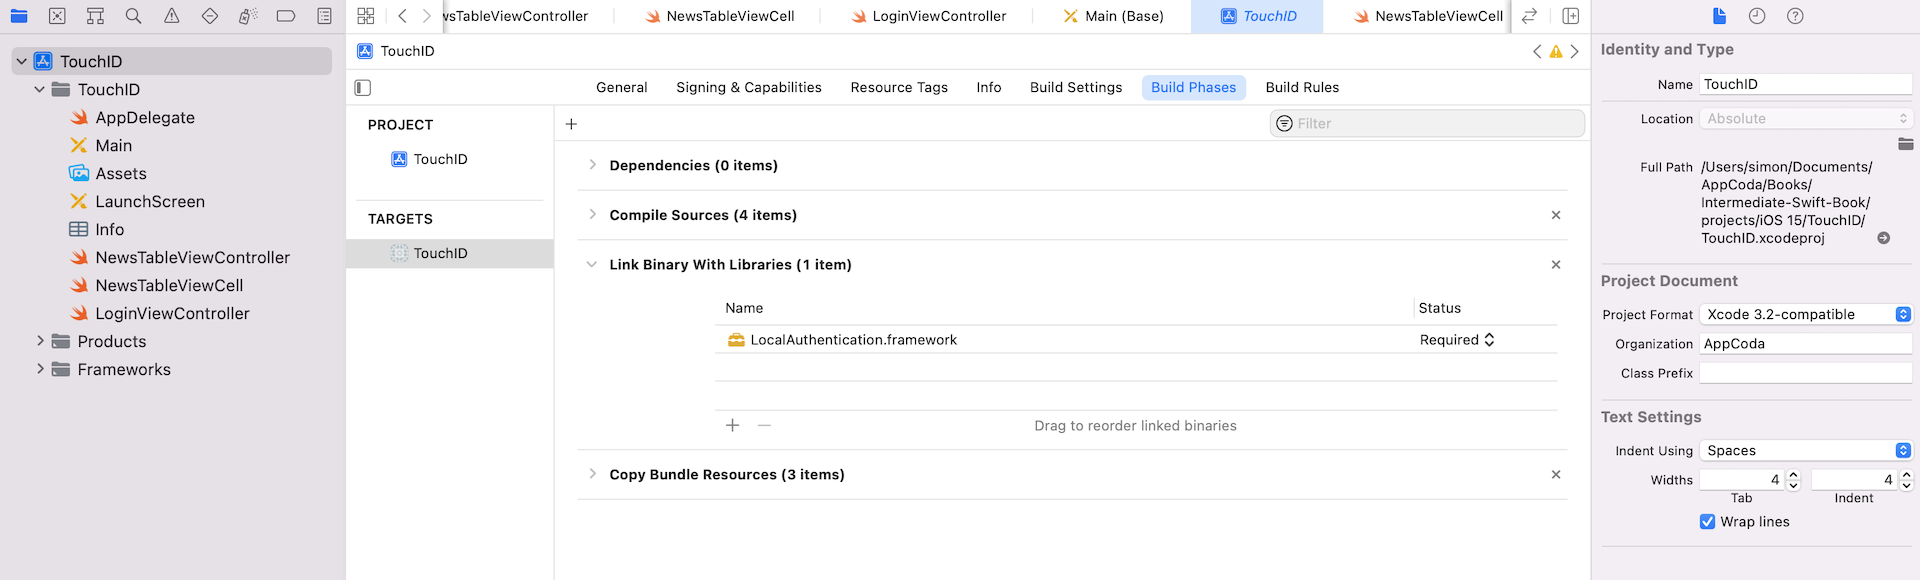
As I mentioned at the beginning of the chapter, the use of Touch ID/Face ID is based on the Local Authentication framework. For the time being, this framework doesn't exist in our project. We must manually add it to the project first.
In the Project Navigator, click on the TouchID Project and then select the Build Phases tab on the right side of the project window. Next, click on the disclosure icon of the Link Binary with Libraries to expand the section and then click on the small plus icon. When prompted, search for the Local Authentication framework and add it to the project.
To use the framework, all you need is to import it using the following statement:
import LocalAuthentication
Open the LoginViewController.swift file and insert the above statement at the very beginning. Next, replace the following statement in the viewDidLoad method:
showLoginDialog()
with:
loginView.isHidden = true
Normally, the app displays a login dialog when it is launched. Since we are going to replace the password-based authentication with Touch ID and Face ID, the login view is hidden by default.
To support Touch ID and Face ID, we will create a new method called authenticateWithBiometric in the class. Let's start with the code snippet and insert it in the LoginViewController class:
func authenticateWithBiometric() {
    // Get the local authentication context.
    let localAuthContext = LAContext()
    let reasonText = "Authentication is required to sign in AppCoda"
    var authError: NSError?

    if !localAuthContext.canEvaluatePolicy(LAPolicy.deviceOwnerAuthenticationWithBiometrics, error: &authError) {

        if let error = authError {
            print(error.localizedDescription)
        }

        // Display the login dialog when Touch ID is not available (e.g. in simulator)
        showLoginDialog()

        return
    }
}
The core of the Local Authentication framework is the LAContext class. To use Touch ID or Face ID, the very first thing is to instantiate a LAContext object.
The next step is to ask the framework if the Touch ID or Face ID authentication can be performed on the device by calling the canEvaluatePolicy method. As mentioned earlier, the framework supports the deviceOwnerAuthenticationWithBiometrics policy, that indicates the device owner authenticates using Touch ID.
We pass this policy to the method to check if the device supports Touch ID or Face ID authentication. If the method returns a true value, this indicates the device is capable to use one of these biometric authentication and the user has enabled either Touch ID or Face ID as the authentication mechanism. If a false value is returned, that means you cannot use any of them to authenticate the user. In this case, you should provide an alternative authentication method. Here we just call up the showLoginDialog method to fall back to password authentication.
Once we've confirmed that the Touch ID / Face ID is supported, we can proceed to perform the corresponding authentication. Continue to insert the following lines of code in the authenticateWithBiometric method:
// Perform the Biometric authentication
localAuthContext.evaluatePolicy(LAPolicy.deviceOwnerAuthenticationWithBiometrics, localizedReason: reasonText, reply: { (success: Bool, error: Error?) -> Void in

    // Failure workflow
    if !success {
        if let error = error {
            switch error {
            case LAError.authenticationFailed:
                print("Authentication failed")
            case LAError.passcodeNotSet:
                print("Passcode not set")
            case LAError.systemCancel:
                print("Authentication was canceled by system")
            case LAError.userCancel:
                print("Authentication was canceled by the user")
            case LAError.biometryNotEnrolled:
                print("Authentication could not start because you haven't enrolled either Touch ID or Face ID on your device.")
            case LAError.biometryNotAvailable:
                print("Authentication could not start because Touch ID / Face ID is not available.")
            case LAError.userFallback:
                print("User tapped the fallback button (Enter Password).")
            default:
                print(error.localizedDescription)
            }
        }

        // Fallback to password authentication
        OperationQueue.main.addOperation({
            self.showLoginDialog()
        })

    } else {

        // Success workflow

        print("Successfully authenticated")
        OperationQueue.main.addOperation({
            self.performSegue(withIdentifier: "showHomeScreen", sender: nil)
        })
    }

})
The evaluatePolicy method of the local authentication context object handles all the heavy lifting of the user authentication. When deviceOwnerAuthenticationWithBiometrics is specified as the policy, the method automatically presents a dialog, requesting a finger scan from the user if the device supports Touch ID. You can provide a reason text, which will be displayed in the sub-title of the authentication dialog. The method performs Touch ID authentication in an asynchronous manner. When it finishes, the reply block (i.e. closure in Swift) will be called with the authentication result and error passed as parameters.
For devices that support Face ID, no dialog will be presented. The user just needs to look at the iPhone to perform the Face ID authentication.
In the closure, we first check if the authentication is successful. If it is true, we simply call up the performSegue(withIdentifier:) method and navigate to the Home screen.
If the authentication fails, the error object will incorporate the reason for failure. You can use the code property of the error object to reveal the possible cause, which includes:
.authenticationFailed- the authentication failed because the fingerprint does not match up with those enrolled..userCancel- the user has canceled the authentication (e.g. by tapping the Cancel button in the dialog)..userFallback- the user chooses to use password authentication instead of Touch ID / Face ID. In the authentication dialog, there is a button called Enter Password. When a user taps the button, this error code will be returned..systemCancel- the authentication is canceled by the system. For example, if another application came to the foreground while the authentication dialog was up..passcodeNotSet- the authentication failed because the passcode is not configured..biometryNotAvailable- Touch ID / Face ID is not available on the device..biometryNotEnrolled- the user has not configured either Touch ID or Face ID yet.
In the implementation, we simply log the error to the console. When an error occurs, the app will fall back to password authentication by calling showLoginDialog():
// Fallback to password authentication
OperationQueue.main.addOperation({
    self.showLoginDialog()
})
Because the reply block is run in the background, we have to explicitly perform the visual change in the main thread. This is why we execute the showLoginDialog method in the main thread to ensure a responsive UI update.
Lastly, insert the following line of code at the end of the viewDidLoad method to initiate the authentication:
authenticateWithBiometric()
Before you run the project to test the app, you will have to edit the Info.plist file and insert an entry with the key Privacy - Face ID Usage Description for Face authentication. In its value field, specify a reason why your app needs biometric authentication.
Now you're ready to test the app. Make sure you run the app on a real device with Touch ID or Face ID support. Once launched, the app should ask for Touch ID authentication if your device supports Touch ID. On newer iPhone models, which supports Face ID, you just need to look at your device and Face ID authentication happens instantly.
If the authentication is successful, you will be able to access the Home screen. If you run the app on the simulator, you should see the login dialog with the following error shown in the console:
No identities are enrolled.
Password Authentication
Now you have implemented the Touch ID / Face ID authentication. However, when the user opts for password authentication, the login dialog is not fully functional yet. Let's create an action method called authenticateWithPassword in LoginViewController.swift:
@IBAction func authenticateWithPassword() {

    if emailTextField.text == "hi@appcoda.com" && passwordTextField.text == "1234" {
        performSegue(withIdentifier: "showHomeScreen", sender: nil)
    } else {
        // Shake to indicate wrong login ID/password
        loginView.transform = CGAffineTransform(translationX: 25, y: 0)
        UIView.animate(withDuration: 0.2, delay: 0.0, usingSpringWithDamping: 0.15, initialSpringVelocity: 0.3, options: .curveEaseInOut, animations: {

            self.loginView.transform = CGAffineTransform.identity

        }, completion: nil)
    }
}
In reality, you may store the user profiles in your backend and authenticate the user using web service call. To keep things simple, we just hardcode the login ID and password to hi@appcoda.com and 1234 respectively. When the user enters a wrong combination of login ID and password, the dialog performs a "Shake" animation to indicate the error.
Now go back to the storyboard to connect the Sign In button with the method. Control-drag from the Sign In button to the Login View Controller and select authenticateWithPassword under Sent Events.
Build and run the project again. You should now be able to log in the app even if you choose to fall back to the password authentication. Tapping the Sign In button without entering the password will "shake" the login dialog.
For reference, you can download the final project from http://www.appcoda.com/resources/swift55/TouchID.zip.