- Made by AppCoda
- Contact us / Support
- Tweet this book
- Preface
- 1. Building Adaptive User Interfaces
- 2. Creating Table View Sections and Index list with Diffable Data Source
- 3. Animating Table View Cells
- 4. Working with JSON and Codable
- 5. How to Integrate the Twitter and Facebook SDK for Social Sharing
- 6. Working with Email and Attachments
- 7. Sending SMS and MMS Using MessageUI Framework
- 8. How to Get Direction and Draw Route on Maps
- 9. Search Nearby Points of Interest Using Local Search
- 10. Audio Recording and Playback
- 11. Scan QR Code Using AVFoundation Framework
- 12. Working with URL Schemes
- 13. Building a Full Screen Camera with Gesture-based Controls
- 14. Video Capturing and Playback Using AVKit
- 15. Displaying Banner Ads using Google AdMob
- 16. Working with Custom Fonts
- 17. Working with AirDrop, UIActivityViewController and Uniform Type Identifiers
- 18. Building Grid Layouts Using Collection Views and Diffable Data Source
- 19. Interacting with Collection Views
- 20. Adaptive Collection Views Using UITraitCollection and Compositional Layout
- 21. Building a Weather Widget Using WidgetKit
- 22. Building Slide Out Sidebar Menus Using Objective-C Libraries
- 23. View Controller Transitions and Animations
- 24. Building a Slide Down Menu
- 25. Self Sizing Cells and Dynamic Type
- 26. XML Parsing, RSS and Expandable Table View Cells
- 27. Applying a Blurred Background Using UIVisualEffect
- 28. Using Touch ID and Face ID For Authentication
- 29. Building a Carousel-Like User Interface
- 30. Working with Parse
- 31. Parsing CSV and Preloading a SQLite Database Using Core Data
- 32. Connecting Multiple Annotations with Polylines and Routes
- 33. Using CocoaPods in Swift Projects
- 34. Building a Simple Sticker App
- 35. Building iMessage Apps Using Messages Framework
- 36. Building Custom UI Components Using IBDesignable and IBInspectable
- 37. Using Firebase for User Authentication
- 38. Google and Facebook Authentication Using Firebase
- 39. Using Firebase Database and Storage to Build an Instagram-like App
- 40. Building a Real-time Image Recognition App Using Core ML
- 41. Building AR Apps with ARKit and SpriteKit
- 42. Working with 3D Objects in Augmented Reality Using ARKit and SceneKit
- 43. Use Create ML to Train Your Own Machine Learning Model for Image Recognition
- 44. Building a Sentiment Classifier Using Create ML to Classify User Reviews
- 45. Working with Image Tracking Using ARKit
- Published with GitBook
Chapter 44
Building a Sentiment Classifier Using Create ML to Classify User Reviews

In the previous chapter, I have walked you through the basics of Create ML and showed you how to train an image classifier. As mentioned, Create ML doesn't limit ML model training to images. You can use it to train your own text classifier model to classify natural language text.
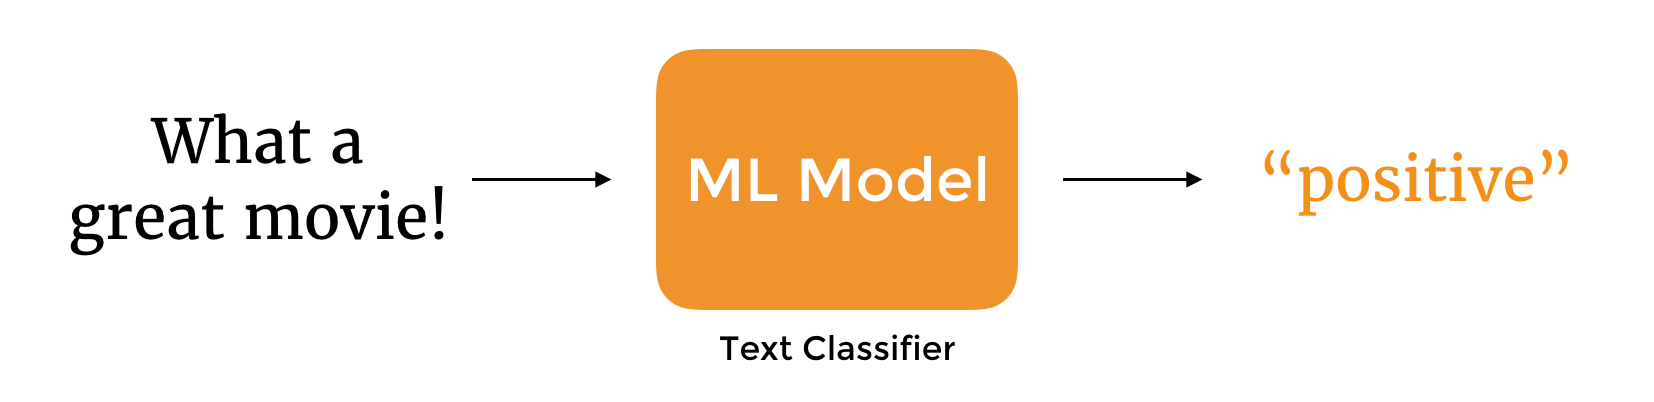
What we are going to do in this chapter is to create a sentiment model for classifying product and movie reviews. The trained model takes in opinions in natural language text, analyze, and classifies it into positive/negative reviews. Furthermore, I will show you how to compile and test the model in Playgrounds.
Before you move on, please make sure you check out the previous two chapters. I assume you already equip yourself with the basics of Create ML and Core ML.
Data Preparation
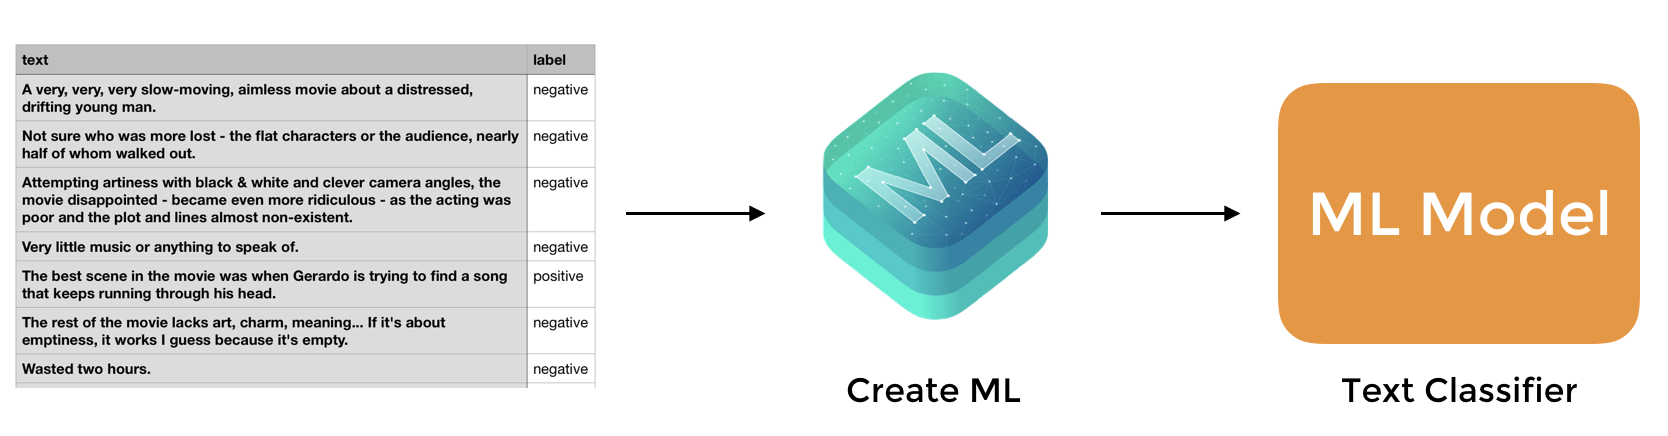
The workflow of creating a text classifier is very similar to that of an image classifier. You begin with data collection. Since we are going to create a sentiment classifier, we have to prepare tons of examples of product/movie/restaurant reviews (in natural language) to train the ML model. For each of the reviews, we label it as positive or negative. This is how we train the machine to understand and differentiate positive/negative reviews.
But where can you find the examples of the product/movie/restaurant reviews?
One way is to write the sample reviews by yourself and label each of the reviews like this:
"I like this movie. It's really good!", positive
"This coffee machine sucks!", negative
If your customers give you regular feedback on your products, you can also use the reviews as the training data. Alternatively, there are a plenty of websites like amazon.com, yelp.com, and imdb.com that you can refer to for retrieving sample user reviews. Some of the websites offer APIs (like Yelp) for you to request the reviews. The other common approach is to extract and collect the user reviews through web scraping. I will not go into the details of web scraping in this book, but you can refer to the following reference if you are interested in learning more:
- How to scrape websites with Python and BeautifulSoup (https://medium.freecodecamp.org/how-to-scrape-websites-with-python-and-beautifulsoup-5946935d93fe)
- How to scrape Amazon Reviews using Python (https://www.scrapehero.com/how-to-scrape-amazon-product-reviews/)
- How to scrap Amazon Reviews in 3 simple steps (https://medium.com/prowebscraper/tutorial-how-to-scrape-amazon-reviews-in-3-simple-steps-c463a01b9f0a)
In this demo, we will use the sample data, provided by Dimitrios Kotzias, from the UCI Machine Learning Repository:
- Sentiment Labelled Sentences Data Set (https://archive.ics.uci.edu/ml/datasets/Sentiment+Labelled+Sentences)
This data set contains a total of 3,000 sample reviews from amazon.com, yelp.com, and imdb.com. The creator already labelled all the reviews with either 1 (for positive) or 0 (for negative). Here is the sample content:
But I recommend waiting for their future efforts, let this one go.      0
Service was very prompt.    1
I could care less... The interior is just beautiful.    1
This is pretty cool, so instead of preparing our own data, we will use this data set to train the sentiment classifier. However, before opening Playgrounds to train the model, we will have to alter the data a bit in order to conform to the requirement of Create ML.
Create ML has a built-in support for tabular data. If you look into the data set closely, it is actually a table with two columns. The first column is the sentence (or the user review), while the second column indicates whether the corresponding sentence is positive or negative. The new framework introduces a new class called MLDataTable to import a table of training data. It supports two types of data format including JSON and CSV. In this case, we will convert the data file to CSV format like this:
text,label
"But I recommend waiting for their future efforts, let this one go.",negative
"Service was very prompt.",positive
"I could care less... The interior is just beautiful.",positive
.
.
.
The first line of the file is the column labels. Here we name the first column text and the second column label. It is required to give the columns of data a name. Later, when you import the data using MLDataTable, the resulting data table will have two columns, named "text" and "label". Both names serve as a key to access the specific column of the data.
There are various ways to perform the conversion. You can manually modify the file's content and convert it to the desired CSV format. Or you can open TextEdit and use its "Find & Replace" function to replace the tab character with a comma. As a practice, I suggest you think of your own approach to handle the text conversion.
For me, I prefer to use sed, a stream editor for performing basic text transformation, to create the CSV file from the data files. On macOS, you can run sed in Terminal using the command like this:
echo "text,label" > sample_reviews.csv

sed "s/\"/'/g; s/    0/\",negative/g; s/        1/\",positive/g; s/^/\"/g" imdb_labelled.txt >> sample_reviews.csv

sed "s/\"/'/g; s/      0/\",negative/g; s/      1/\",positive/g; s/^/\"/g" amazon_cells_labelled.txt >> sample_reviews.csv

sed "s/\"/'/g; s/      0/\",negative/g; s/      1/\",positive/g; s/^/\"/g" yelp_labelled.txt >> sample_reviews.csv
The first command uses echo to write the column names and create the sample_reviews.csv file. The next three commands are very similar, except that the text transformation applies to different files.
In the commands above, I use sed to execute 4 replacement patterns at once and then output the transformed content to sample_reviews.csv:
- Replace all double quotes with single quotes.
- Replace "
0" with ",negative". As a side note, to type the tab character in Terminal, press control+vand then presstab. - Replace "
1" with ",positive". - Insert a double quote at the beginning of each sentence.
Once you execute the commands, sed will convert the files accordingly. Here is the excerpt of the resulting CSV file:
text,label
"A very, very, very slow-moving, aimless movie about a distressed, drifting young man.",negative
"Not sure who was more lost - the flat characters or the audience, nearly half of whom walked out.",negative
"Attempting artiness with black & white and clever camera angles, the movie disappointed - became even more ridiculous - as the acting was poor and the plot and lines almost non-existent.",negative
"Very little music or anything to speak of.",negative
"The best scene in the movie was when Gerardo is trying to find a song that keeps running through his head.",positive
.
.
.
.
In case you have problems converting the data files, you can download the final CSV file from http://www.appcoda.com/resources/swift5/createml-sample-reviews.zip.
Create and Train the Text Classifier Using MLTextClassifier
Now that you've prepared the training data, let's begin to train the ML model. In this demo, I will show you how to train the model programmatically using MLTextClassifier.
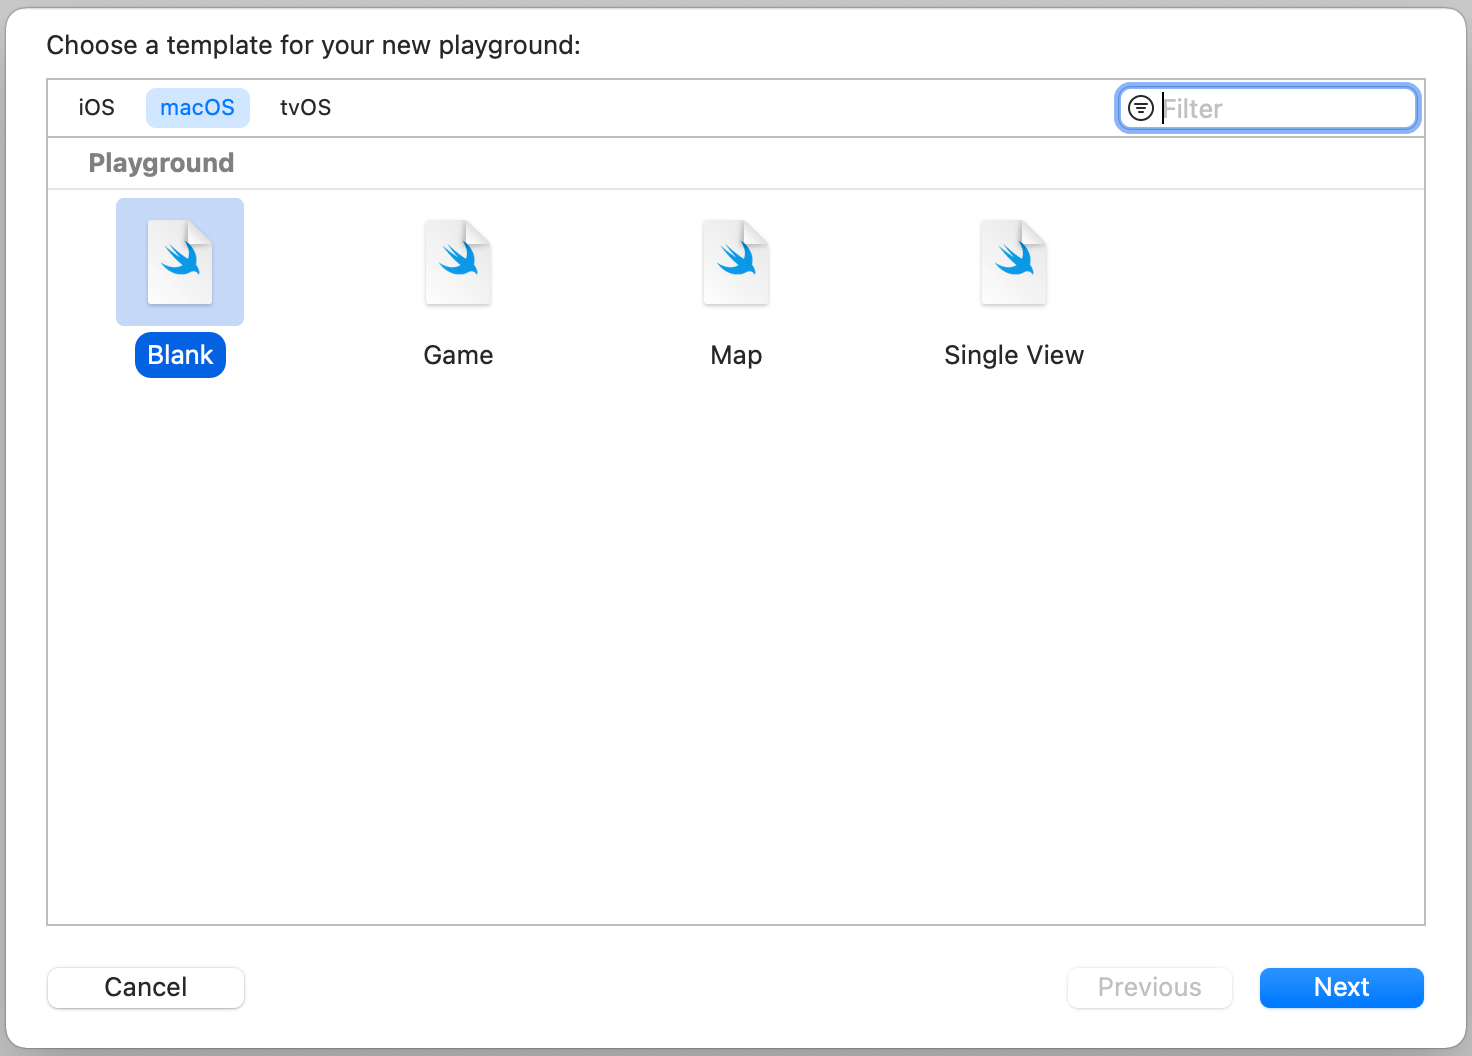
Similar to what we've done before, create a new Playground using the Blank template. Please make sure you choose the blank template under macOS. Name the Playgrounds file to whatever you like. Here I set its name to SentimentTextClassifier.
Once created, replace the content with the following code:
import CreateML
import Foundation

let dataPath = URL(fileURLWithPath: "/Users/simon/Downloads/sample_sentences/sample_reviews.csv")

// Load the data set
let dataSet = try MLDataTable(contentsOf: dataPath)
We first import the CreateML framework and then load the sample_reviews.csv file into a MLDataTable object. Your file path should be different from mine. Therefore, please make sure you replace the path with your own path.
So far, we only prepared the training data. You may wonder why we do not need to prepare the test data for the text classifier?
In fact, we need to have the test data for evaluation purpose. However, instead of arranging another data set for testing, we will derive the test data from the data set of sample_reviews.csv. To do that, insert the following line of code in the Playgrounds project:
let (trainingData, testingData) = dataSet.randomSplit(by: 0.8, seed: 5)
The randomSplit method divides the current data set into two sets of data. In the code above, we specify the value of the by parameter to 0.8. This means 80% of the original data will be assigned as the training data. The rest of it (i.e. 20%) is for testing.
Now that both training and test data are all set, it is ready to train the text classifier for classifying the user reviews into sentiment. Continue to insert the following code:
let textClassifier = try MLTextClassifier(trainingData: trainingData, textColumn: "text", labelColumn: "label")
To train a text classifier, we use MLTextClassifier and specify the training data. In addition to that, we have to tell MLTextClassifier the name of the text column and the label column. Recall that we set the column of the user reviews to "text" and that of the sentiment to "label", this is why we pass these two values in the method call.
This is the line of code you need to create and train a ML model for classifying natural language text. If you execute the code, the model training will begin right away. Once finished, you can reveal the accuracy of the model by accessing the classificationError properties of the model’s trainingMetrics and validationMetrics properties like this:
// Find out the accuracy of the ML model in percentage
let trainingAccuracy = (1.0 - textClassifier.trainingMetrics.classificationError) * 100
let validationAccuracy = (1.0 - textClassifier.validationMetrics.classificationError) * 100
It's easy to understand what training accuracy is, but you may wonder what validation accuracy means. If you print out the value of trainingAccuracy, the ML model got a 99.96% training accuracy. That's pretty awesome!
During training, Create ML put aside a small percentage (~10%) of the training data for validating the model during the training phase. In other words, 90% of the training data is used for training the model. The rest of it is assigned for validating and fine-tuning the model. So, the validation accuracy indicates the performance of the model on the validation data set. If you run the code, the model achieves an 81% validation accuracy.
How does the model perform on some "unseen" data set?
This comes to the next phase of ML model training. We will provide another set of data known as test data set to evaluate the trained model. Insert the following lines of code in the Playgrounds project:
let evaluationMetrics = textClassifier.evaluation(on: testingData, textColumn: "text", labelColumn: "label")
let evaluationAccuracy = (1.0 - evaluationMetrics.classificationError) * 100
To start the evaluation, you invoke the evaluation method of the text classifier with your test data. Then you can find out the evaluation accuracy. If you are satisfied with the evaluation accuracy, you can then export the model and save it as SentimentClassifier.mlmodel.
Here is the required code for saving the ML model:
if evaluationAccuracy >= 80.0 {
    let modelInfo = MLModelMetadata(author: "Simon Ng", shortDescription: "A trained model to classify review sentiment", license: "MIT", version: "1.0", additional: nil)
    try textClassifier.write(to: URL(fileURLWithPath: "/Users/simon/Downloads/SentimentClassifier.mlmodel"), metadata: modelInfo)
}
Running the code will result in the following output in the console:
Finished parsing file /Users/simon/Downloads/sample_sentences/sample_reviews.csv
Parsing completed. Parsed 100 lines in 0.013956 secs.
Finished parsing file /Users/simon/Downloads/sample_sentences/sample_reviews.csv
Parsing completed. Parsed 3000 lines in 0.005352 secs.
Tokenizing data and extracting features
20% complete
40% complete
60% complete
80% complete
100% complete
Starting MaxEnt training with 2273 samples
Iteration 1 training accuracy 0.494941
Iteration 2 training accuracy 0.877695
Iteration 3 training accuracy 0.919490
Iteration 4 training accuracy 0.961725
Iteration 5 training accuracy 0.995161
Iteration 6 training accuracy 0.999120
Iteration 7 training accuracy 0.999560
Finished MaxEnt training in 0.03 seconds
Trained model successfully saved at /Users/simon/Downloads/SentimentClassifier.mlmodel.
Testing Out the Model in Playgrounds
Now that you've created your ML model for classifying sentiment, you can integrate the model file into your iOS apps to test out the model. But sometimes you want to test it in Playgrounds.
In order to do that, you have to first compile the ML model file using the command below:
xcrun coremlc compile SentimentClassifier.mlmodel .
By running the command in Terminal, it will compile the model and result the SentimentClassifier.mlmodelc bundle, which is actually a folder. To use the compiled model, create another Blank Playground project and add the SentimentClassifier.mlmodelc bundle to the Resources folder of your Playground.
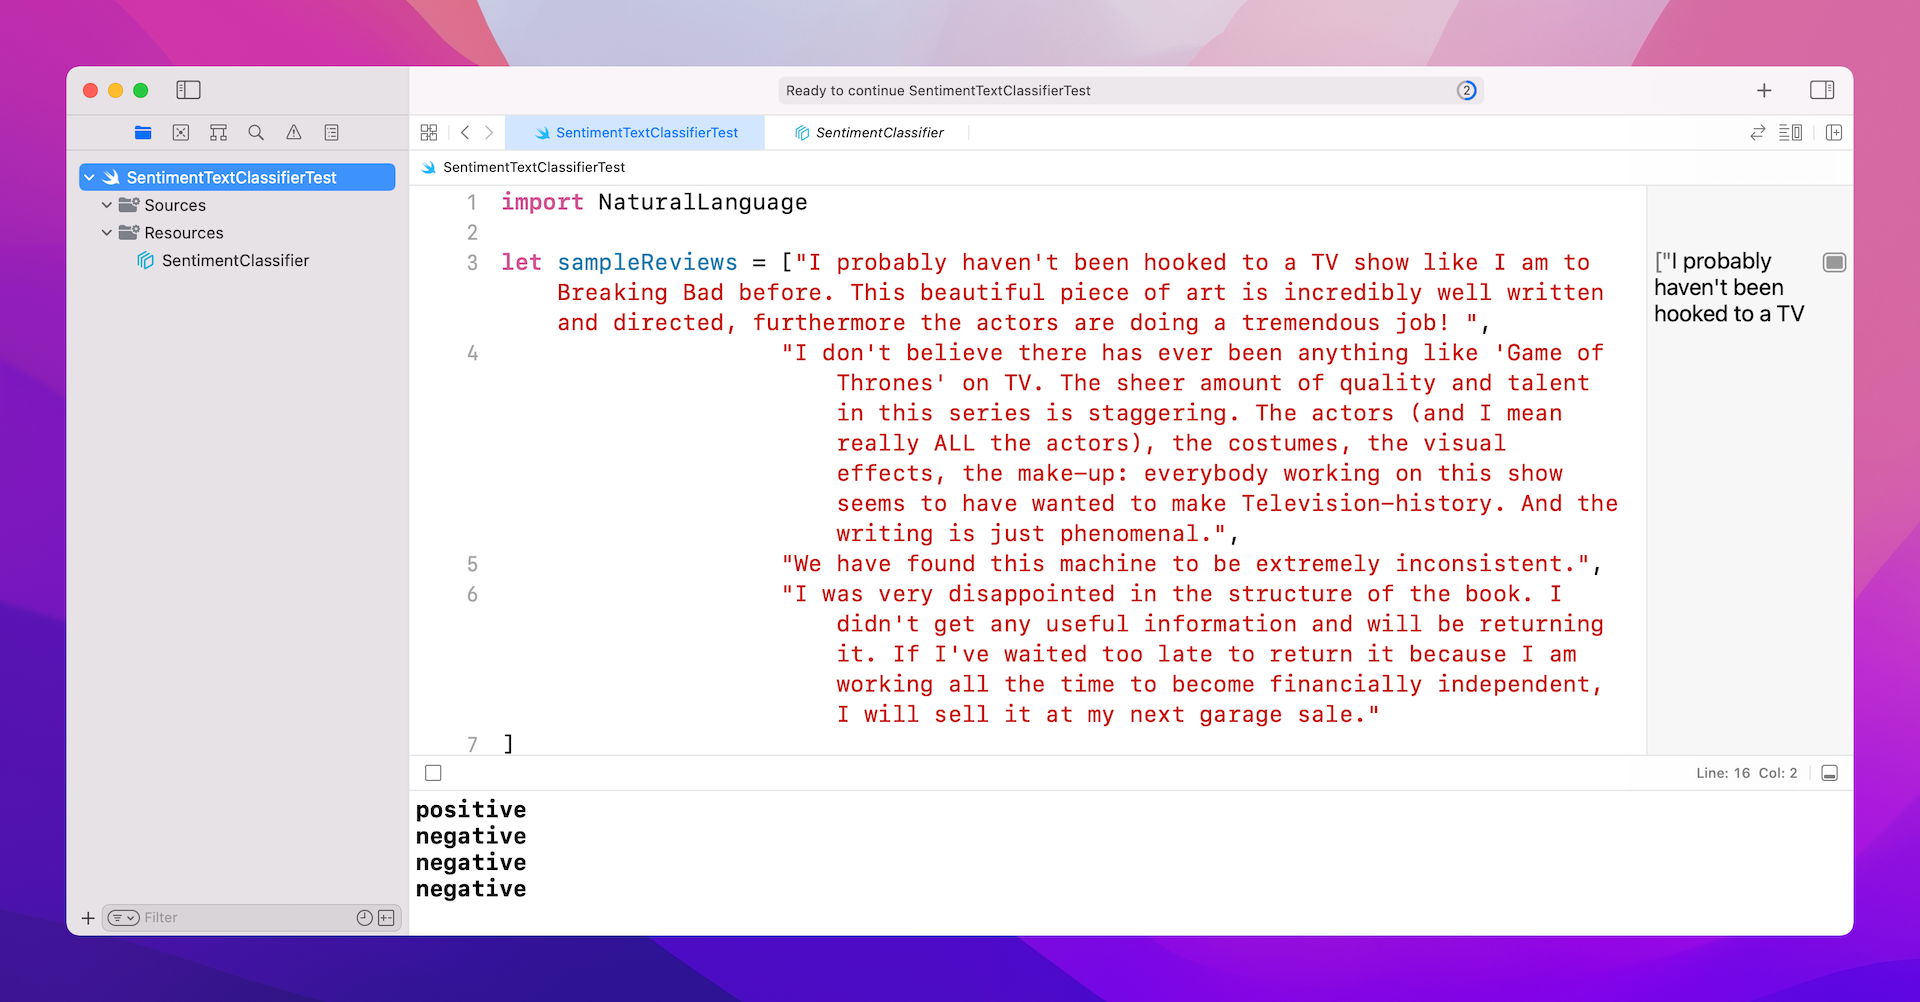
Next, replace all the generated code with the following code snippet:
import NaturalLanguage

let sampleReviews = ["I probably haven't been hooked to a TV show like I am to Breaking Bad before. This beautiful piece of art is incredibly well written and directed, furthermore the actors are doing a tremendous job! ",
                    "I don't believe there has ever been anything like 'Game of Thrones' on TV. The sheer amount of quality and talent in this series is staggering. The actors (and I mean really ALL the actors), the costumes, the visual effects, the make-up: everybody working on this show seems to have wanted to make Television-history. And the writing is just phenomenal.",
                    "We have found this machine to be extremely inconsistent.",
                    "I was very disappointed in the structure of the book. I didn't get any useful information and will be returning it. If I've waited too late to return it because I am working all the time to become financially independent, I will sell it at my next garage sale."
]

if let modelURL = Bundle.main.url(forResource: "SentimentClassifier", withExtension: "mlmodelc") {

    let model = try! NLModel(contentsOf: modelURL)

    for review in sampleReviews {
        print(model.predictedLabel(for: review) ?? "")
    }
}
Here, we initialize several sample reviews for testing purpose. To load the bundle, you can call Bundle.main.url with the SentimentClassifier.mlmodelc file. The NaturalLanguage framework provides a class named NLModel for developers to integrate custom text classifier. In the code above, we initialize an NLModel object with the sentiment classifier, and then call predictedLabel(for:) to classify the sample reviews.
Running the code in Playground will give you the following result in the console.
Training the Model Using Create ML
Earlier, I showed you how to train the model programmatically. If you prefer to use the Create ML app, you can achieve the same result. All you need to do is to launch the Create ML app and create a new project using the Text Classifier template.

You can then assign the training and test data to the project, similar to what we have done in the previous chapter.
Your Exercise
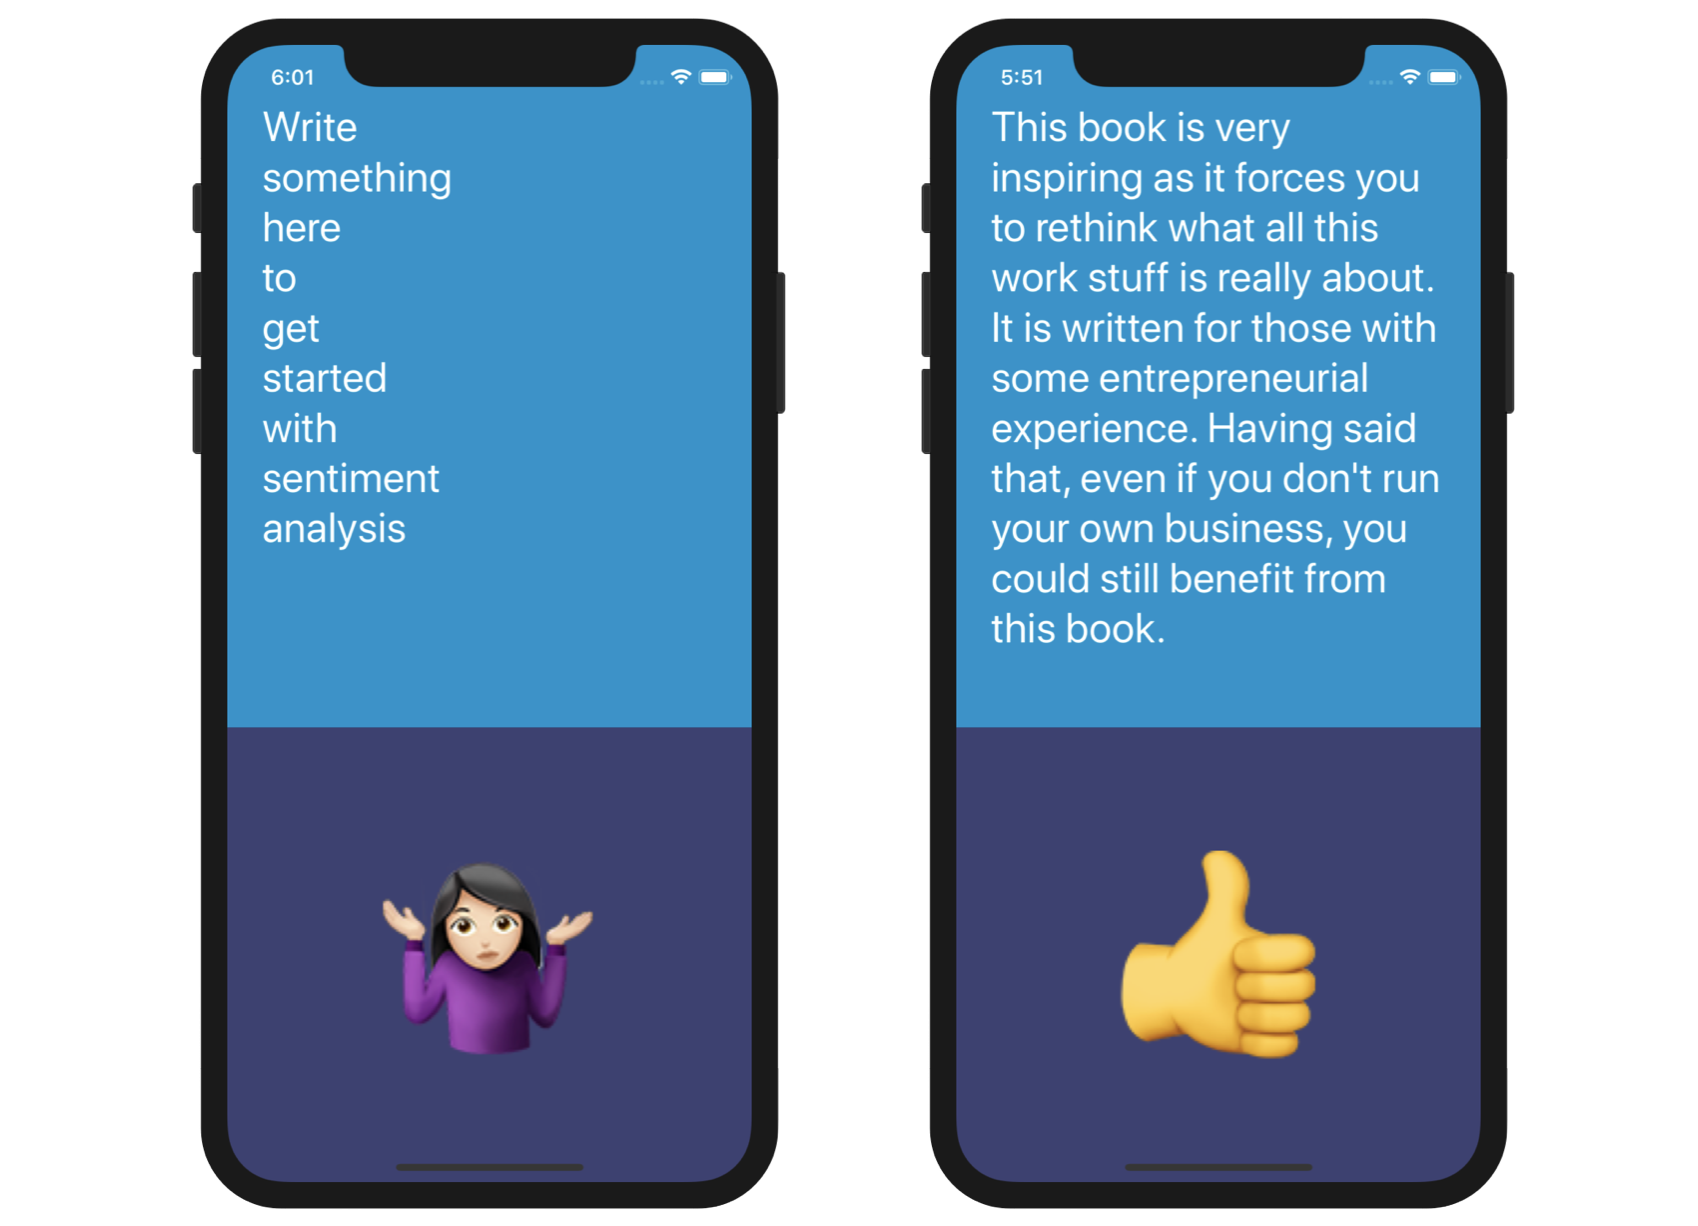
Now that you've created a trained ML model for sentiment analysis and tested it in Playgrounds, wouldn't it be great to integrate it in an iOS app? This is an exercise I really want you to work on.
The app is very simple. It allows users to input a paragraph of text in a text view. When the user hit the return key, the app will analyze the text and classify the message. If the message is positive, it displays the emoji 👍. Conversely, it shows the thumb down emoji 👎 if the user's message is negative.
To integrate the trained ML model into an app, all you need to do is add the SentimentClassifier.mlmodel file into your iOS project. The code for using the ML model is exactly the same as that we used in the Playground project. Don't skip this exercise and take some time to work on it.
Conclusion
As you can see, training a text classifier is very similar to training an image classifier, that we have done before. Create ML has provided developers an easy way to create our own model. You don't need to write a lot of code, but just a few lines. The tool empowers developers to build features that couldn't be built before.
Just consider the demo we built in this chapter, it's impossible to use pattern matching to find out an accurate sentiment of a user review. Now, all you need to do is collect the data and train your own model in Playgrounds. You will then have a ML model for you to build a sentiment classification feature in your iOS app. This is pretty amazing.
For reference, you can download the Playground project from http://www.appcoda.com/resources/swift55/SentimentTextClassifier.playground.zip.
For the solution of the exercise, you can download it from http://www.appcoda.com/resources/swift55/SentimentClassifierDemo.zip