- Made by AppCoda
- Contact us / Support
- Tweet this book
- Preface
- 1. Building Adaptive User Interfaces
- 2. Creating Table View Sections and Index list with Diffable Data Source
- 3. Animating Table View Cells
- 4. Working with JSON and Codable
- 5. How to Integrate the Twitter and Facebook SDK for Social Sharing
- 6. Working with Email and Attachments
- 7. Sending SMS and MMS Using MessageUI Framework
- 8. How to Get Direction and Draw Route on Maps
- 9. Search Nearby Points of Interest Using Local Search
- 10. Audio Recording and Playback
- 11. Scan QR Code Using AVFoundation Framework
- 12. Working with URL Schemes
- 13. Building a Full Screen Camera with Gesture-based Controls
- 14. Video Capturing and Playback Using AVKit
- 15. Displaying Banner Ads using Google AdMob
- 16. Working with Custom Fonts
- 17. Working with AirDrop, UIActivityViewController and Uniform Type Identifiers
- 18. Building Grid Layouts Using Collection Views and Diffable Data Source
- 19. Interacting with Collection Views
- 20. Adaptive Collection Views Using UITraitCollection and Compositional Layout
- 21. Building a Weather Widget Using WidgetKit
- 22. Building Slide Out Sidebar Menus Using Objective-C Libraries
- 23. View Controller Transitions and Animations
- 24. Building a Slide Down Menu
- 25. Self Sizing Cells and Dynamic Type
- 26. XML Parsing, RSS and Expandable Table View Cells
- 27. Applying a Blurred Background Using UIVisualEffect
- 28. Using Touch ID and Face ID For Authentication
- 29. Building a Carousel-Like User Interface
- 30. Working with Parse
- 31. Parsing CSV and Preloading a SQLite Database Using Core Data
- 32. Connecting Multiple Annotations with Polylines and Routes
- 33. Using CocoaPods in Swift Projects
- 34. Building a Simple Sticker App
- 35. Building iMessage Apps Using Messages Framework
- 36. Building Custom UI Components Using IBDesignable and IBInspectable
- 37. Using Firebase for User Authentication
- 38. Google and Facebook Authentication Using Firebase
- 39. Using Firebase Database and Storage to Build an Instagram-like App
- 40. Building a Real-time Image Recognition App Using Core ML
- 41. Building AR Apps with ARKit and SpriteKit
- 42. Working with 3D Objects in Augmented Reality Using ARKit and SceneKit
- 43. Use Create ML to Train Your Own Machine Learning Model for Image Recognition
- 44. Building a Sentiment Classifier Using Create ML to Classify User Reviews
- 45. Working with Image Tracking Using ARKit
- Published with GitBook
Chapter 43
Using Create ML to Train Your Own Machine Learning Model for Image Recognition
Earlier, you learned how to integrate a Core ML model in your iOS app. In that demo application, we utilized a pre-trained ML model which was created by other developers. What if you can't find a ML model that fits your need?
You will have to train your own model. The big question is how?
There are no shortage of ML tools for training your own model. Tensorflow and Caffe are a couple of the examples. However, all these tools require lots of code and don't have a friendly visual interface. Starting from Xcode 10, Apple introduced a new tool called Create ML that allows developers (and even non-developers) to train their own ML model.
Create ML was first released in Xcode 10 but it's built right into Playgrounds. Since the release of Xcode 11, Create ML becomes an independent full featured app. To train your own ML model, all you need is import your training data into the Create ML tool and you are good to go. You will understand what I mean when we dive into the demo in later section.
Last year, Create ML only focused on these main areas of machine learning models:
- Images
- Text
- Tabular data
- Sound
- Activity
Say, for images, you can create your own image classifier for image recognition. In this case, you take a photo or an image as input and the ML model outputs the label of the image. You can also create your own ML model for text classification. For example, you can train a model to classify if a user's comment is positive or negative.
In this chapter, we will focus on training a ML model for image recognition. For other types of ML models, we will look into them in later chapters.
The Workflow of Creating a ML Model
When you need to create your own ML model, you usually start with a problem. Here are a couple of the examples:
- I can't find any ML models to identify all type of cuisines.
- All existing ML models I found can only identity 1,000 real world objects. However, some objects such as HomePod and Apple Watch are not available in the model.
Generally speaking, the main reason why you need to build your own ML model is there is no existing model that fits your need.
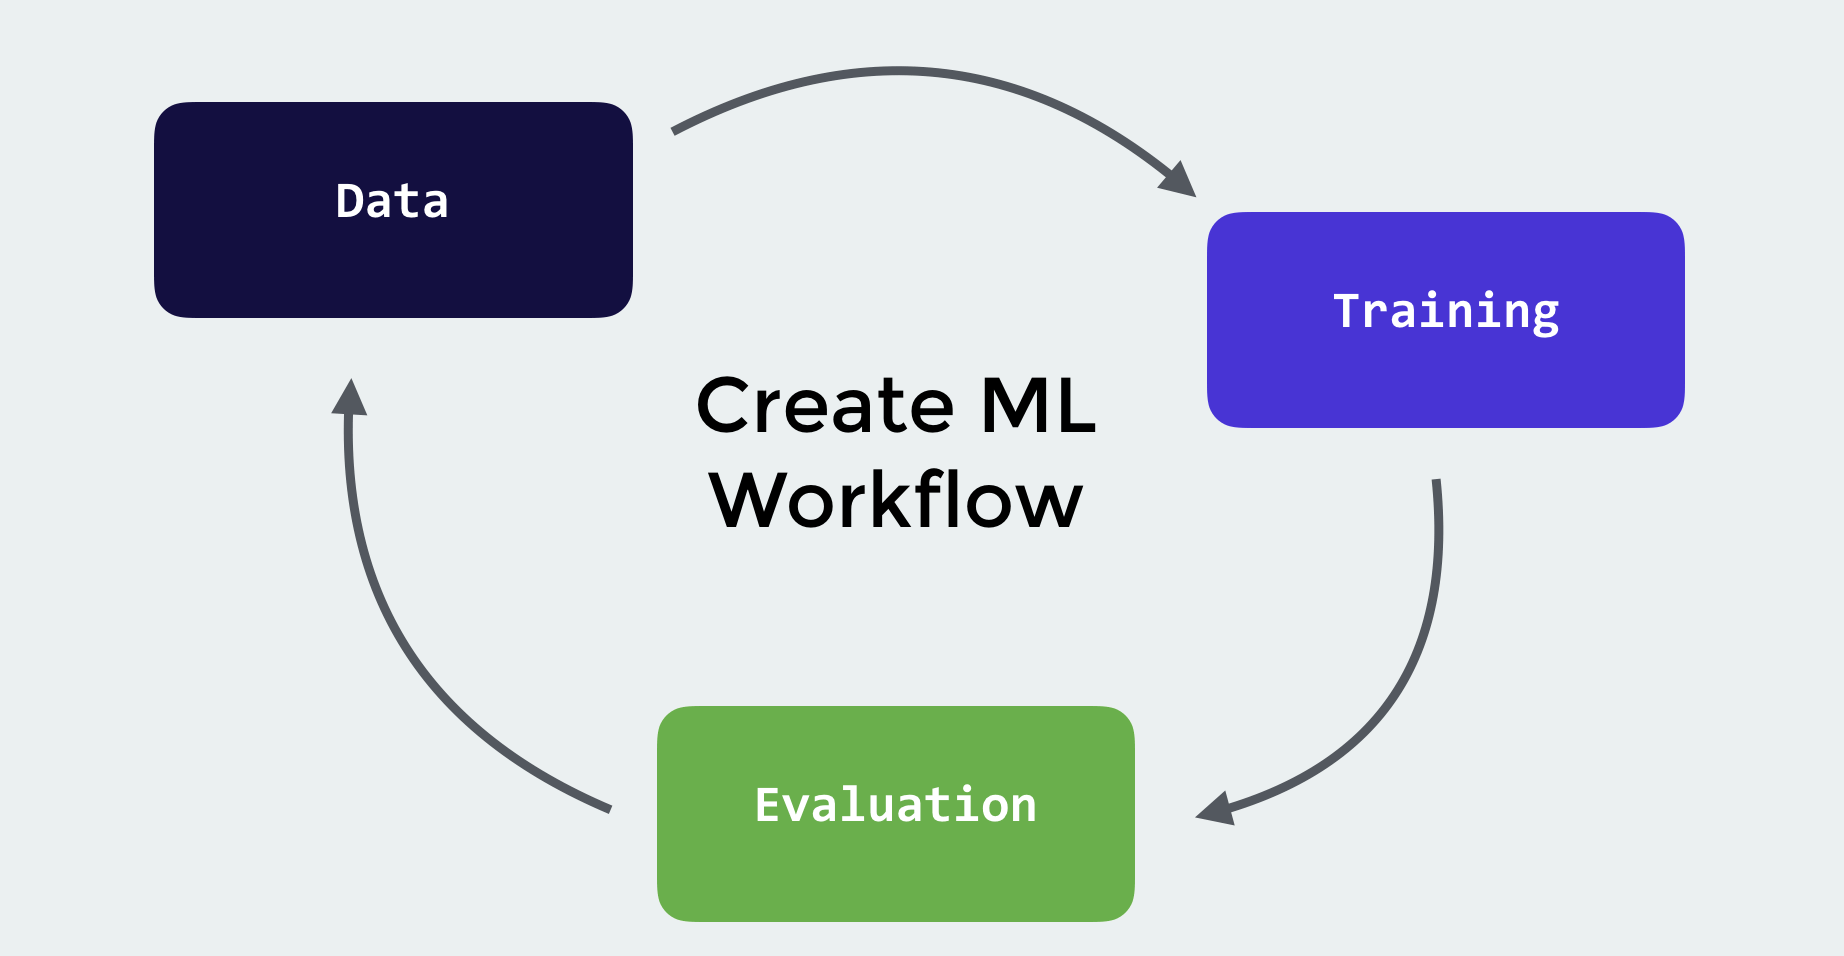
In order to create the model, you start by collecting the data. Say, you want to train a model for classifying bread according to types. You take photos of different bread and then train the model.
Next, you use some test data to evaluate the model and see if you are happy with the result. If not, you go back to collect more data, fine tune them and train the model again until the results are satisfactory.
Finally, you export the ML model and integrate it into your iOS app. This pretty much sums up the workflow of creating a ML model.
Requirements of Using Create ML
As mentioned at the very beginning, we use a new tool called Create ML to create and train ML models. This tool is built into Xcode. As long as you have Xcode installed on your Mac, you should be able to run the tool.
Creating an Image Classifier Model
What I am going to show you is to train an image classifier using Create ML. This image classifier model is very simple. It is designed to recognize "Dim Sum", a style of Chinese cuisine. We are not going to train a model that identifies all sorts of dishes. Of course, you can do that, but for demo purpose, we will only focus on recognizing a couple of "Dim Sum" dishes such as Steamed Shrimp Dumpling and Steamed Meat Ball. That said, you will have an idea about how to train your own image classifier model with Create ML.
Preparing the data
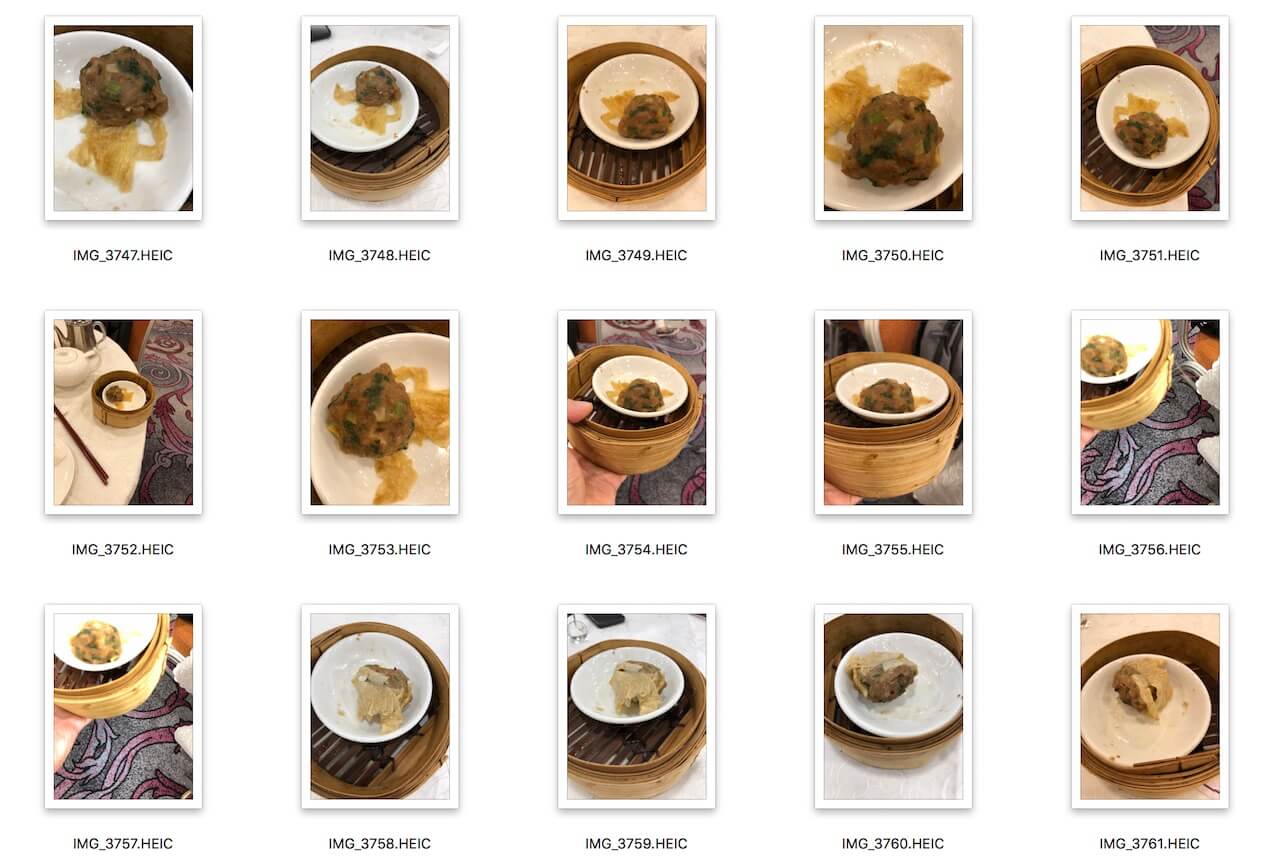
The first step of training a ML model is data collection. In this case, we need to collect some photos of the "Dim Sum" dishes. For me, I dined in a Chinese restaurant, ordered some dim sum, and took some photos of them. Alternatively, you can try to collect "Dim Sum" photos on the web (please be aware of the copyright issue). To follow the demo, please download the image pack from https://www.appcoda.com/resources/swift42/CreateMLImages.zip.
After you unpack the archive, you should find two folders: training and testing. In order to use Create ML for creating your own ML model, you need to prepare two sets of data: one for training and the other one for testing. Here, the training folder contains all the images for training the model, while the testing folder contains the images for evaluating the trained model.
If you look into the training folder, you will find a set of sub-folders. The name of the sub-folder is the label of a dim sum dish (e.g. Steamed Shrimp Dumpling). In that sub-folder, it contains around 10-20 images of that particular dim sum dish. This is how you prepare the training data. You create a sub-folder, put all the images of a dim sum dish in the folder, and set the folder's name to the image label.
The structure of the testing folder is similar to that of the training folder. You assign the test images into different sub-folders. The name of sub-folders is the expected label of the test images.
You may wonder how many images should you prepare for training? In general, the more samples you provide the better is the accuracy.
Create ML leverages the machine learning infrastructure built in to Apple products like Photos and Siri. This means your image classification and natural language models are smaller and take much less time to train.
- Apple's documentation (https://developer.apple.com/documentation/create_ml)
As Apple recommended, you should have at least 10 images for each object. It is also suggested to provide photos of the object taken from various angles and with different background. This would improve the accuracy of the trained ML model.
Training the Model Using CreateML
With the training data, the next step is fire up Xcode and use Create ML to train the model. Create ML is built right into Xcode. To launch the app, go up to the Xcode menu and select Xcode > Open Developer Tool > Create ML. Upon launch, choose File > New Project to create a new project and you will be asked to choose a ML model template.
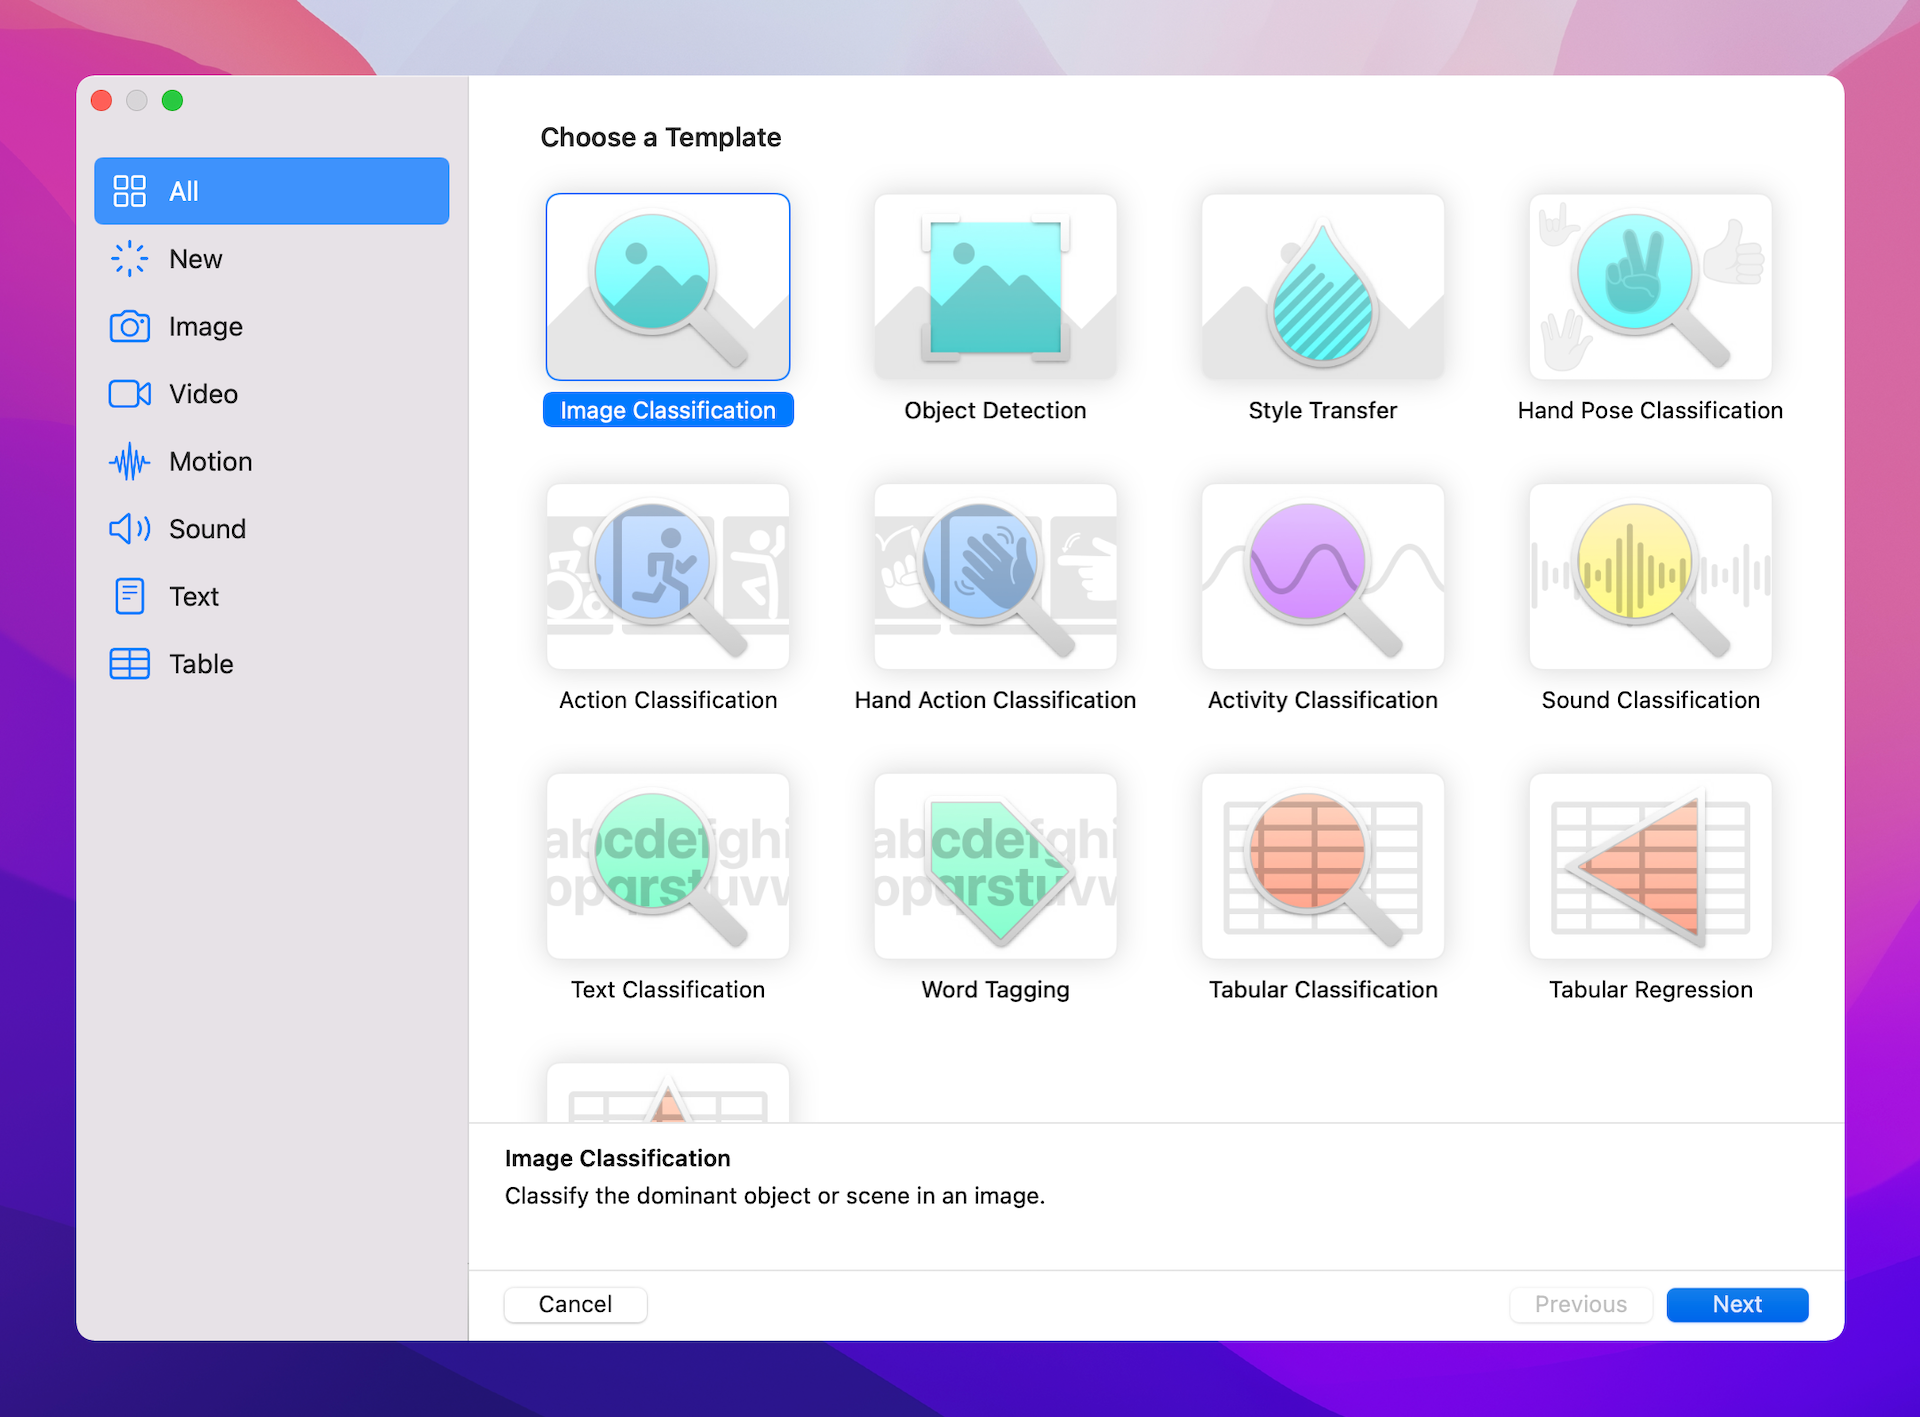
Since we are going to train a ML model for classifying images, let's choose the Image Classification template. In the next screen, name the project DimSumClassifier. Optionally, you can change the author and description of the model. Next, save it to your preferred folder. You will then see the UI of the image classifier builder.
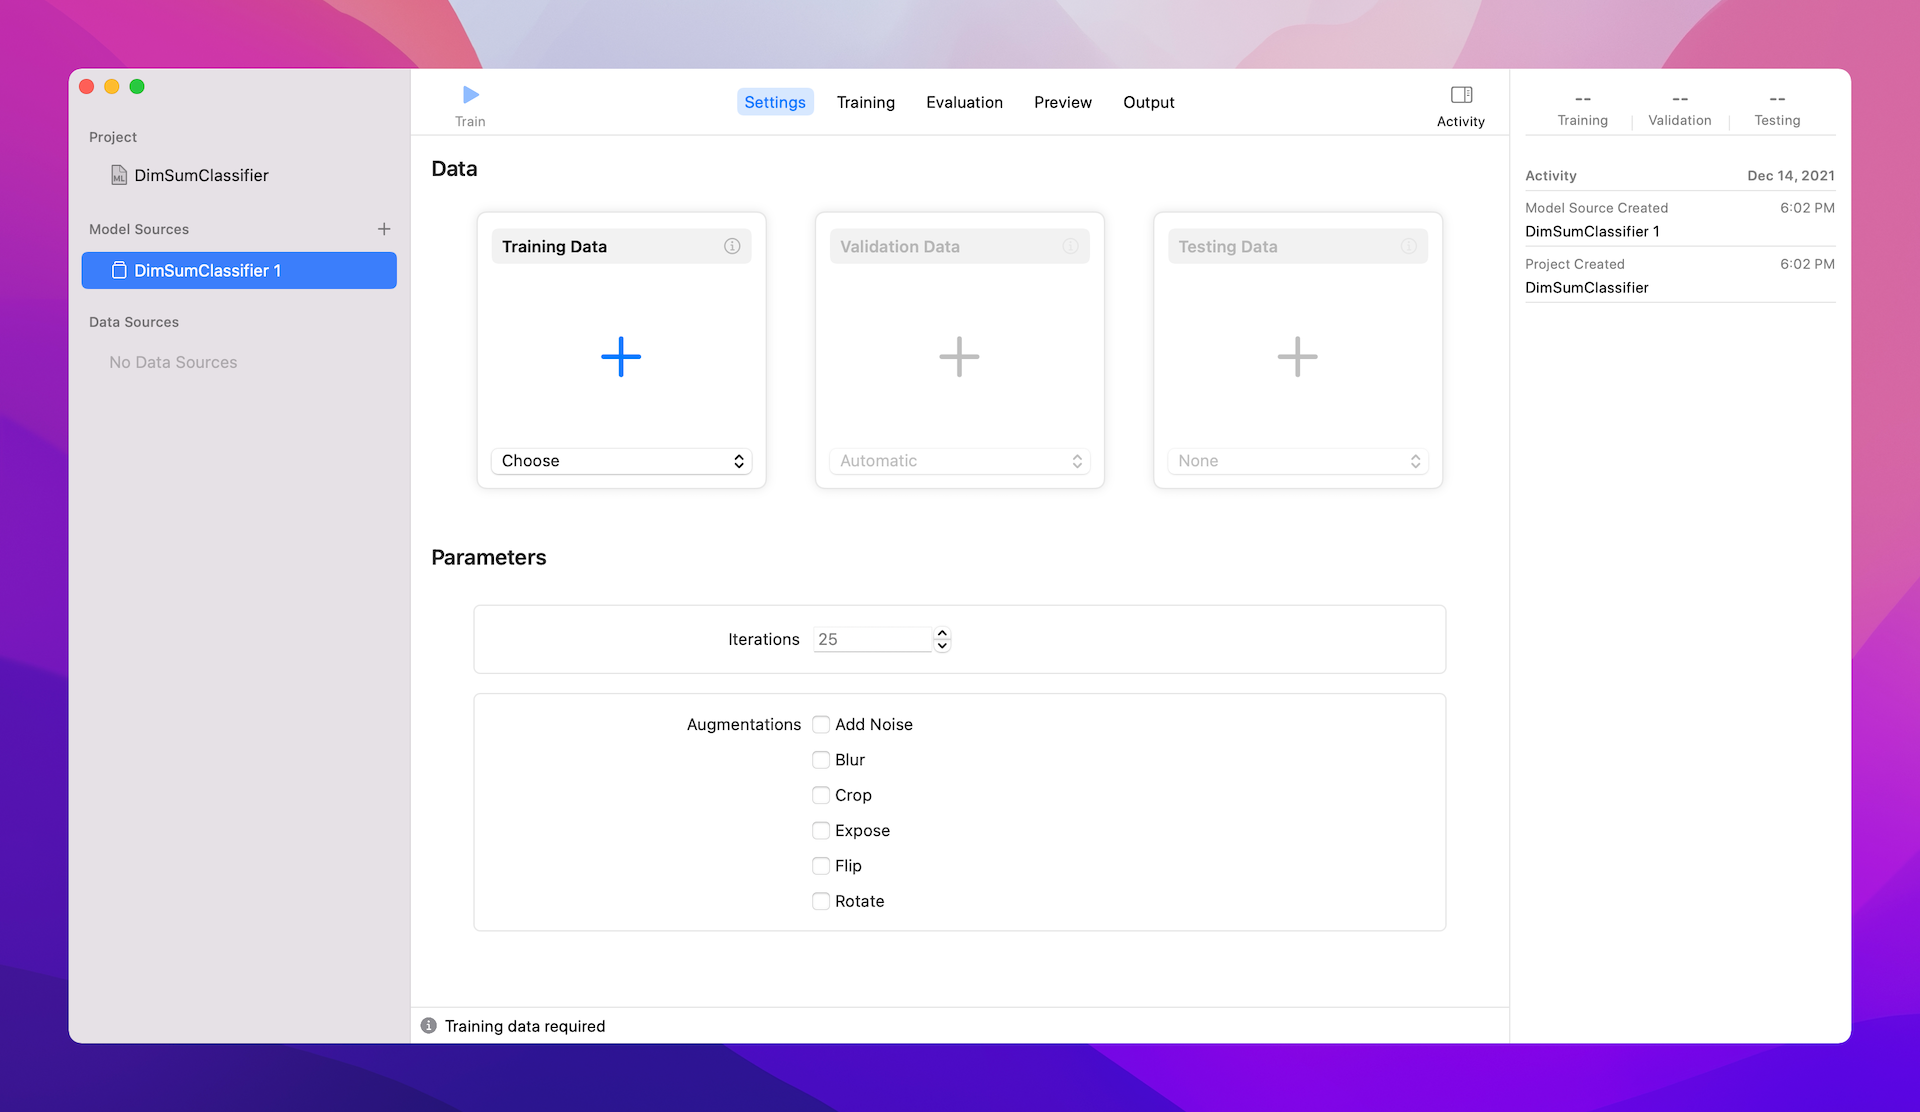
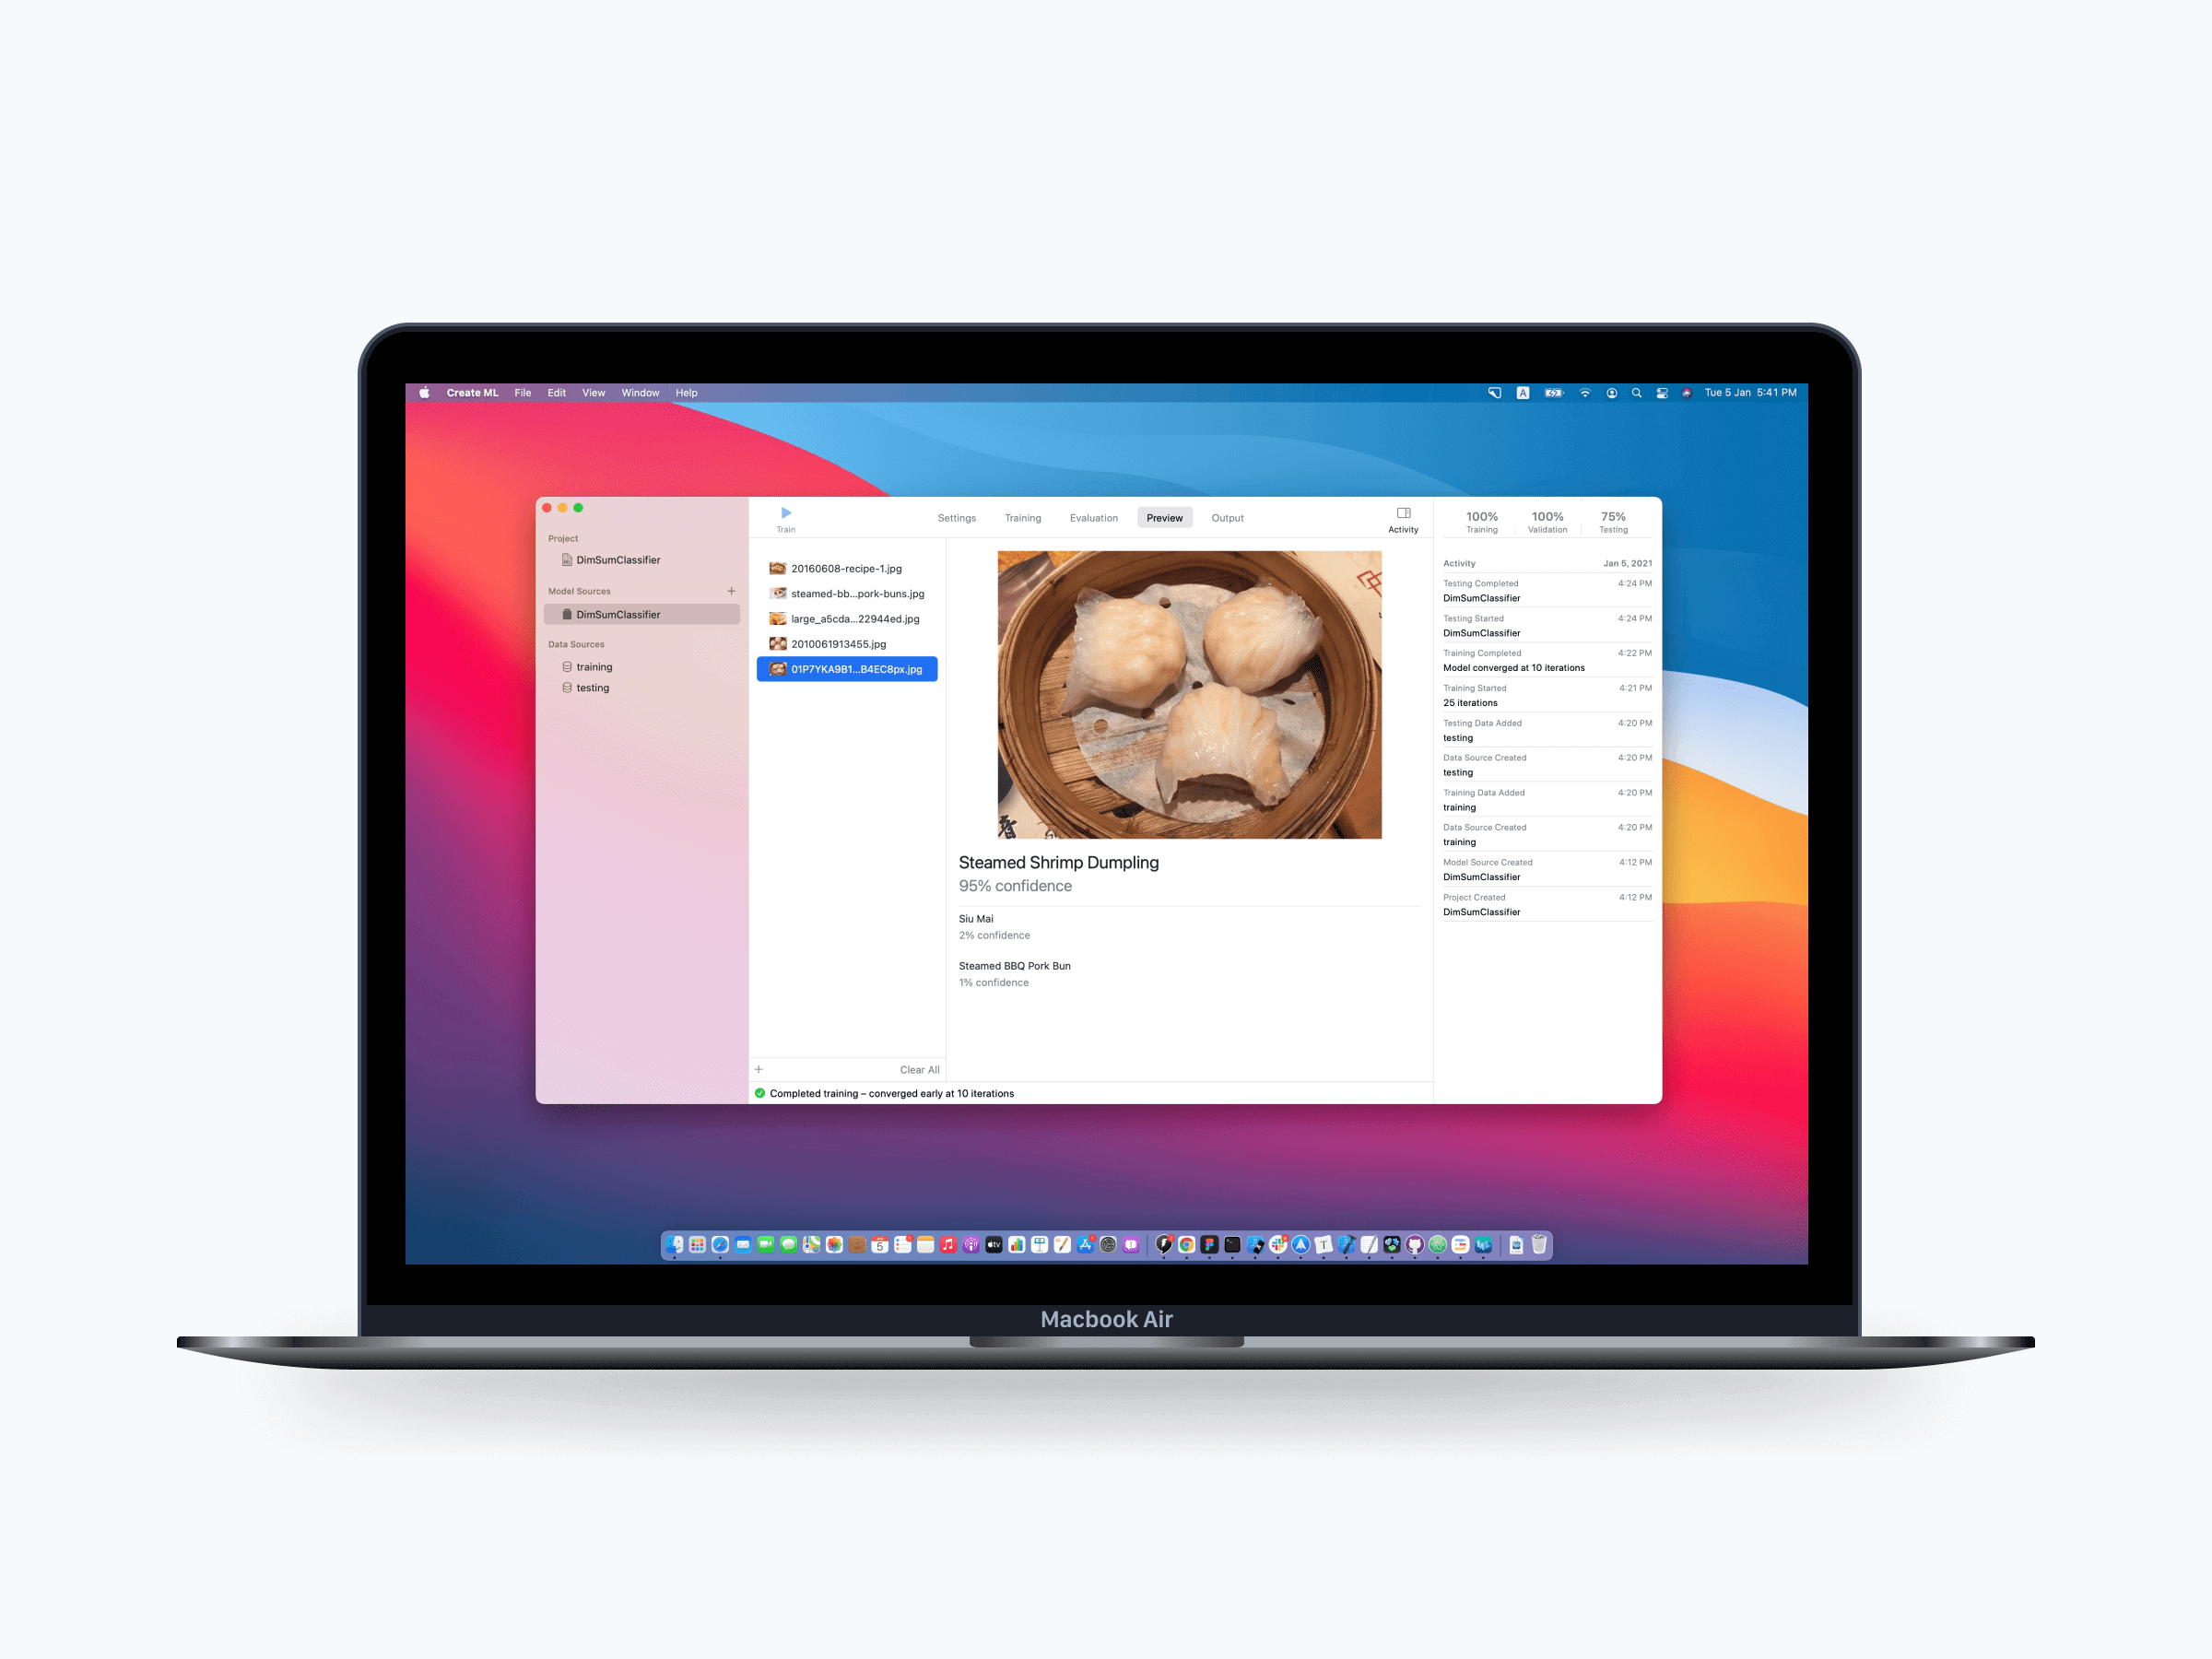
Normally, you don't need to change the setting of the image classifier builder such as maximum iterations and augmentations. To begin training your ML model, all you need to do is specify the training folder, which should point it to the training folder of the image pack you downloaded earlier. For the Validation Data, you can keep it to automatic and let the CreateML tool choose the validation data randomly. For the Testing Data, please set it to the testing folder of the image pack. If you've made everything correct, you should see a screen similar to figure 43.5. The tool automatically recognizes the training and testing data. The image pack includes 107 images with 5 classes (i.e. 5 different types of dim sum) for training.

Next, what you need to do is to hit the Play button to start the training. Once the training completes, the tool should show you the training result. Training indicates the percentage of training data Xcode was successfully able to train. It should normally display 100%. If it's less than 100%, this means Create ML couldn't extract an identifiable feature from the image.

During the training, Create ML randomly selects around 10% of the training data for validation purpose. In the demo above, we achieve 100% accuracy.
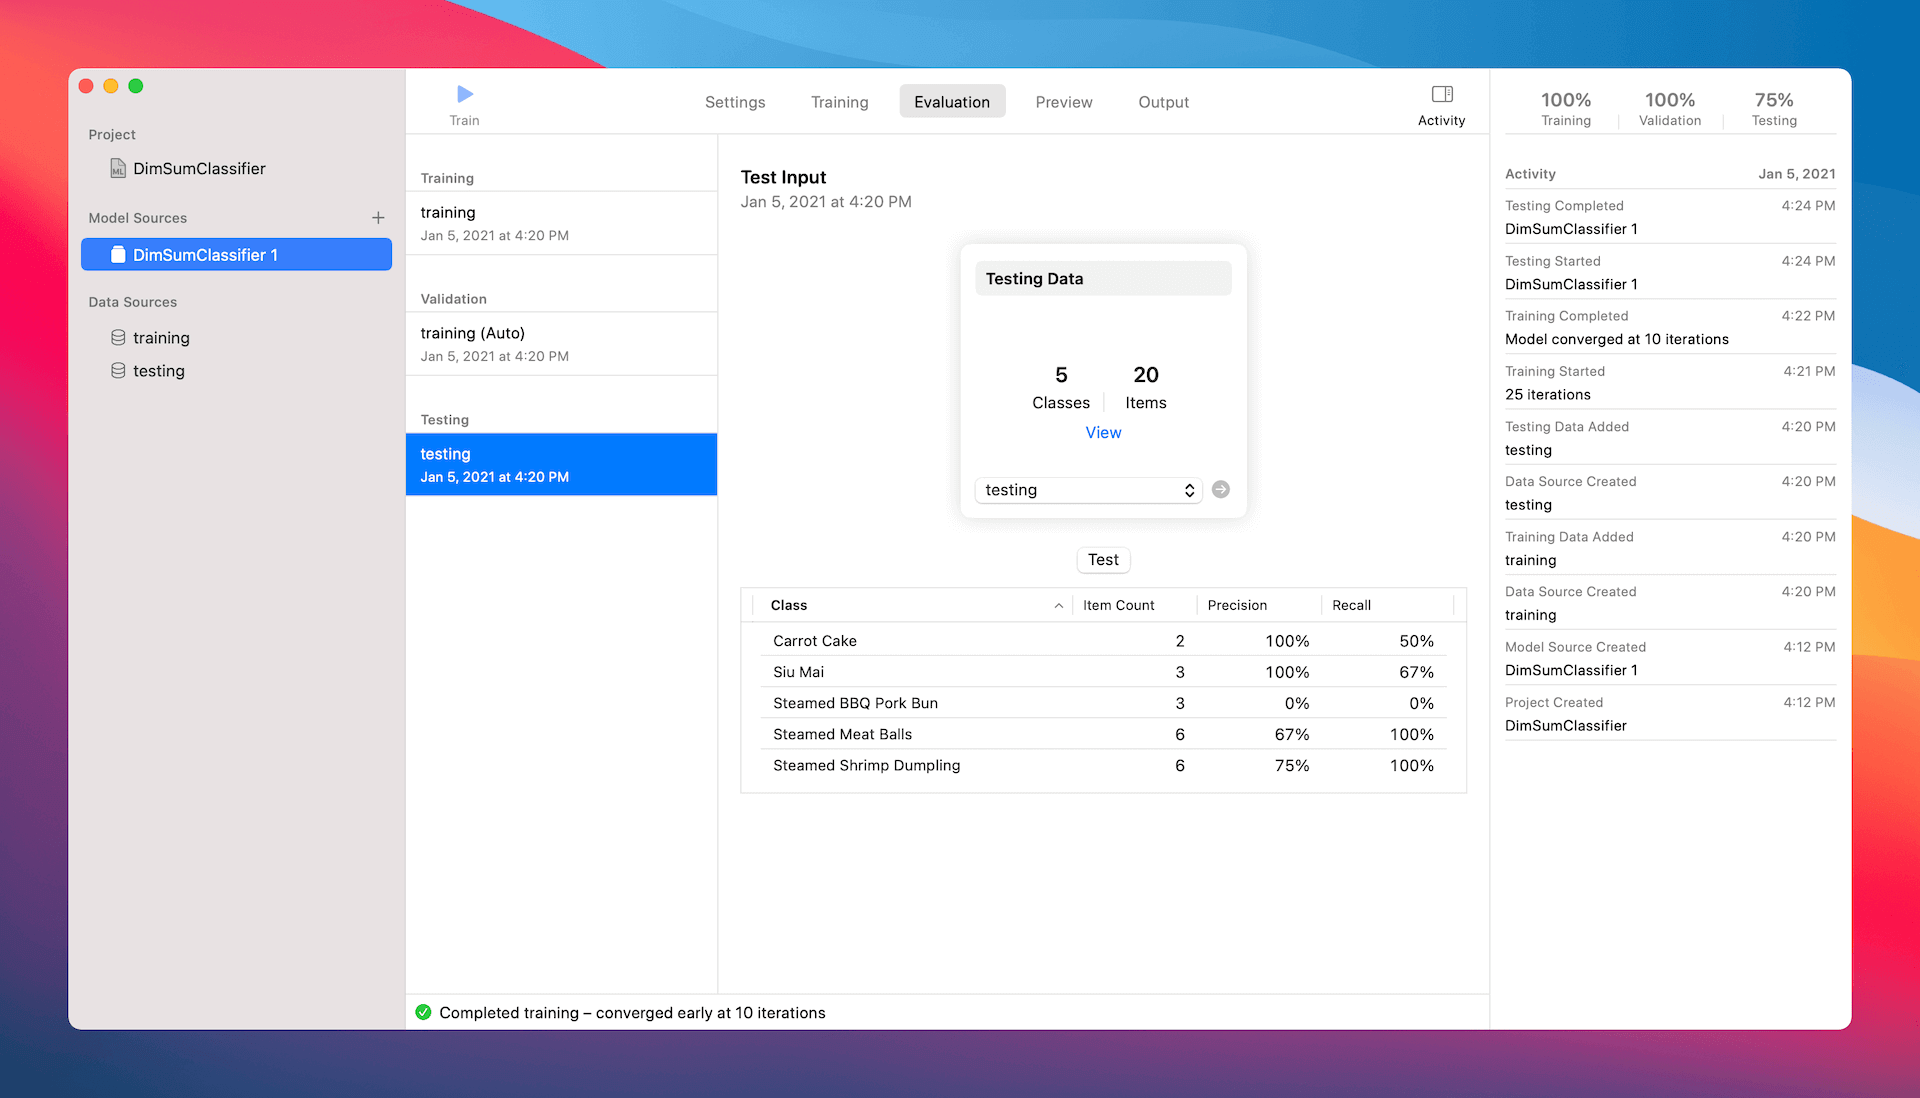
How well does the trained ML model perform? After training, we need to test the accuracy of the ML model. That's why we need to provide the testing data set. In this case, the testing data folder contains the dim sum images that the model has never seen before. During testing, the ML model makes prediction on the test images. Create ML compares each prediction and compute the overall testing accuracy. In the demo, the overall testing accuracy is 75%.
Does it sound good enough? To improve the accuracy, what you can do is re-train the model with more training data. Furthermore, you may vary the parameters of the training (e.g. iteration) to improve the accuracy.
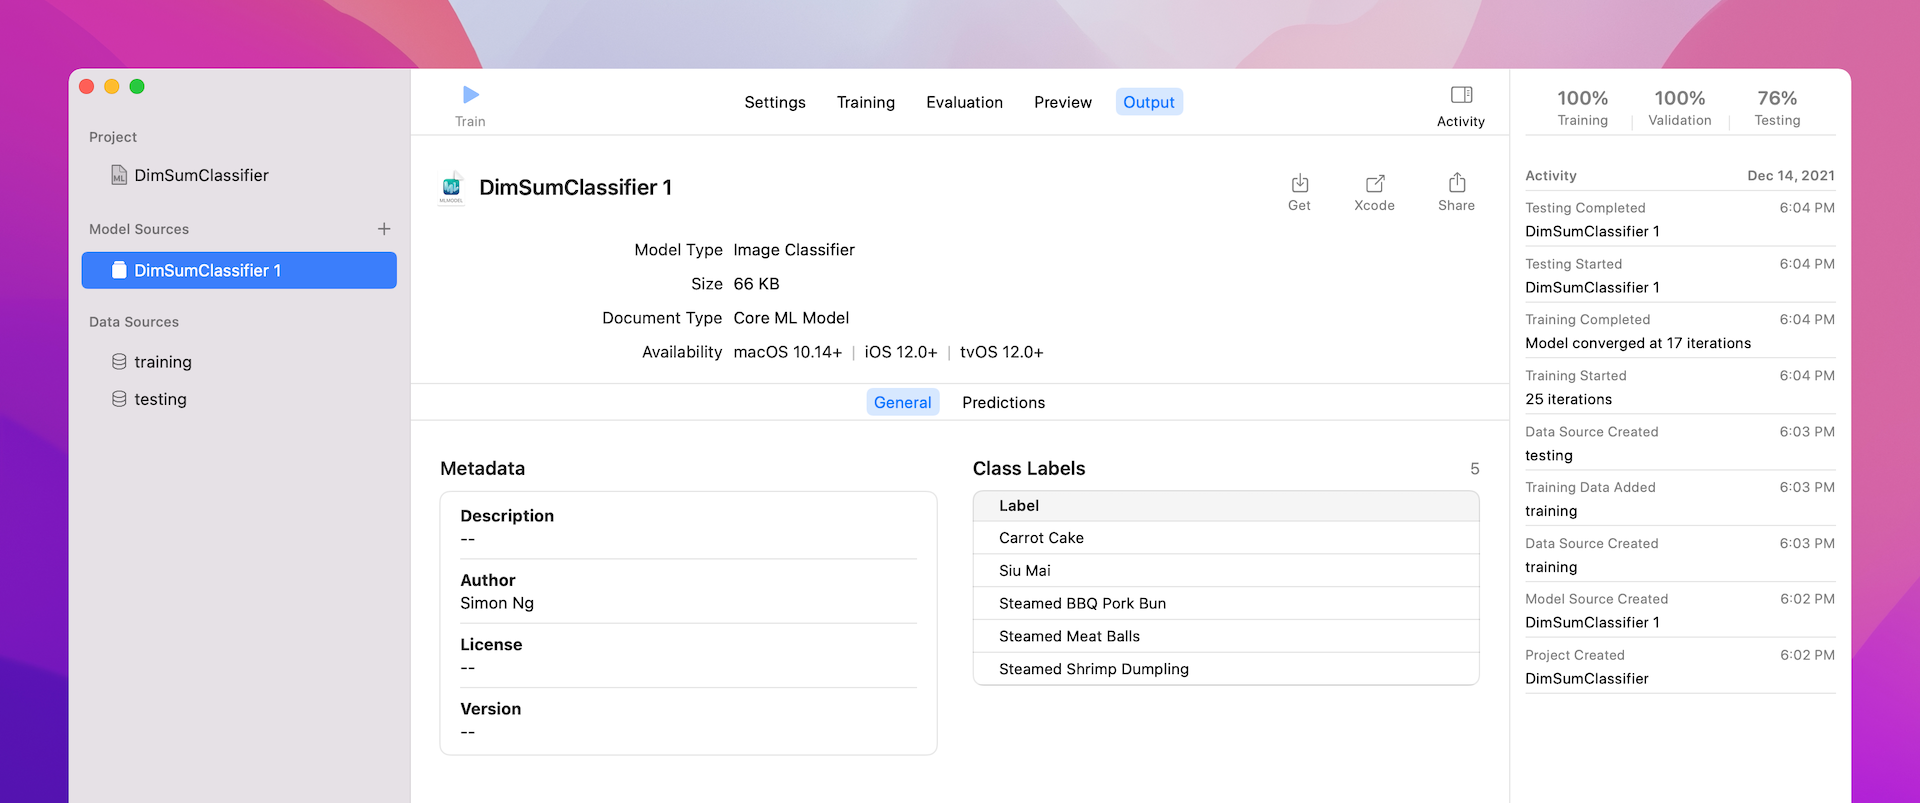
On the other hand, if you think the result is good enough for your application, you can export the ML model for further integration. Simply click the Get button in the Output tab to save the model file. To rename the model name, you can right click DimSumClassifier 1 and choose rename.
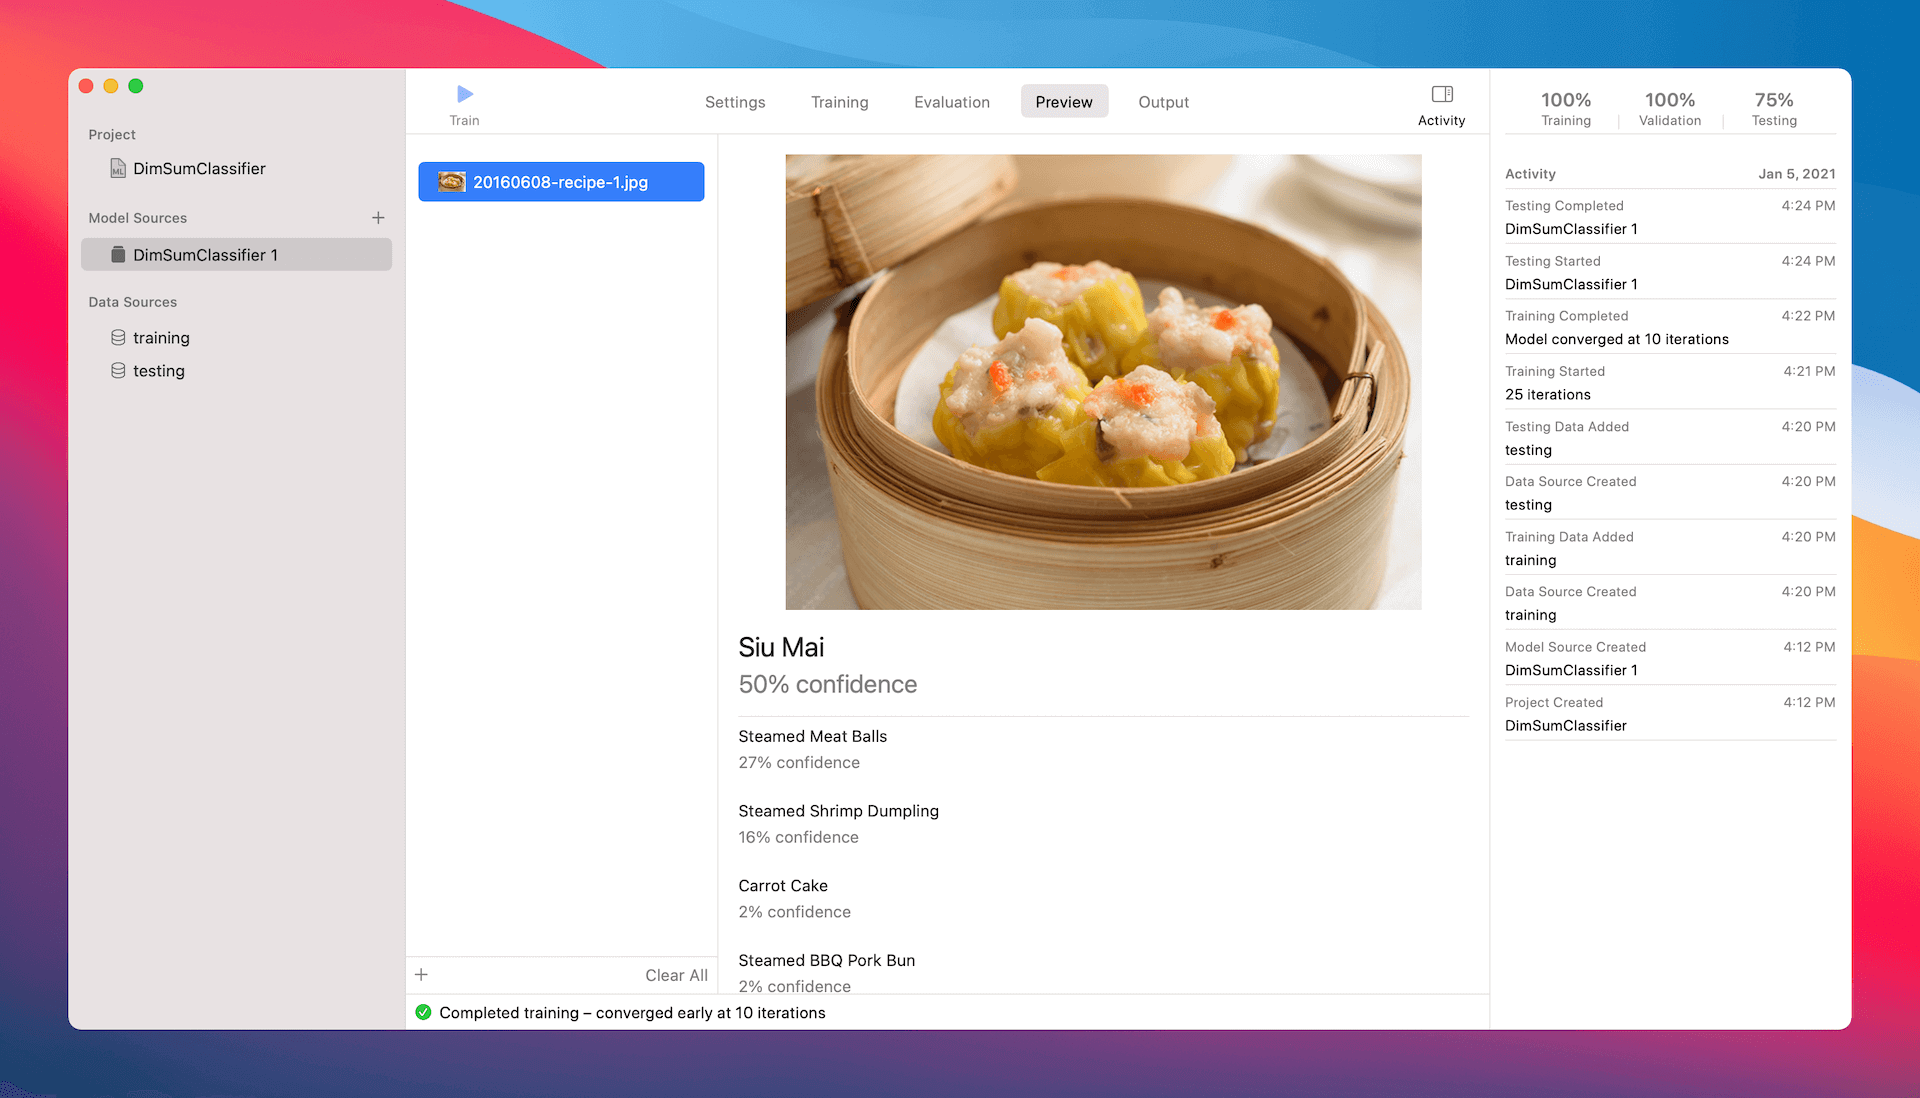
I forgot to mention the Preview tab. This feature lets you perform a quick test to see how the model performs on some unseen photos. Simply drag and drop a test image to the empty pane to see the result.
You are now ready to use the ML model file and integrate it in your iOS app. Say, for the demo app you built in chapter 40, you can replace MobileNetV2.mlmodel with DimSumClassifier.mlmodel. This will allow the Image Recognition app to identify dim sum. Give it a try and see what you get!
Training the Model Programmatically
Before we move onto the next chapter which will show you how to train a text classifier, let's take a look at an alternative way to create the image classifier model. Earlier, we used the Create ML tool to train the ML model. You can drag and drop the training and test data through a graphical user interface.
While the visual builder provides an intuitive way to train your model, it is probably not the best way for developers. You may want to do things programmatically. Instead of dragging and dropping the training data, you may want to read the data directly from a specific folder.
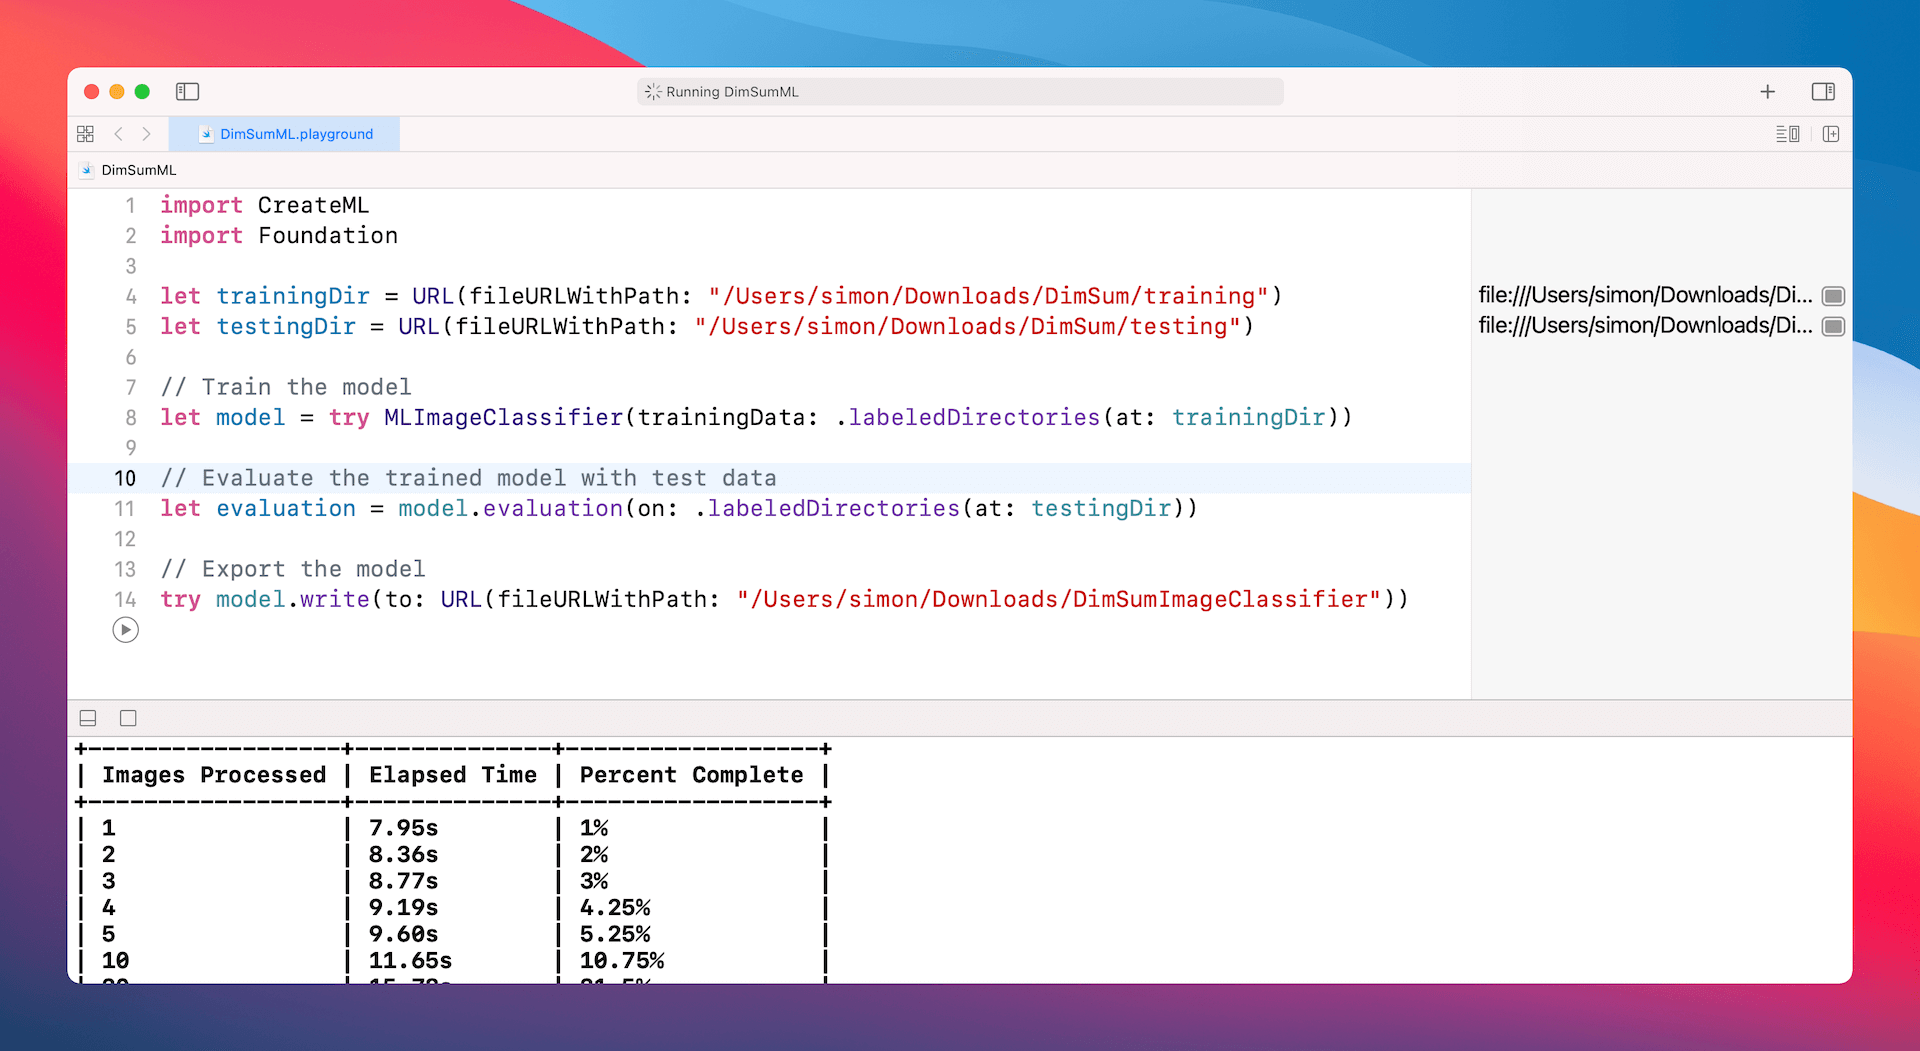
To create a ML model programmatically, open a new Playground project using a Blank template of macOS. And, insert the following code:
import CreateML
import Foundation

let trainingDir = URL(fileURLWithPath: "/Users/simon/Downloads/DimSum/training")
let testingDir = URL(fileURLWithPath: "/Users/simon/Downloads/DimSum/testing")

// Train the model
let model = try MLImageClassifier(trainingData: .labeledDirectories(at: trainingDir))

// Evaluate the trained model with test data
let evaluation = model.evaluation(on: .labeledDirectories(at: testingDir))

// Export the model
try model.write(to: URL(fileURLWithPath: "/Users/simon/Downloads/DimSumImageClassifier"))
Depending on the directory of your training and test data, you will need to modify the file path of the above code to your own path. For my demo, I put all the training data in the Downloads folder.
The first two lines of code set the file path of the training and test data. We then create the MLImageClassifier object and use our training data to train the model. Once the model is created, we call up the evaluation method of the model to evaluate the accuracy of the ML model. Lastly, we export the model to a specific folder.
That's how you train the ML model without using the visual builder. When you execute the code, you should see the status messages and can reveal the validation accuracy in the console. When finished, the DimSumImageClassifier.mlmodel file will be saved in the specified folder.
As a developer, I prefer the programmatical approach for training the ML model. This allows you to automate the whole training process. You can just update the training/test data and then re-run the program to create the updated ML model.
Conclusion
In this chapter, you saw how to create your own machine learning models using Apple’s newest framework Create ML. With just a few lines of code, you can create advanced, state-of-the-art machine learning algorithms to process your data and give you the results you want.
To learn more about Create ML, you can watch Apple’s video on the Create ML app: