- Made by AppCoda
- Contact us / Support
- Tweet this book
- Preface
- 1. Building Adaptive User Interfaces
- 2. Creating Table View Sections and Index list with Diffable Data Source
- 3. Animating Table View Cells
- 4. Working with JSON and Codable
- 5. How to Integrate the Twitter and Facebook SDK for Social Sharing
- 6. Working with Email and Attachments
- 7. Sending SMS and MMS Using MessageUI Framework
- 8. How to Get Direction and Draw Route on Maps
- 9. Search Nearby Points of Interest Using Local Search
- 10. Audio Recording and Playback
- 11. Scan QR Code Using AVFoundation Framework
- 12. Working with URL Schemes
- 13. Building a Full Screen Camera with Gesture-based Controls
- 14. Video Capturing and Playback Using AVKit
- 15. Displaying Banner Ads using Google AdMob
- 16. Working with Custom Fonts
- 17. Working with AirDrop, UIActivityViewController and Uniform Type Identifiers
- 18. Building Grid Layouts Using Collection Views and Diffable Data Source
- 19. Interacting with Collection Views
- 20. Adaptive Collection Views Using UITraitCollection and Compositional Layout
- 21. Building a Weather Widget Using WidgetKit
- 22. Building Slide Out Sidebar Menus Using Objective-C Libraries
- 23. View Controller Transitions and Animations
- 24. Building a Slide Down Menu
- 25. Self Sizing Cells and Dynamic Type
- 26. XML Parsing, RSS and Expandable Table View Cells
- 27. Applying a Blurred Background Using UIVisualEffect
- 28. Using Touch ID and Face ID For Authentication
- 29. Building a Carousel-Like User Interface
- 30. Working with Parse
- 31. Parsing CSV and Preloading a SQLite Database Using Core Data
- 32. Connecting Multiple Annotations with Polylines and Routes
- 33. Using CocoaPods in Swift Projects
- 34. Building a Simple Sticker App
- 35. Building iMessage Apps Using Messages Framework
- 36. Building Custom UI Components Using IBDesignable and IBInspectable
- 37. Using Firebase for User Authentication
- 38. Google and Facebook Authentication Using Firebase
- 39. Using Firebase Database and Storage to Build an Instagram-like App
- 40. Building a Real-time Image Recognition App Using Core ML
- 41. Building AR Apps with ARKit and SpriteKit
- 42. Working with 3D Objects in Augmented Reality Using ARKit and SceneKit
- 43. Use Create ML to Train Your Own Machine Learning Model for Image Recognition
- 44. Building a Sentiment Classifier Using Create ML to Classify User Reviews
- 45. Working with Image Tracking Using ARKit
- Published with GitBook
Chapter 40
Building a Real-time Image Recognition App Using Core ML
Over the past years, machine learning has been one of the hottest topics, with tech giants like Google, Amazon, and Facebook competing in this field and trying to add AI services to differentiate their offerings. Other than Siri, the intelligent personal assistant, Apple has been quite silent about their view on AI and how developers can apply machine learning on iOS apps. Core ML is one of the Apple's answers, empowering developers with simple APIs to make their apps more intelligent.
With the Core ML framework, developers can easily integrate trained machine learning models into iOS apps. In brief, machine learning is an application of artificial intelligence (AI) that allows a computer program to learn from historical data and then make predictions. A trained ML model is a result of applying a machine learning algorithm to a set of training data.
Core ML lets you integrate a broad variety of machine learning model types into your app. In addition to supporting extensive deep learning with over 30 layer types, it also supports standard models such as tree ensembles, SVMs, and generalized linear models. Because it’s built on top of low level technologies like Metal and Accelerate, Core ML seamlessly takes advantage of the CPU and GPU to provide maximum performance and efficiency. You can run machine learning models on the device so data doesn’t need to leave the device to be analyzed.
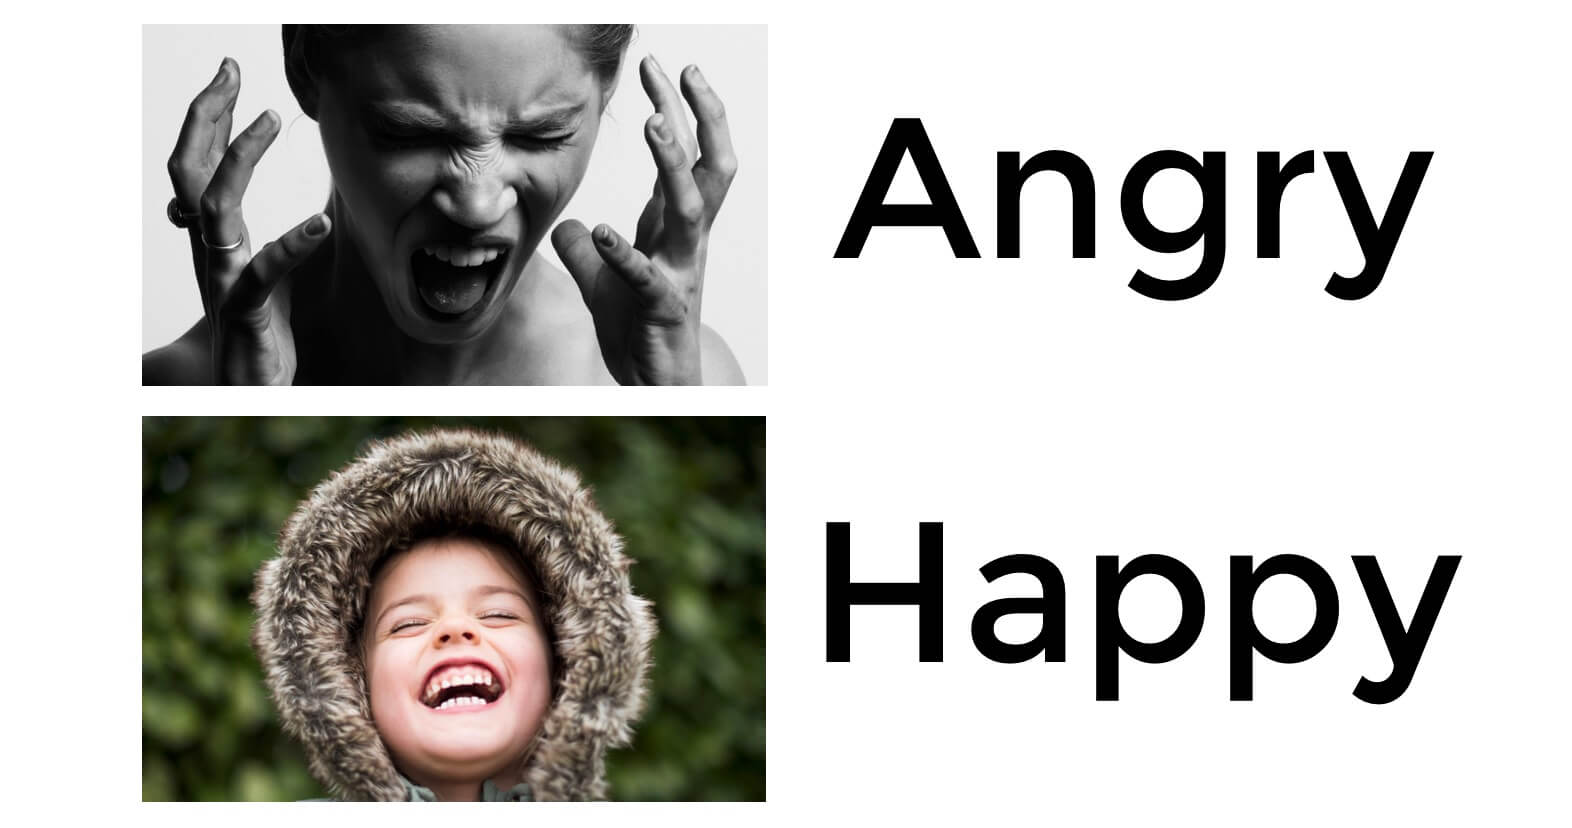
Let's say, you want to build an app with a feature to identify a person's emotion (e.g. happy, angry, sad). You will need to train a ML model that can make this kind of predictions. To train the model, you will feed it a huge set of data that teaches it how a happy face looks or how an angry face looks like. In this example, the trained ML model takes an image as the input, analyze the facial expression of the person in that image, and then predicts the person's emotion as the output.
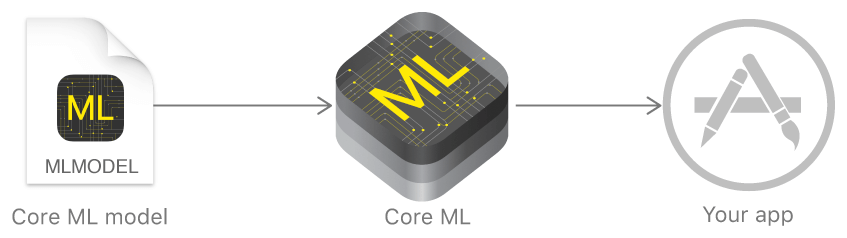
Before the introduction of Core ML, it is hard to incorporate the trained ML model in iOS apps. Now, with this new framework, you can convert the trained model into Core ML format, integrate it into your app, and use the model to make your app more intelligent. Most importantly, as you will see in a while, it only takes a few lines of code to use the model.
Note: If you are new to machine learning and artificial intelligence, I highly recommend you to check out this beginner's guide - Machine Learning for Humans written by Vishal Maini (https://medium.com/machine-learning-for-humans/why-machine-learning-matters-6164faf1df12).In this tutorial, we will focus on using some readily available models for building our Core ML demo. Regarding how a machine learning model is trained, this is out of our scope for this article. But if you are interested to learn training your own model, you can take a look at the following references:
- How to Use Machine Learning to Predict the Quality of Wines (https://medium.freecodecamp.org/using-machine-learning-to-predict-the-quality-of-wines-9e2e13d7480d)
- A simple deep learning model for stock price prediction using TensorFlow (https://medium.com/mlreview/a-simple-deep-learning-model-for-stock-price-prediction-using-tensorflow-30505541d877)
App Demo Overview
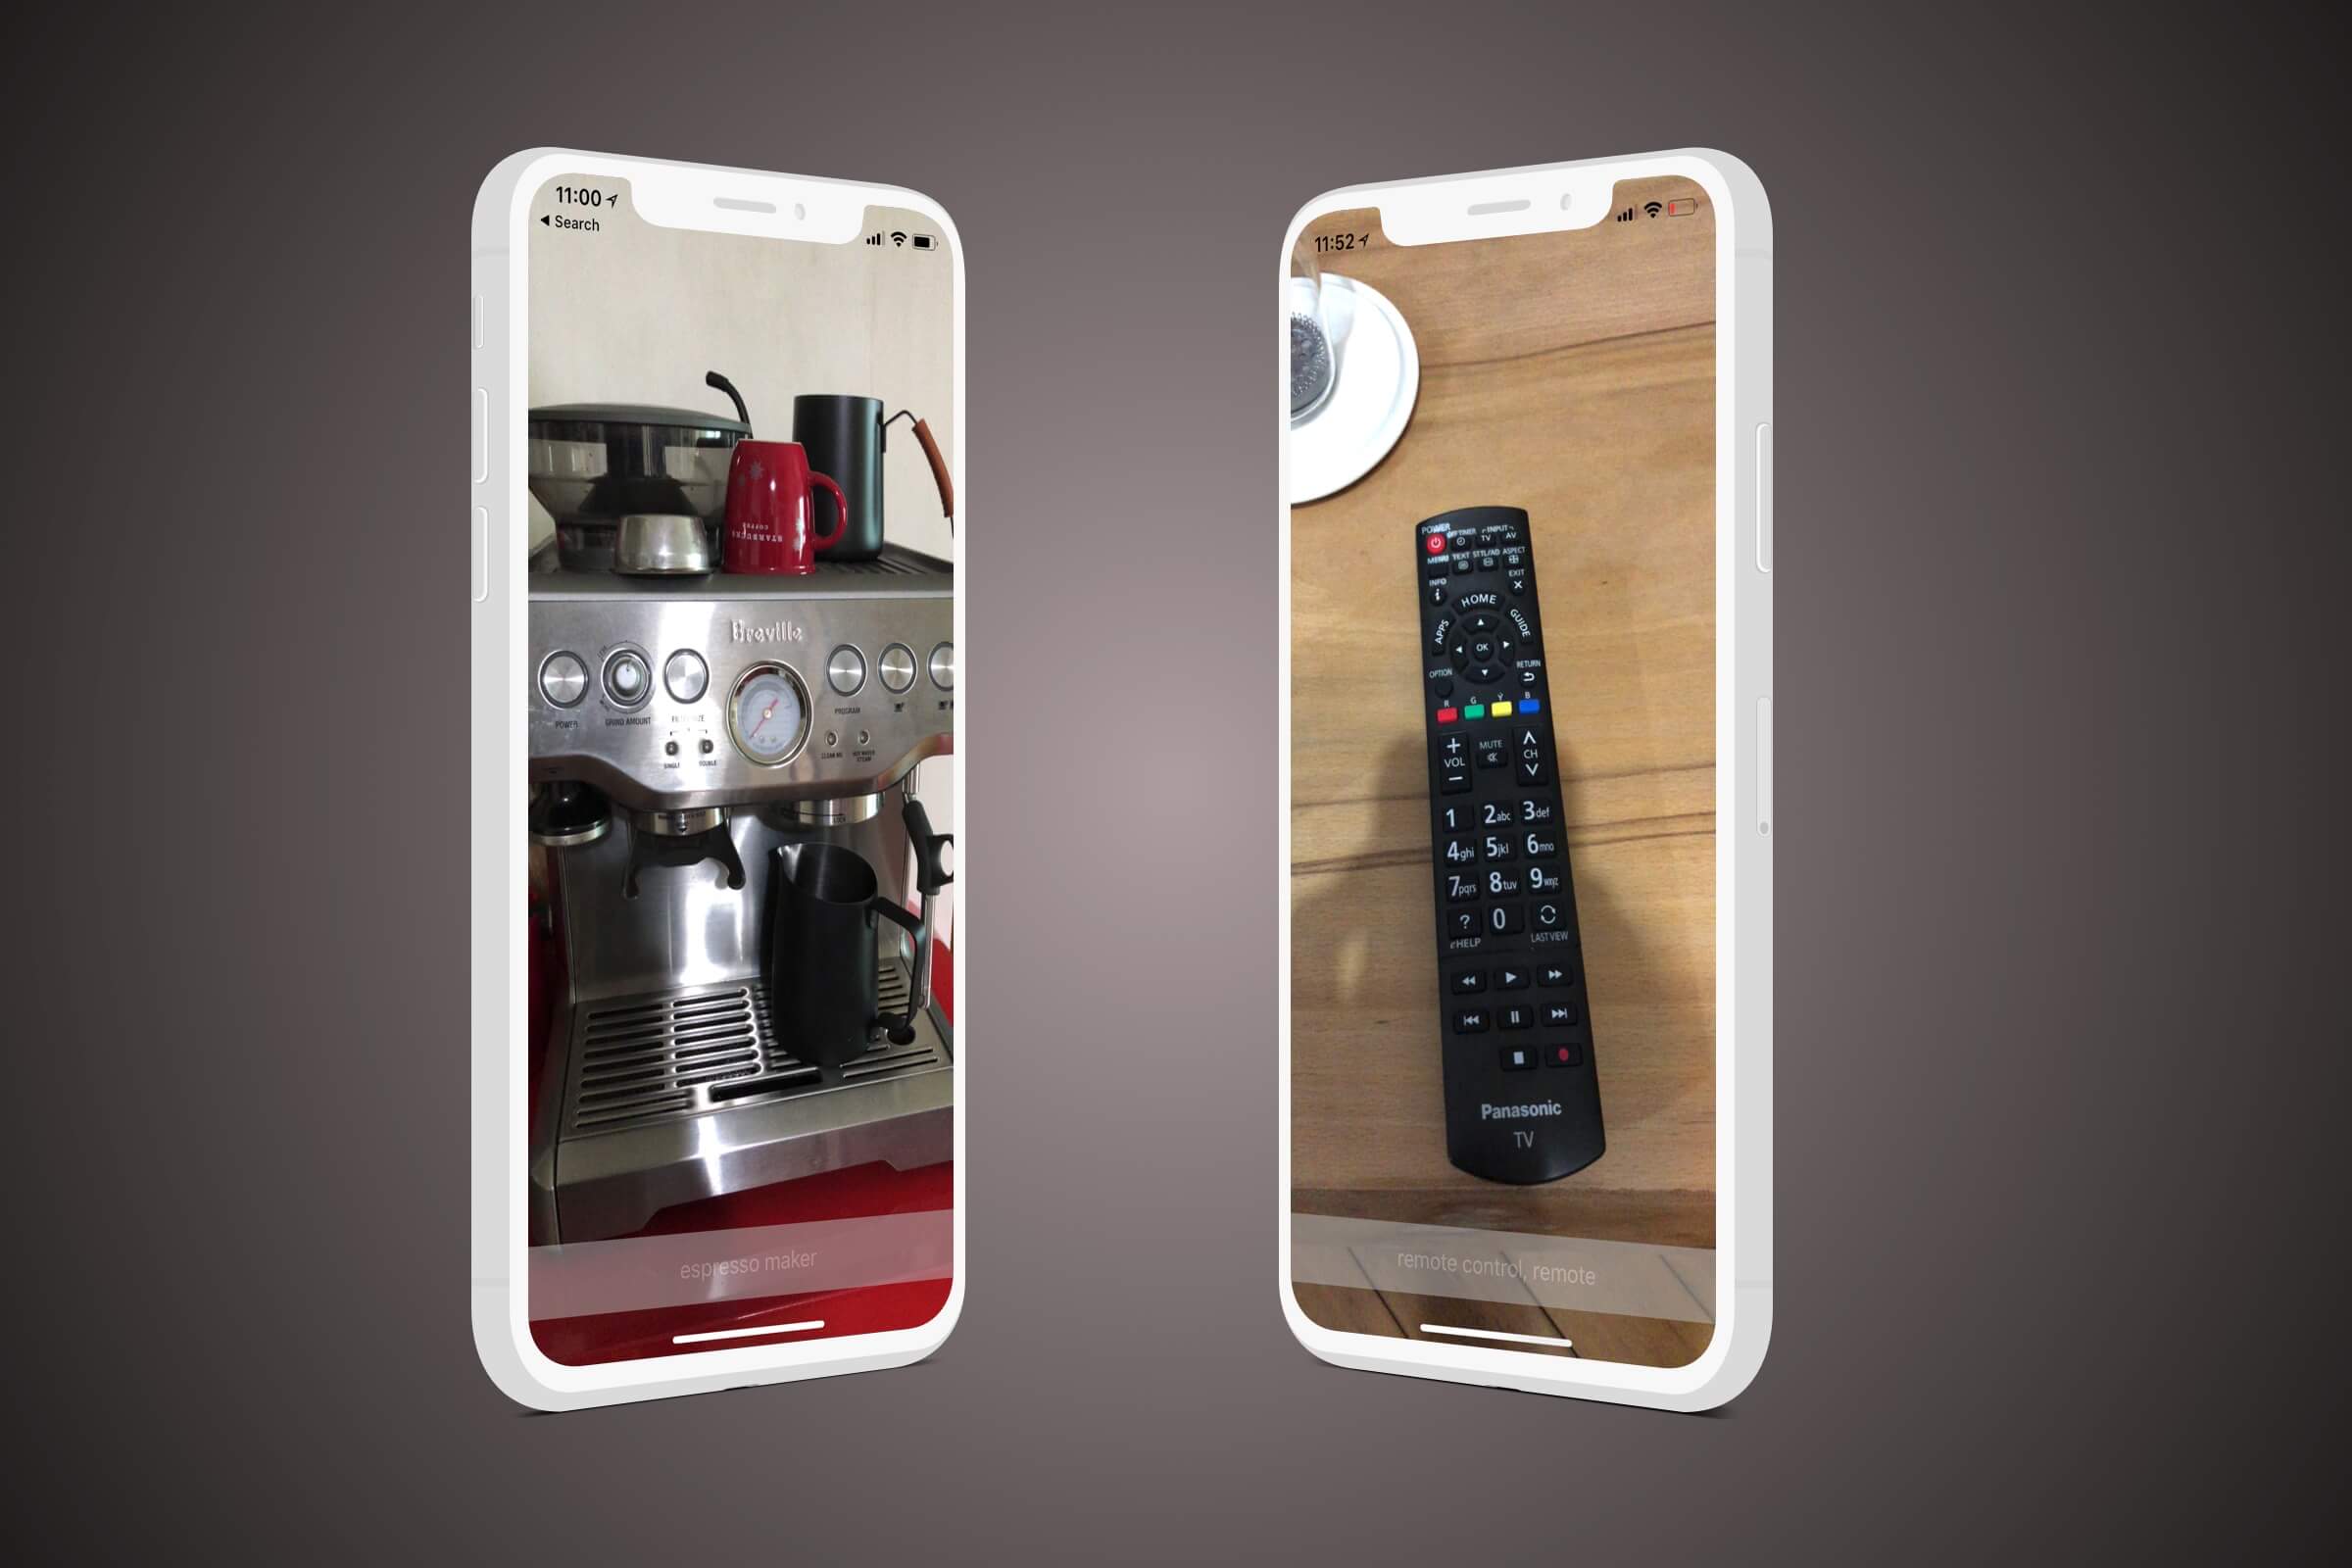
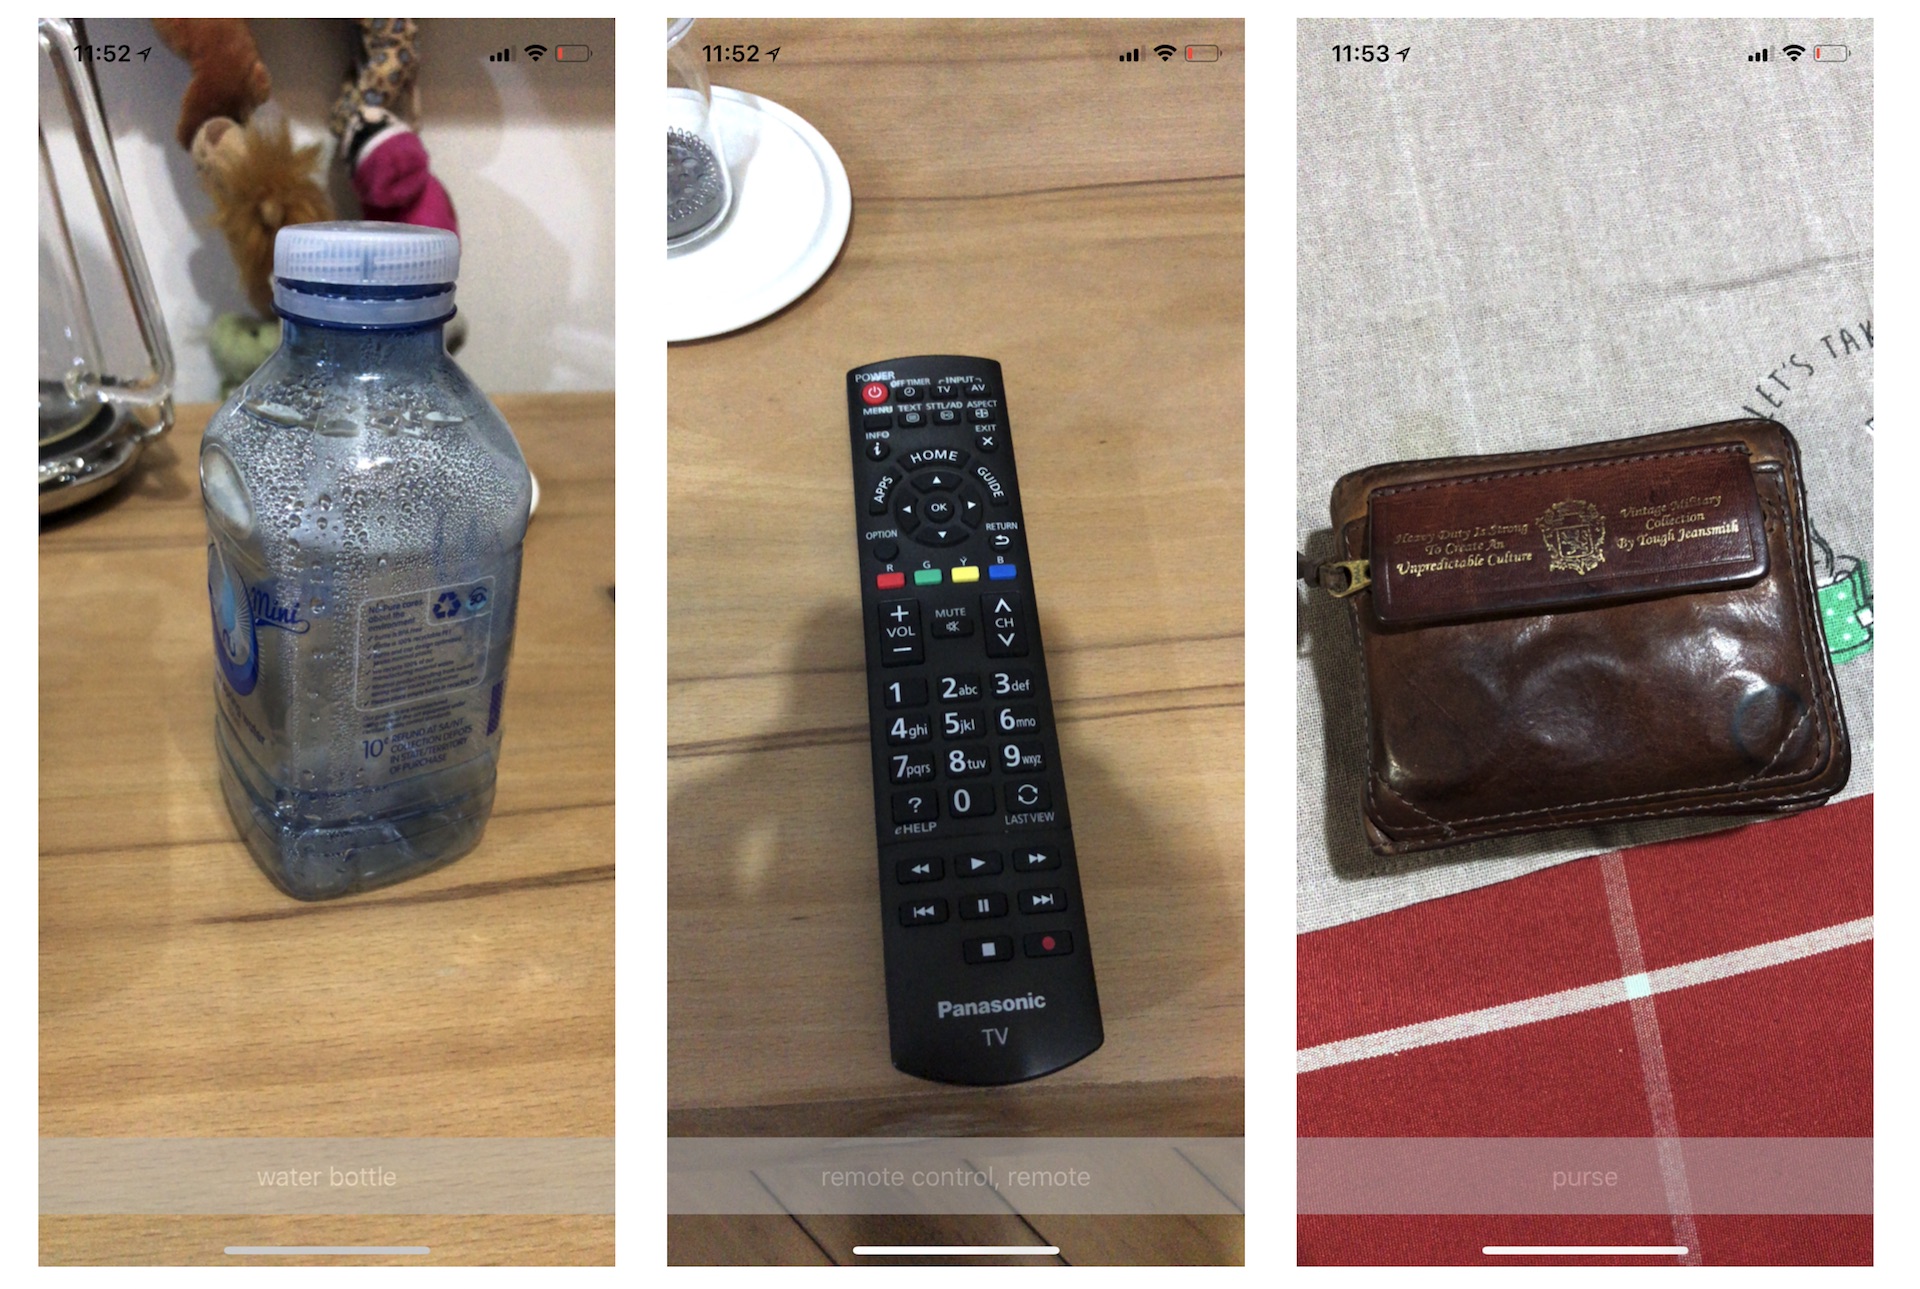
Now that I have given you a quick overview of Core ML, let's dive into the implementation. As a demo, we will build a simple app which captures real-time images, analyzes them, and predicts what the object is in the images. Figure 40.3 will give you some ideas about the app demo.
As mentioned earlier, we will not build our own ML model. Instead, we rely on a ready-to-use trained model. If you go up to Apple's Machine Learning website (https://developer.apple.com/machine-learning/models/), you will find a number of Core ML models including:
- MobileNetV2 - for detecting the dominant objects present in an image from a set of 1000 categories such as trees, animals, food, vehicles, people, and more.
- SqueezeNet - similar to MobileNet, it is used for detecting the dominant objects present in an image from a set of 1000 categories.
- DeeplabV3 - for segmenting the pixels of a camera frame or image into a predefined set of classes..
- ResNet50 - for detecting objects from a set of 1000 categories such as trees, animals.
- YOLOv3 - for classifying 80 different types of objects
While some of the ML models listed above have the same purpose, the detection accuracy varies. In this demo, we will use the MobileNetV2 model. So, download the model from https://ml-assets.apple.com/coreml/models/Image/ImageClassification/MobileNetV2/MobileNetV2.mlmodel and save it to your preferred folder.
Preparing the Starter Project
We will not build the app demo from scratch. Instead, I have created a starter project with a prebuilt user interface, so we can focus on discussing the integration of Core ML models.
First, download the starter project from http://www.appcoda.com/resources/swift55/ImageRecognitionStarter.zip. Once you open the project in Xcode, try to build and deploy it on your iPhone. The current project is very similar to what you built in chapter 11 and 13. When you run the app, it will ask you for permission to access the device's camera. Please make sure you grant the permission. For now, other than showing the live image feed, the app does nothing.
This is what we are going to implement that the app will analyze the object you point at and predict what it is. The result may not be perfect, but you will get an idea how you can apply Core ML in your app.
Importing the Core ML Model
Recalled that you have downloaded the MobileNetV2 model from Apple, you will need to import it into the Xcode project in order to use. To import the Core ML model, all you need to do is drag the MobileNetV2.mlmodel file to the project navigator. To better organize your project, I recommend you to create a group named MLModel (or any other name you prefer) and put the file under that group.
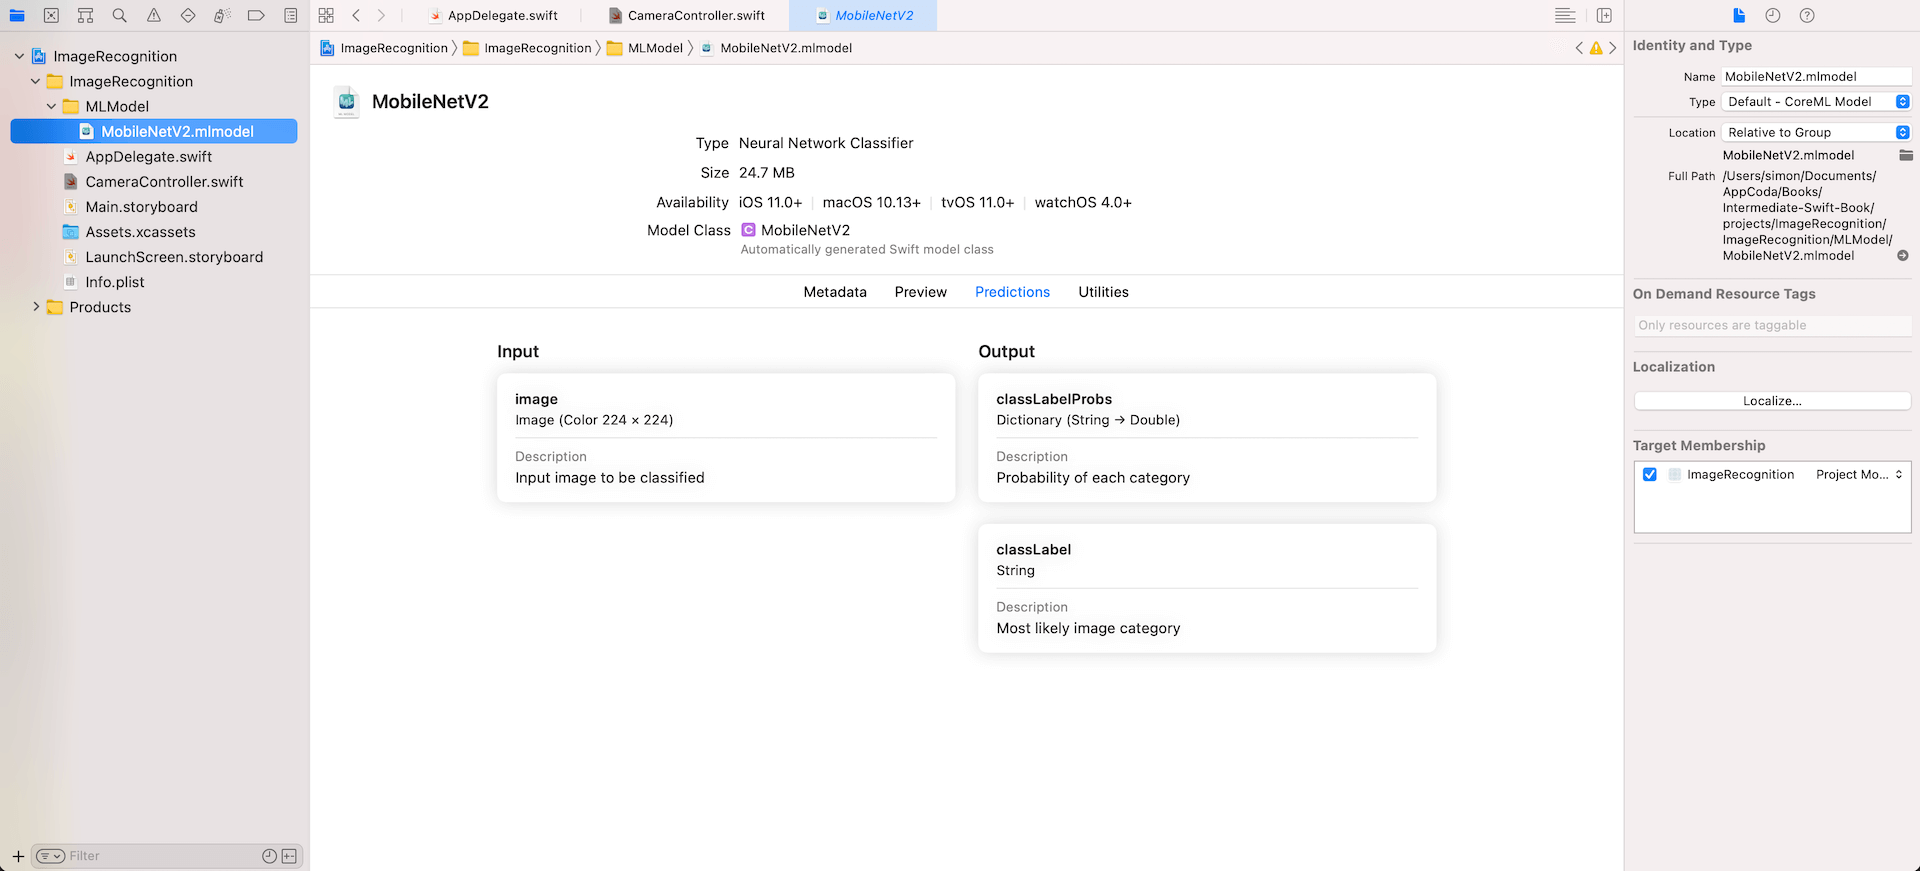
Once you imported the model, select the MobileNetV2.mlmodel file to reveal its details including the model type, author, description, and license. The Model Class section shows you the name of the Swift class for this model. Later, you can instantiate the model object like this:
var mlModel = try! MobileNetV2(configuration: MLModelConfiguration())
The Model Evaluation Parameters section describes the input and output of the model. Here, the Core ML model takes an image of the size 224x224 as an input and gives you two outputs:
- The most likely image category, which is the best guess of the object identified in the given image.
- A dictionary containing all the possible predictions and the corresponding probability. Figure 40.5 illustrates what this dictionary is about.

Implementing the Real-time Image Recognition
Now that you have a basic idea about how to use a Core ML model, let's talk about the implementation. The starter project already implements the camera access to capture real-time videos. As you remember, the Core ML model accepts a still image as the input. Therefore, in order to use the model for image recognition, we have to provide the following implementation:
- Processes the video frames and turn them into a series of still images such that they conform to the requirement of the Core ML model. In other words, the images should have the width of 224 and the height of 224.
- Passes the images to the Core ML model for predictions.
- Displays the most likely answer on screen.
Okay, it is time to turn the description above into code.
First, open CameraController.swift and insert the following code snippet after captureSession.addInput(input) in the configure() method:
let videoDataOutput = AVCaptureVideoDataOutput()
videoDataOutput.setSampleBufferDelegate(self, queue: DispatchQueue(label: "imageRecognition.queue"))
videoDataOutput.alwaysDiscardsLateVideoFrames = true
captureSession.addOutput(videoDataOutput)
The starter project only defines the input of the capture session. To process the video frames, we first create an object of AVCaptureVideoDataOutput to access the frames. And then we set the delegate for the video sample buffer such that every time when a new video sample buffer is received, it will be sent to the delegate for further processing. In the code above, the delegate is set to self (i.e. CameraController). After the video data output is defined, we add it to the capture session by invoking addOutput.
Meanwhile, Xcode should show you an error because we haven't implemented the sample buffer delegate which should conform to the AVCaptureVideoDataOutputSampleBufferDelegate protocol. We will use an extension to adopt it like this:
extension CameraController: AVCaptureVideoDataOutputSampleBufferDelegate {
    func captureOutput(_ output: AVCaptureOutput, didOutput sampleBuffer: CMSampleBuffer, from connection: AVCaptureConnection) {
        connection.videoOrientation = .portrait

        // Resize the frame to 224x224
        // This is the required size of the inceptionv3 model
        guard let imageBuffer = CMSampleBufferGetImageBuffer(sampleBuffer) else {
            return
        }

        let ciImage = CIImage(cvPixelBuffer: imageBuffer)
        let image = UIImage(ciImage: ciImage)

        UIGraphicsBeginImageContext(CGSize(width: 224, height: 224))
        image.draw(in: CGRect(x: 0, y: 0, width: 224, height: 224))
        let resizedImage = UIGraphicsGetImageFromCurrentImageContext()!
        UIGraphicsEndImageContext()
    }
}
When a new sample video buffer is received, the captureOutput(_:didOutput:from:) method of the delegate is called. In the code above, we retrieve the video frame data, create an image from the data, and then convert the image to the required size (i.e. 224x224).
With the processed image, we can now create the ML model and pass the image to the model. First, declare a variable in the CameraController class to hold the ML model:
var mlModel = try! MobileNetV2(configuration: MLModelConfiguration())
If you look into the MobileNetV2 class, you will find a method called prediction(image:). If you don't know where to locate the class, select MobileNetV2.mlmodel and then click the c icon next to the model class. This is the method we will use for identifying the object in a given image.
func prediction(image: CVPixelBuffer) throws -> MobileNetV2Output {
    let input_ = MobileNetV2Input(image: image)
    return try self.prediction(input: input_)
}
If you look even closer, the parameter image has the type CVPixelBuffer. Therefore, in order to use this method, we have to convert the resized image from UIImage to CVPixelBuffer. Insert the following code after UIGraphicsEndImageContext() to perform the conversion:
// Convert UIImage to CVPixelBuffer
// The code for the conversion is adapted from this post of StackOverflow
// https://stackoverflow.com/questions/44462087/how-to-convert-a-uiimage-to-a-cvpixelbuffer

let attrs = [kCVPixelBufferCGImageCompatibilityKey: kCFBooleanTrue, kCVPixelBufferCGBitmapContextCompatibilityKey: kCFBooleanTrue] as CFDictionary
var pixelBuffer : CVPixelBuffer?
let status = CVPixelBufferCreate(kCFAllocatorDefault, Int(resizedImage.size.width), Int(resizedImage.size.height), kCVPixelFormatType_32ARGB, attrs, &pixelBuffer)
guard (status == kCVReturnSuccess) else {
    return
}

CVPixelBufferLockBaseAddress(pixelBuffer!, CVPixelBufferLockFlags(rawValue: 0))
let pixelData = CVPixelBufferGetBaseAddress(pixelBuffer!)

let rgbColorSpace = CGColorSpaceCreateDeviceRGB()
let context = CGContext(data: pixelData, width: Int(resizedImage.size.width), height: Int(resizedImage.size.height), bitsPerComponent: 8, bytesPerRow: CVPixelBufferGetBytesPerRow(pixelBuffer!), space: rgbColorSpace, bitmapInfo: CGImageAlphaInfo.noneSkipFirst.rawValue)

context?.translateBy(x: 0, y: resizedImage.size.height)
context?.scaleBy(x: 1.0, y: -1.0)

UIGraphicsPushContext(context!)
resizedImage.draw(in: CGRect(x: 0, y: 0, width: resizedImage.size.width, height: resizedImage.size.height))
UIGraphicsPopContext()

CVPixelBufferUnlockBaseAddress(pixelBuffer!, CVPixelBufferLockFlags(rawValue: 0))
Once you converted the image to CVPixelBuffer, you can pass it to the Core ML model for predictions. Continue to insert the following code in the same method:
if let pixelBuffer = pixelBuffer,
    let output = try? mlModel.prediction(image: pixelBuffer) {

    DispatchQueue.main.async {
        self.descriptionLabel.text = output.classLabel
    }
}
We call the prediction(image:) method to predict the object in the given image. The best possible answer is stored in the classLabel property of the output. We then set the class label to the description label.
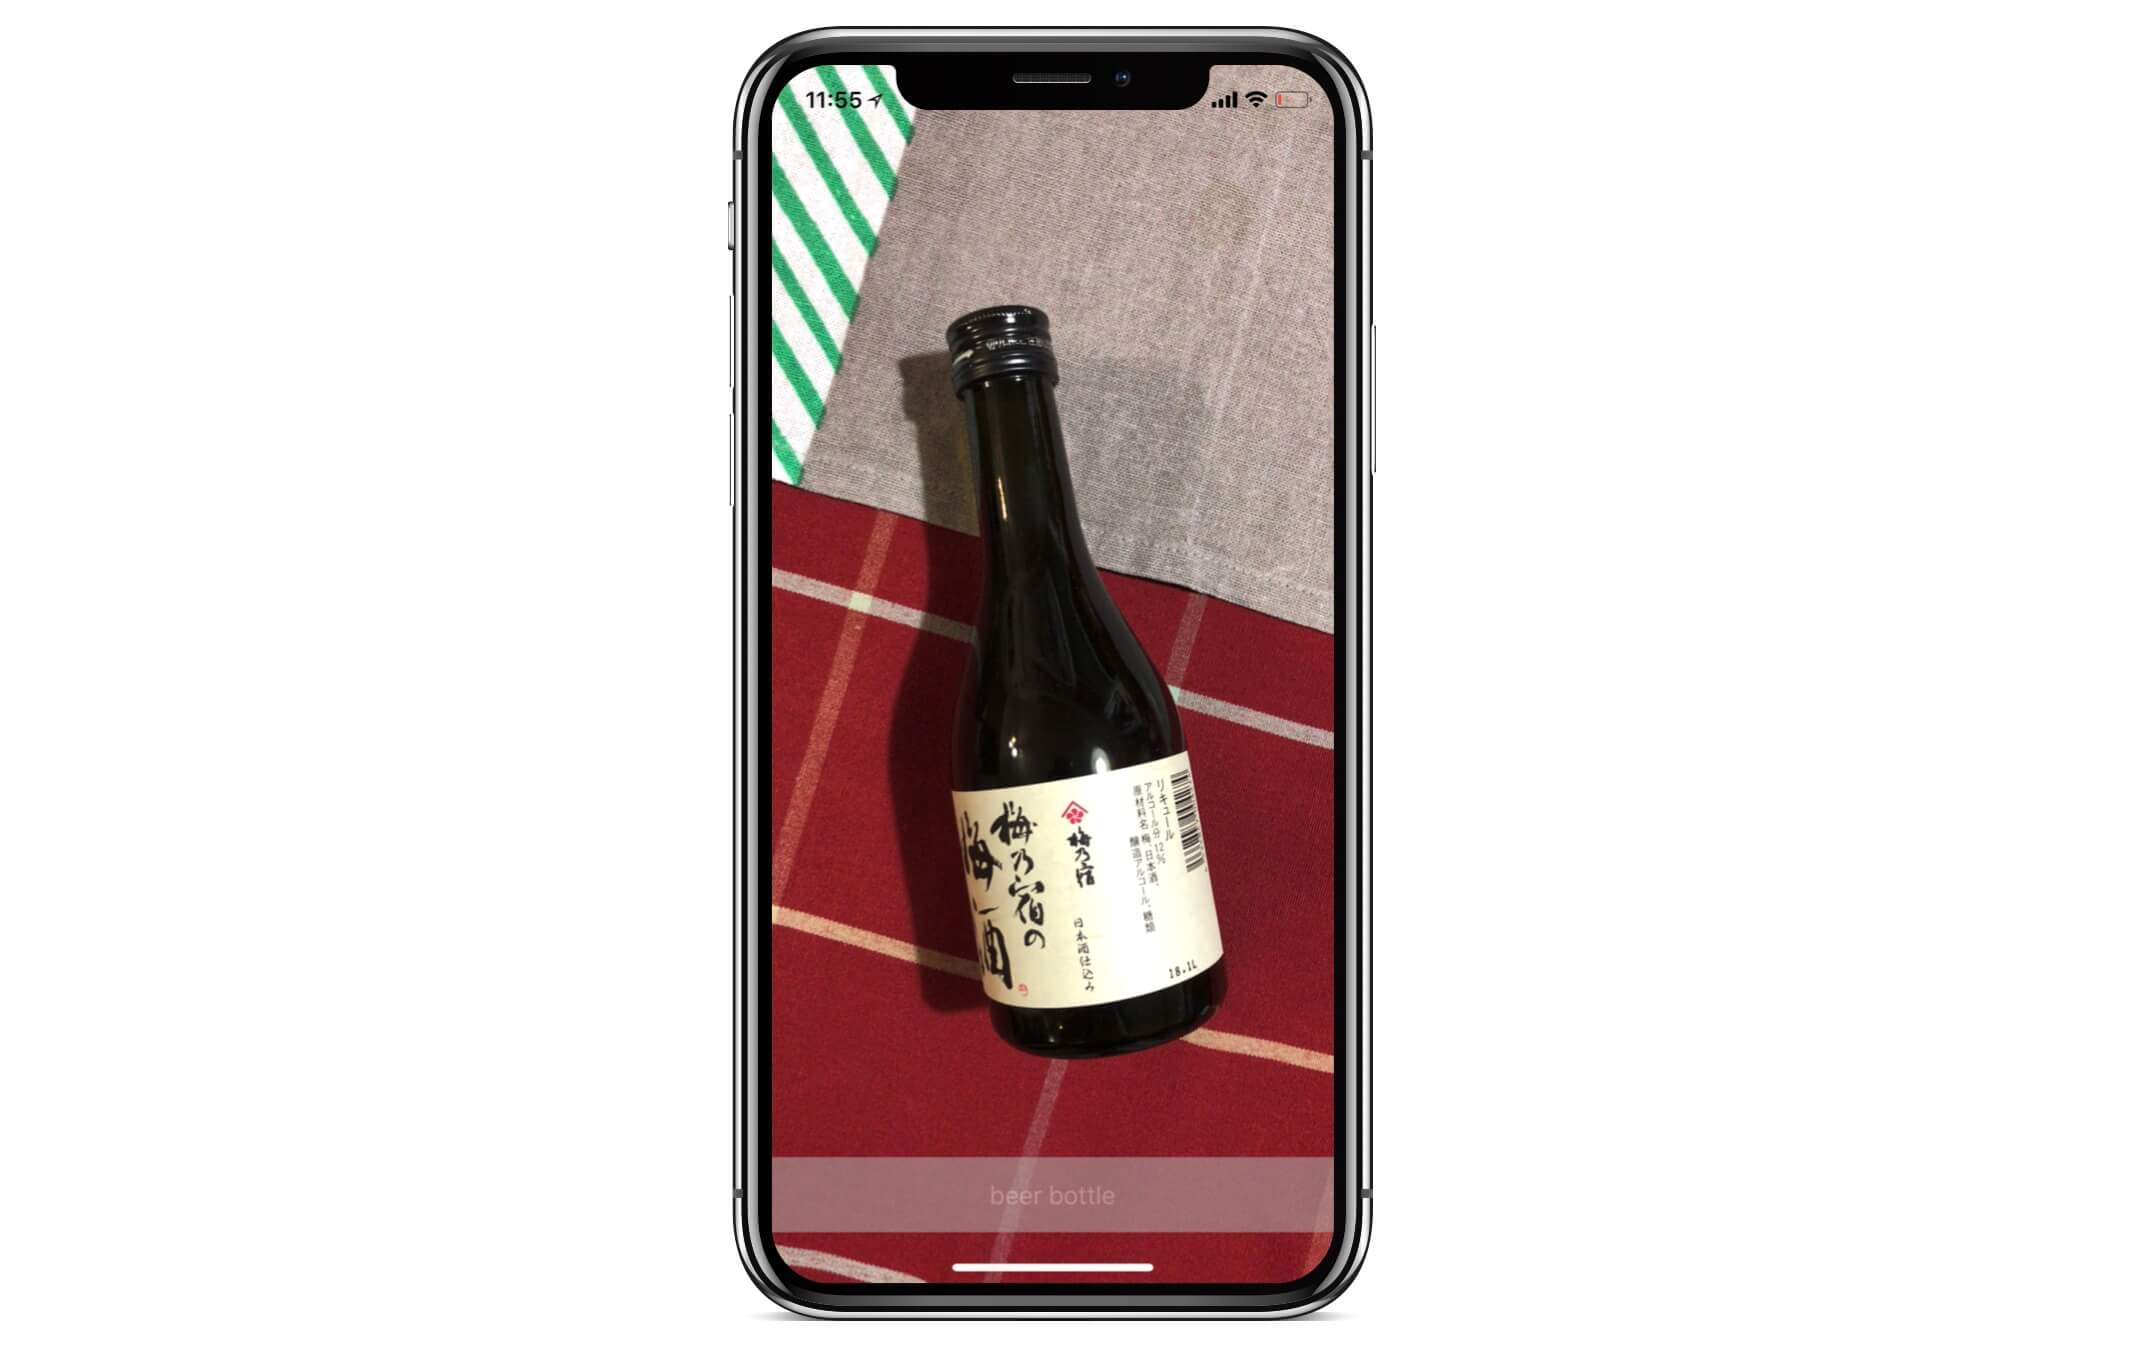
That's how we implement the real-time image recognition. Now it is ready to test the app. Build the project and deploy it on a real iPhone. After the app is launched, point it to a random object. The app should show you what the object is. The detected result may not be correct because the ML model was trained to detect objects from a set of 1000 categories. That said, you should have an idea about how to integrate a ML model in your app.
There is one last thing I want to mention. Other than classLabel, you can access the values of classLabelProbs to retrieve all the possible guesses. Each of the predictions is associated with the corresponding probability. Insert the following code in the DispatchQueue.main.async block:
for (key, value) in output.classLabelProbs {
    print("\(key) = \(value)")
}
Test the app again. You should see all the predictions of the object you are pointing at, each with the probability for your reference, in the console message.
coil, spiral, volute, whorl, helix = 0.00494262157008052
hot pot, hotpot = 0.000246078736381605
beer bottle = 0.000806860974989831
half track = 0.000261949375271797
water snake = 0.000204006355488673
balloon = 0.022151293233037
Summary
I hope you enjoyed reading this chapter and now understand how to integrate Core ML in your apps. This is just a brief introduction to Core ML. If you are interested in training your own model, take a look at the following free tutorials:
- A Beginner’s Guide to Core ML Tools: Converting a Caffe Model to Core ML Format (https://www.appcoda.com/core-ml-tools-conversion)
- Creating a Custom Core ML Model Using Python and Turi Create (https://www.appcoda.com/core-ml-model-with-python)
For reference, you can download the complete Xcode project from http://www.appcoda.com/resources/swift55/ImageRecognition.zip.