- Made by AppCoda
- Contact us / Support
- Tweet this book
- Preface
- 1. Building Adaptive User Interfaces
- 2. Creating Table View Sections and Index list with Diffable Data Source
- 3. Animating Table View Cells
- 4. Working with JSON and Codable
- 5. How to Integrate the Twitter and Facebook SDK for Social Sharing
- 6. Working with Email and Attachments
- 7. Sending SMS and MMS Using MessageUI Framework
- 8. How to Get Direction and Draw Route on Maps
- 9. Search Nearby Points of Interest Using Local Search
- 10. Audio Recording and Playback
- 11. Scan QR Code Using AVFoundation Framework
- 12. Working with URL Schemes
- 13. Building a Full Screen Camera with Gesture-based Controls
- 14. Video Capturing and Playback Using AVKit
- 15. Displaying Banner Ads using Google AdMob
- 16. Working with Custom Fonts
- 17. Working with AirDrop, UIActivityViewController and Uniform Type Identifiers
- 18. Building Grid Layouts Using Collection Views and Diffable Data Source
- 19. Interacting with Collection Views
- 20. Adaptive Collection Views Using UITraitCollection and Compositional Layout
- 21. Building a Weather Widget Using WidgetKit
- 22. Building Slide Out Sidebar Menus Using Objective-C Libraries
- 23. View Controller Transitions and Animations
- 24. Building a Slide Down Menu
- 25. Self Sizing Cells and Dynamic Type
- 26. XML Parsing, RSS and Expandable Table View Cells
- 27. Applying a Blurred Background Using UIVisualEffect
- 28. Using Touch ID and Face ID For Authentication
- 29. Building a Carousel-Like User Interface
- 30. Working with Parse
- 31. Parsing CSV and Preloading a SQLite Database Using Core Data
- 32. Connecting Multiple Annotations with Polylines and Routes
- 33. Using CocoaPods in Swift Projects
- 34. Building a Simple Sticker App
- 35. Building iMessage Apps Using Messages Framework
- 36. Building Custom UI Components Using IBDesignable and IBInspectable
- 37. Using Firebase for User Authentication
- 38. Google and Facebook Authentication Using Firebase
- 39. Using Firebase Database and Storage to Build an Instagram-like App
- 40. Building a Real-time Image Recognition App Using Core ML
- 41. Building AR Apps with ARKit and SpriteKit
- 42. Working with 3D Objects in Augmented Reality Using ARKit and SceneKit
- 43. Use Create ML to Train Your Own Machine Learning Model for Image Recognition
- 44. Building a Sentiment Classifier Using Create ML to Classify User Reviews
- 45. Working with Image Tracking Using ARKit
- Published with GitBook
Chapter 10
Audio Recording and Playback
The iOS SDK provides various frameworks to let you work with sounds in your app. One of the frameworks that you can use to play and record audio files is the AV Foundation framework. In this chapter, I will walk you through the basics of the framework and show you how to manage audio playback and recording.
The AV Foundation provides essential APIs for developers to deal with audio on iOS. In this demo, we mainly use these two classes of the framework:
- AVAudioPlayer – think of it as an audio player for playing sound files. By using the player, you can play sounds of any duration and in any audio formats available in iOS.
- AVAudioRecorder – an audio recorder for recording audio.
A Simple Demo App
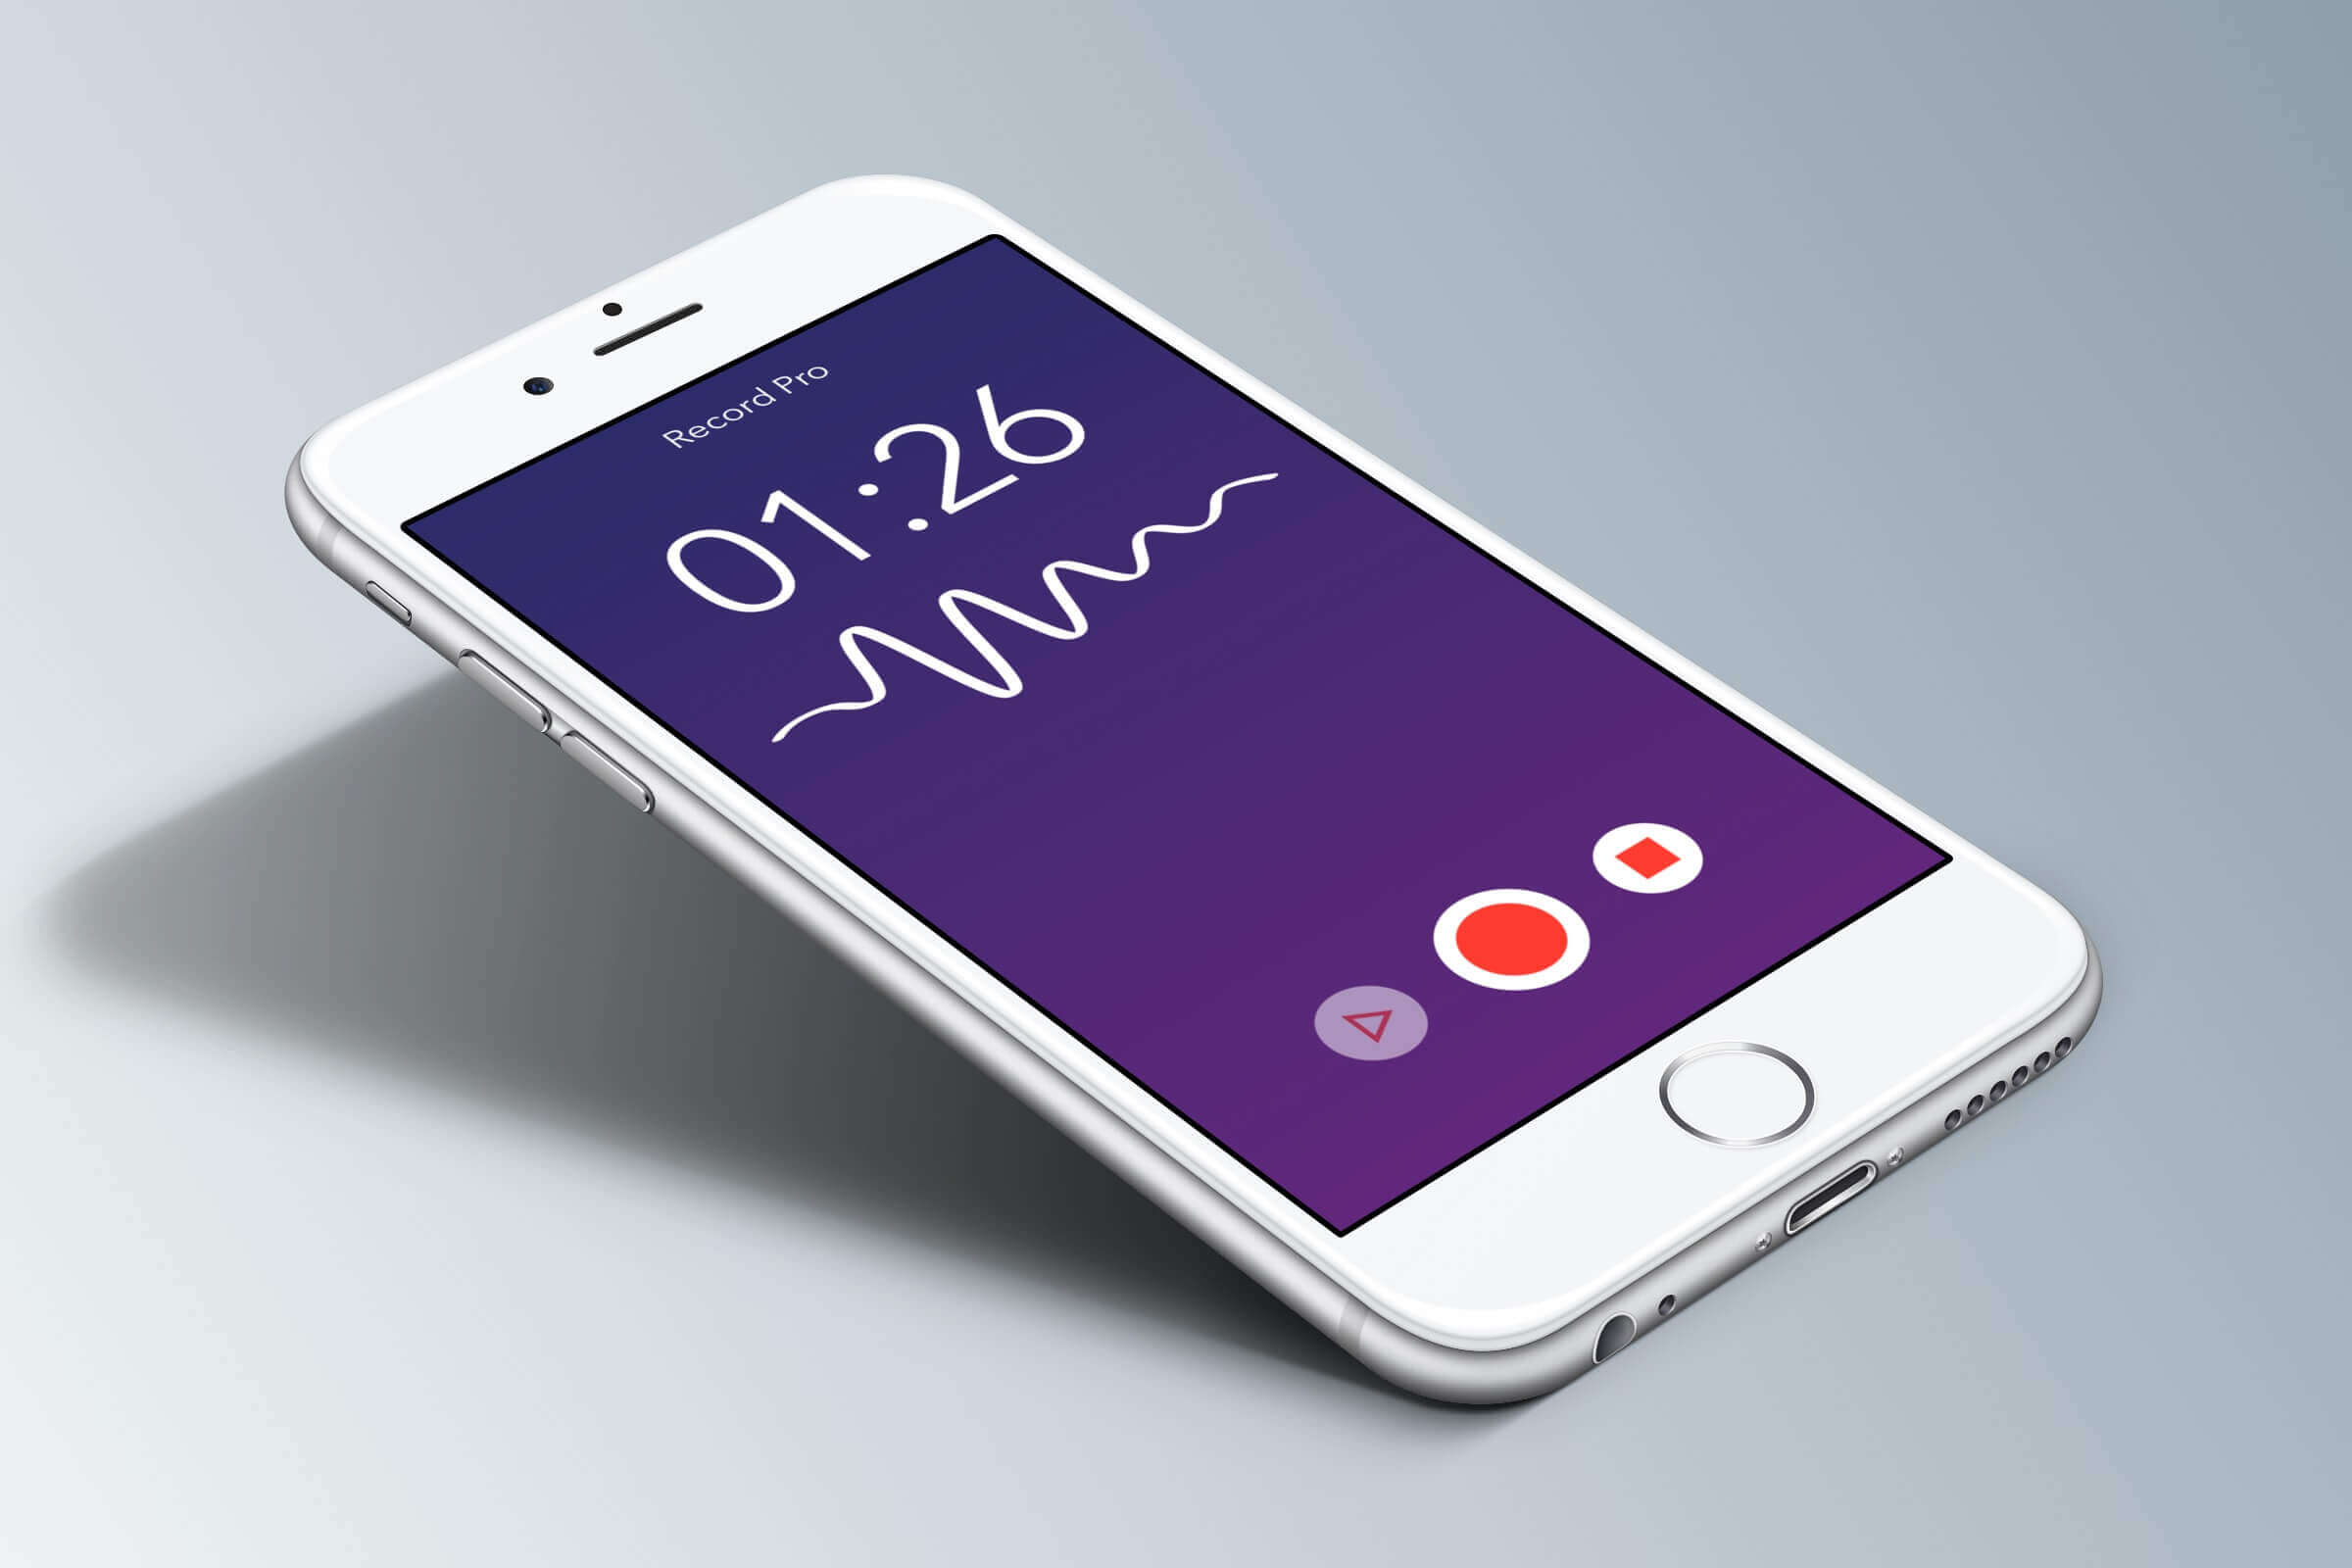
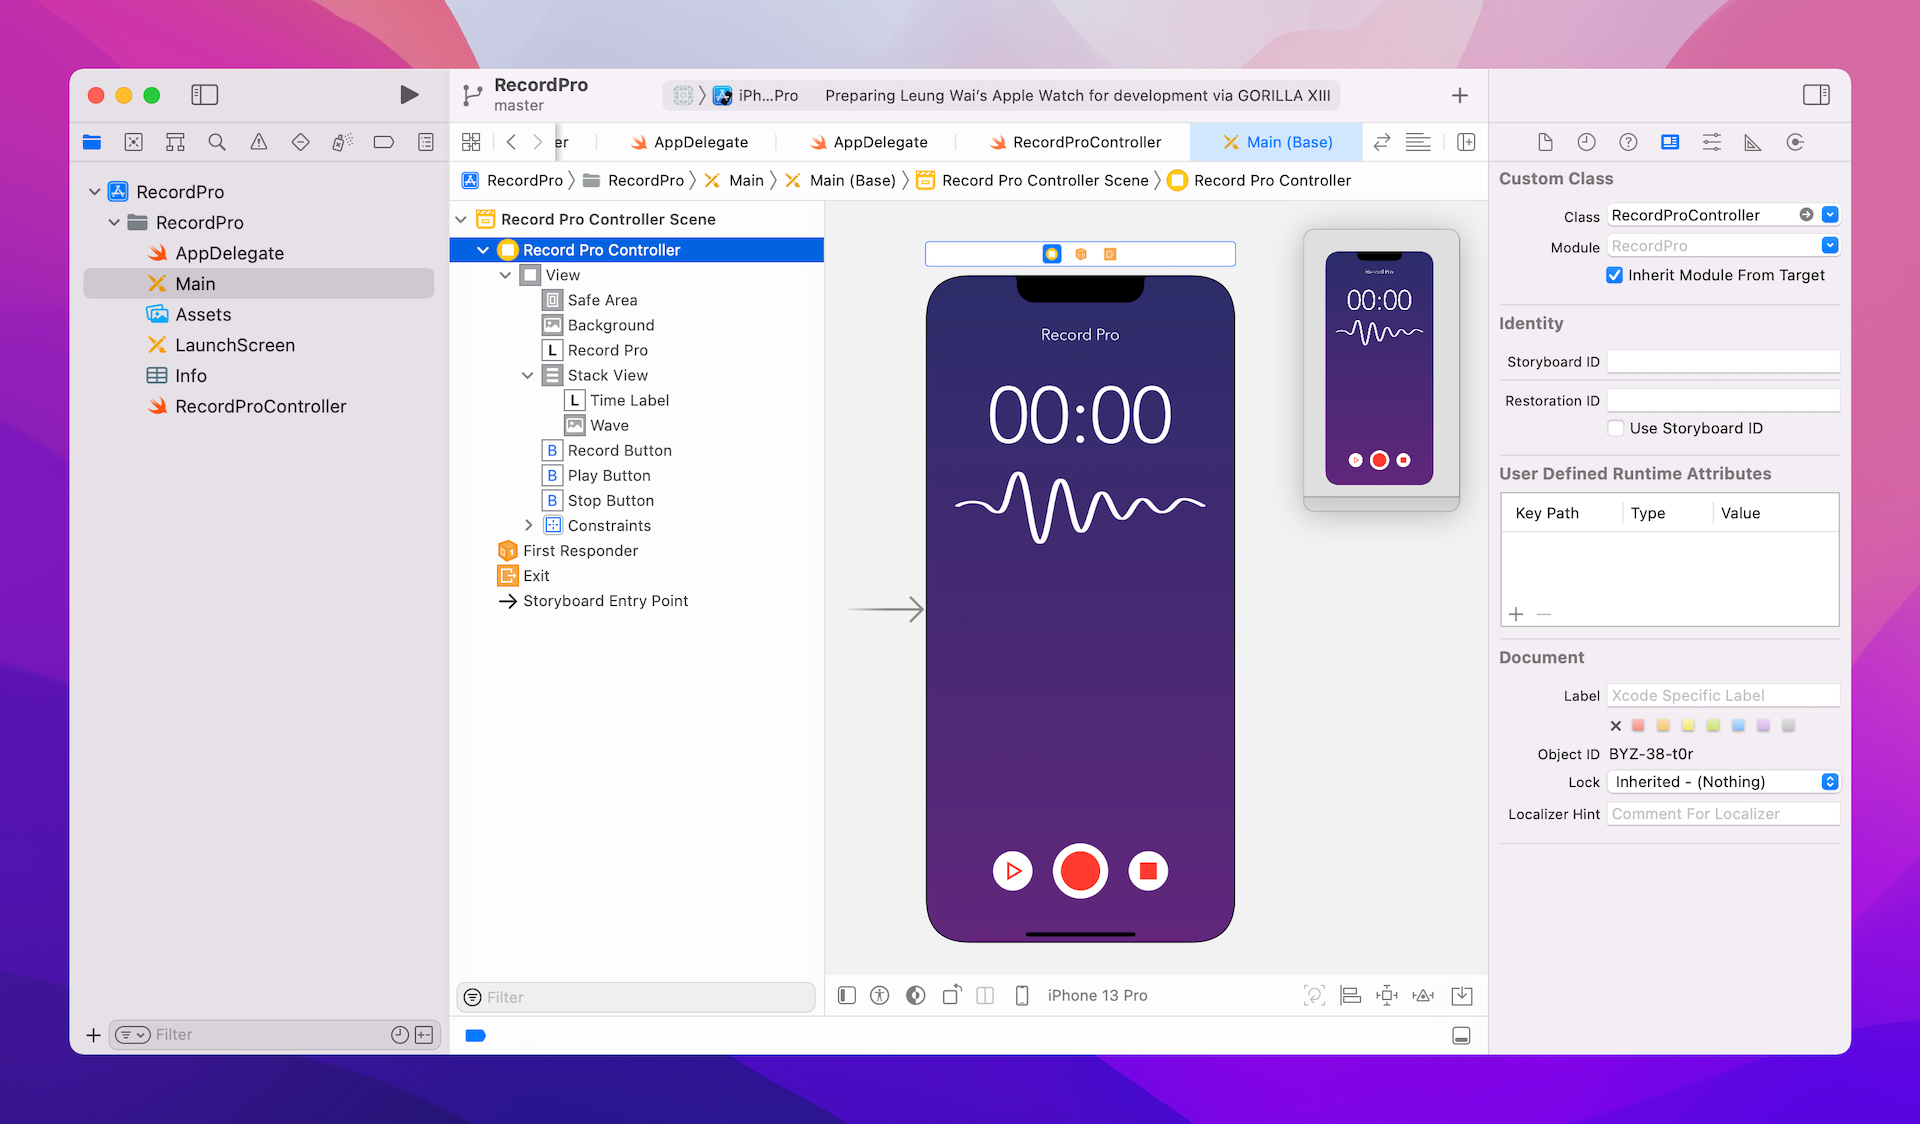
To understand how to use the API, we will build a simple audio app that allows users to record and play audio. Our primary focus is to demonstrate the AVFoundation framework so the app's user interface will be very simple.
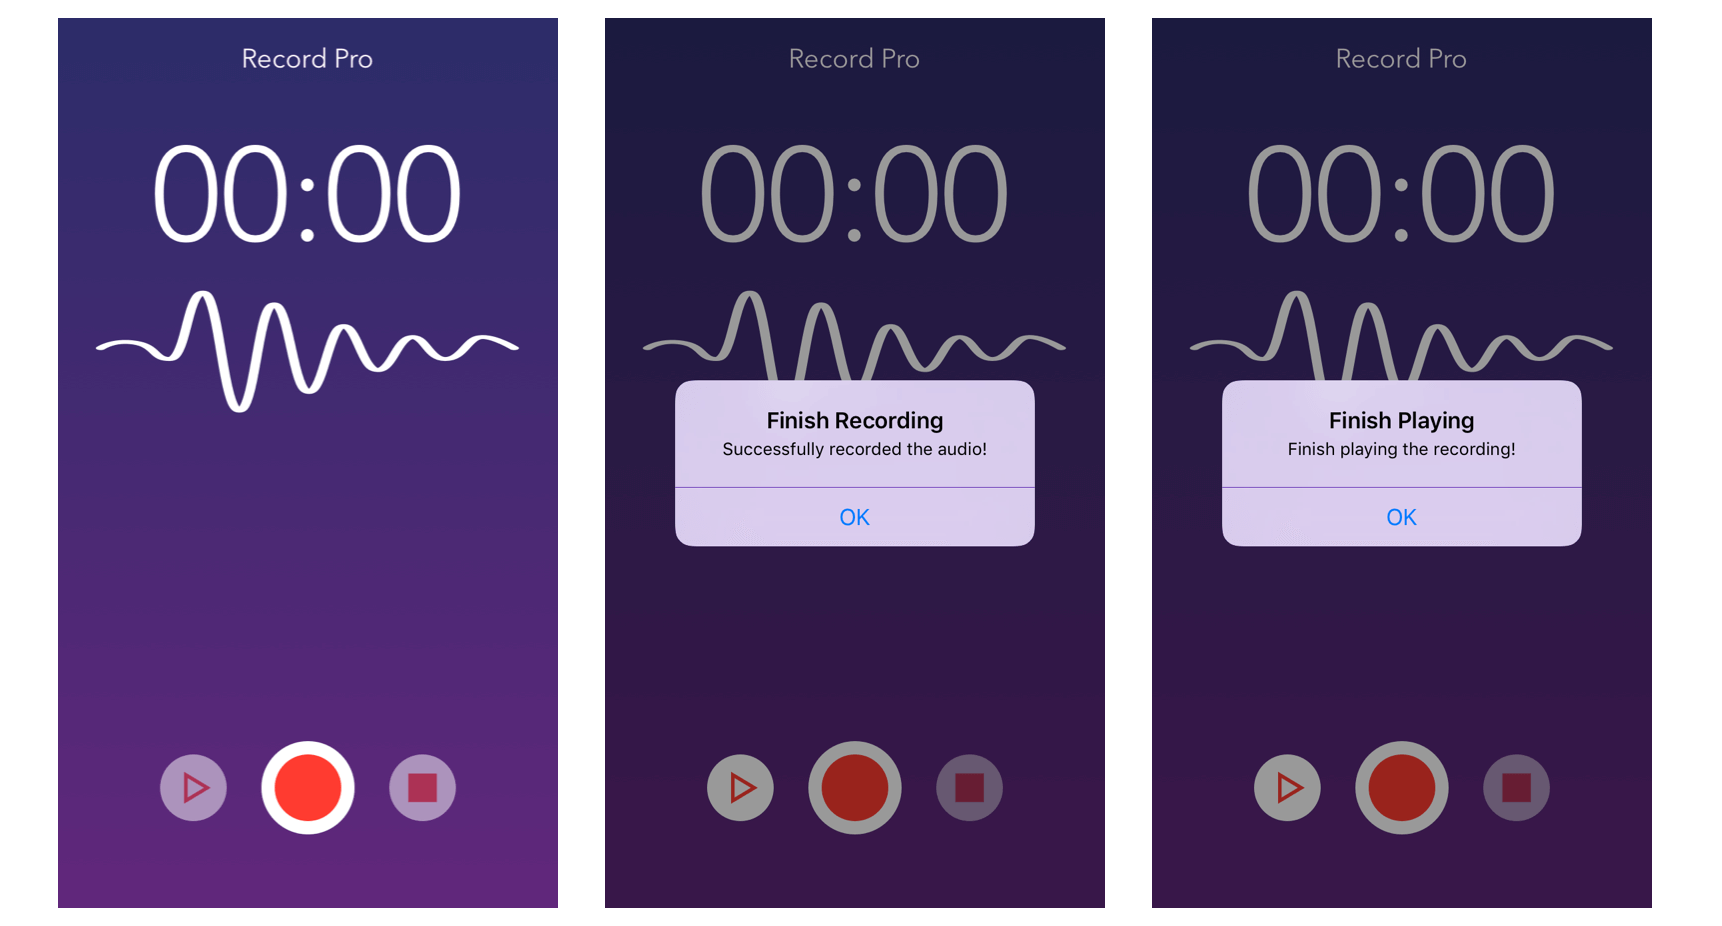
First, create an app using the Single View Application template and name it RecordPro (or any name you like). You can design a user interface like figure 10.1 on your own. However, to free you from setting up the user interface and custom classes, you can download the project template from http://www.appcoda.com/resources/swift55/RecordProStarter.zip. I've created the storyboard and custom classes for you. The user interface is very simple with three buttons: record, stop and play. It also has a timer to show the elapsed time during recording. The buttons have been connected to the corresponding action method in the RecordProController class, which is a subclass of UIViewController.
Before we move onto the implementation, let me give you a better idea of how the demo app works:
- When the user taps the Record button, the app starts the timer and begins to record the audio. The Record button is then replaced by a Pause button. If the user taps the Pause button, the app will pause the recording until the user taps the button again. In terms of coding, it invokes the
recordaction method. - When the user taps the Stop button, the app stops the recording. I have already connected the button with the
stopaction method inRecordProController. - To play the recording, the user can tap the Play button, which is associated with the
playmethod.
Audio Recording using AVAudioRecorder
The AVAudioRecorder class of the AV Foundation framework allows your app to provide audio recording capability. In iOS, the audio being recorded comes from the built-in microphone or headset microphone of the iOS device. These devices include the iPhone, iPad or iPod touch.
First, let's take a look at how we can use the AVAudioRecorder class to record audio. Like most of the APIs in the SDK, AVAudioRecorder makes use of the delegate pattern. You can implement a delegate object for an audio recorder to respond to audio interruptions and to the completion of a recording. The delegate of an AVAudioRecorder object must adopt the AVAudioRecorderDelegate protocol.
For the demo app, the RecordProController class serves as the delegate object. Therefore, we adopt the AVAudioRecorderDelegate protocol by using an extension like this:
extension RecordProController: AVAudioRecorderDelegate {

}
We will implement the option method of the protocol in a later section. For now, we just indicate RecordProController is responsible for adopting AVAudioRecorderDelegate.
Because the protocol is defined in the AV Foundation framework, you have to import the AVFoundation:
import AVFoundation
Next, declare an instance variable of the type AVAudioRecorder and an instance variable of the type AVAudioPlayer in RecordProController.swift:
var audioRecorder: AVAudioRecorder!
var audioPlayer: AVAudioPlayer?
Let's focus on AVAudioRecorder first. We will use the audioPlayer variable later. The AVAudioRecorder class provides an easy way to record sounds in your app. To use the recorder, you have to prepare a few things:
- Specify a sound file URL
- Set up an audio session
- Configure the audio recorder's initial state
We will create a private method called configure() to do the setup. Insert the code into the RecordProController class:
private func configure() {
    // Disable Stop/Play button when application launches
    stopButton.isEnabled = false
    playButton.isEnabled = false

    // Get the document directory. If fails, just skip the rest of the code
    guard let directoryURL = FileManager.default.urls(for: FileManager.SearchPathDirectory.documentDirectory, in: FileManager.SearchPathDomainMask.userDomainMask).first else {

        let alertMessage = UIAlertController(title: "Error", message: "Failed to get the document directory for recording the audio. Please try again later.", preferredStyle: .alert)
        alertMessage.addAction(UIAlertAction(title: "OK", style: .default, handler: nil))
        present(alertMessage, animated: true, completion: nil)

        return
    }

    // Set the default audio file
    let audioFileURL = directoryURL.appendingPathComponent("MyAudioMemo.m4a")

    // Setup audio session
    let audioSession = AVAudioSession.sharedInstance()

    do {
        try audioSession.setCategory(.playAndRecord, mode: .default, options: [ .defaultToSpeaker ])

        // Define the recorder setting
        let recorderSetting: [String: Any] = [
            AVFormatIDKey: Int(kAudioFormatMPEG4AAC),
            AVSampleRateKey: 44100.0,
            AVNumberOfChannelsKey: 2,
            AVEncoderAudioQualityKey: AVAudioQuality.high.rawValue
        ]

        // Initiate and prepare the recorder
        audioRecorder = try AVAudioRecorder(url: audioFileURL, settings: recorderSetting)
        audioRecorder.delegate = self
        audioRecorder.isMeteringEnabled = true
        audioRecorder.prepareToRecord()

    } catch {
        print(error)
    }
}
In the above code, we first disable both the Stop and Play buttons because we only let users record audio when the app is first launched. We then define the URL of the sound file for saving the recording.
The question is where to save the sound file and how can we get the file path?
My plan is to store the file in the document directory of the user. In iOS, you use FileManager to interact with the file system. The class provides the following method for searching common directories:
func urls(for directory: FileManager.SearchPathDirectory, in domainMask: FileManager.SearchPathDomainMask) -> [URL]
The method takes in two parameters: search path directory and file system domain to search. My plan is to store the sound file under the document directory of the user's home directory. Thus, we set the search path directory to the document directory (FileManager.SearchPathDirectory.documentDirectory) and the domain to search to the user's home directory (FileManager.SearchPathDomainMask.userDomainMask).
After retrieving the file path, we create the audio file URL and name the audio file MyAudioMemo.m4a. In case of failures, the app shows an alert message to the users.
Now that we've prepared the sound file URL, the next thing is to configure the audio session. What's the audio session for? iOS handles the audio behavior of an app by using audio sessions. In brief, it acts as a middle man between your app and the system's media service. Through the shared audio session object, you tell the system how you're going to use audio in your app. The audio session provides answers to questions like:
- Should the system disable the existing music being played by the Music app?
- Should your app be allowed to record audio and music playback?
Since the AudioDemo app is used for audio recording and playback, we set the audio session category to .playAndRecord, which enables both audio input and output, and uses the built-in speaker for recording and playback.
The AVAudioRecorder uses dictionary-based settings for the configuration. In the code above, we use recorderSetting to store the audio data format, sample rate, number of channels and audio quality.
After defining the audio settings, we initialize an AVAudioRecorder object and set the delegate to itself.
Lastly, we call the prepareToRecord method to create the audio file and get ready for recording. Note that the recording has not yet started; the recording will not begin until the record method is called.
As you may notice, we’ve used a try keyword when we initialize the AVAudioRecorder instance and call the setCategory method of audioSession. Since the release of Swift 3, Apple changed most of the APIs in favor of the do-try-catch error handling model.
If the method call may throw an error, or the initialization may fail, you have to enclose it in a do-catch block like this:
do {
    try audioSession.setCategory(.playAndRecord, mode: .default, options: [ .defaultToSpeaker ])

     ...

    // Initiate and prepare the recorder
    audioRecorder = try AVAudioRecorder(url: audioFileURL, settings: recorderSetting)

} catch {
    print(error)
}
In the do clause, you call the method by putting a try keyword in front of it. If there is an error, it will be caught and the catch block will be executed. By default, the error is embedded in an Error object.
Okay, the configure() method is ready. To trigger the configuration, insert the following line of code in the viewDidLoad() method:
configure()
Implementing the Record Button
We've completed the recording preparation. Let's move on to the implementation of the action method of the Record button. Before we dive into the code, let me further explain how the Record button works.
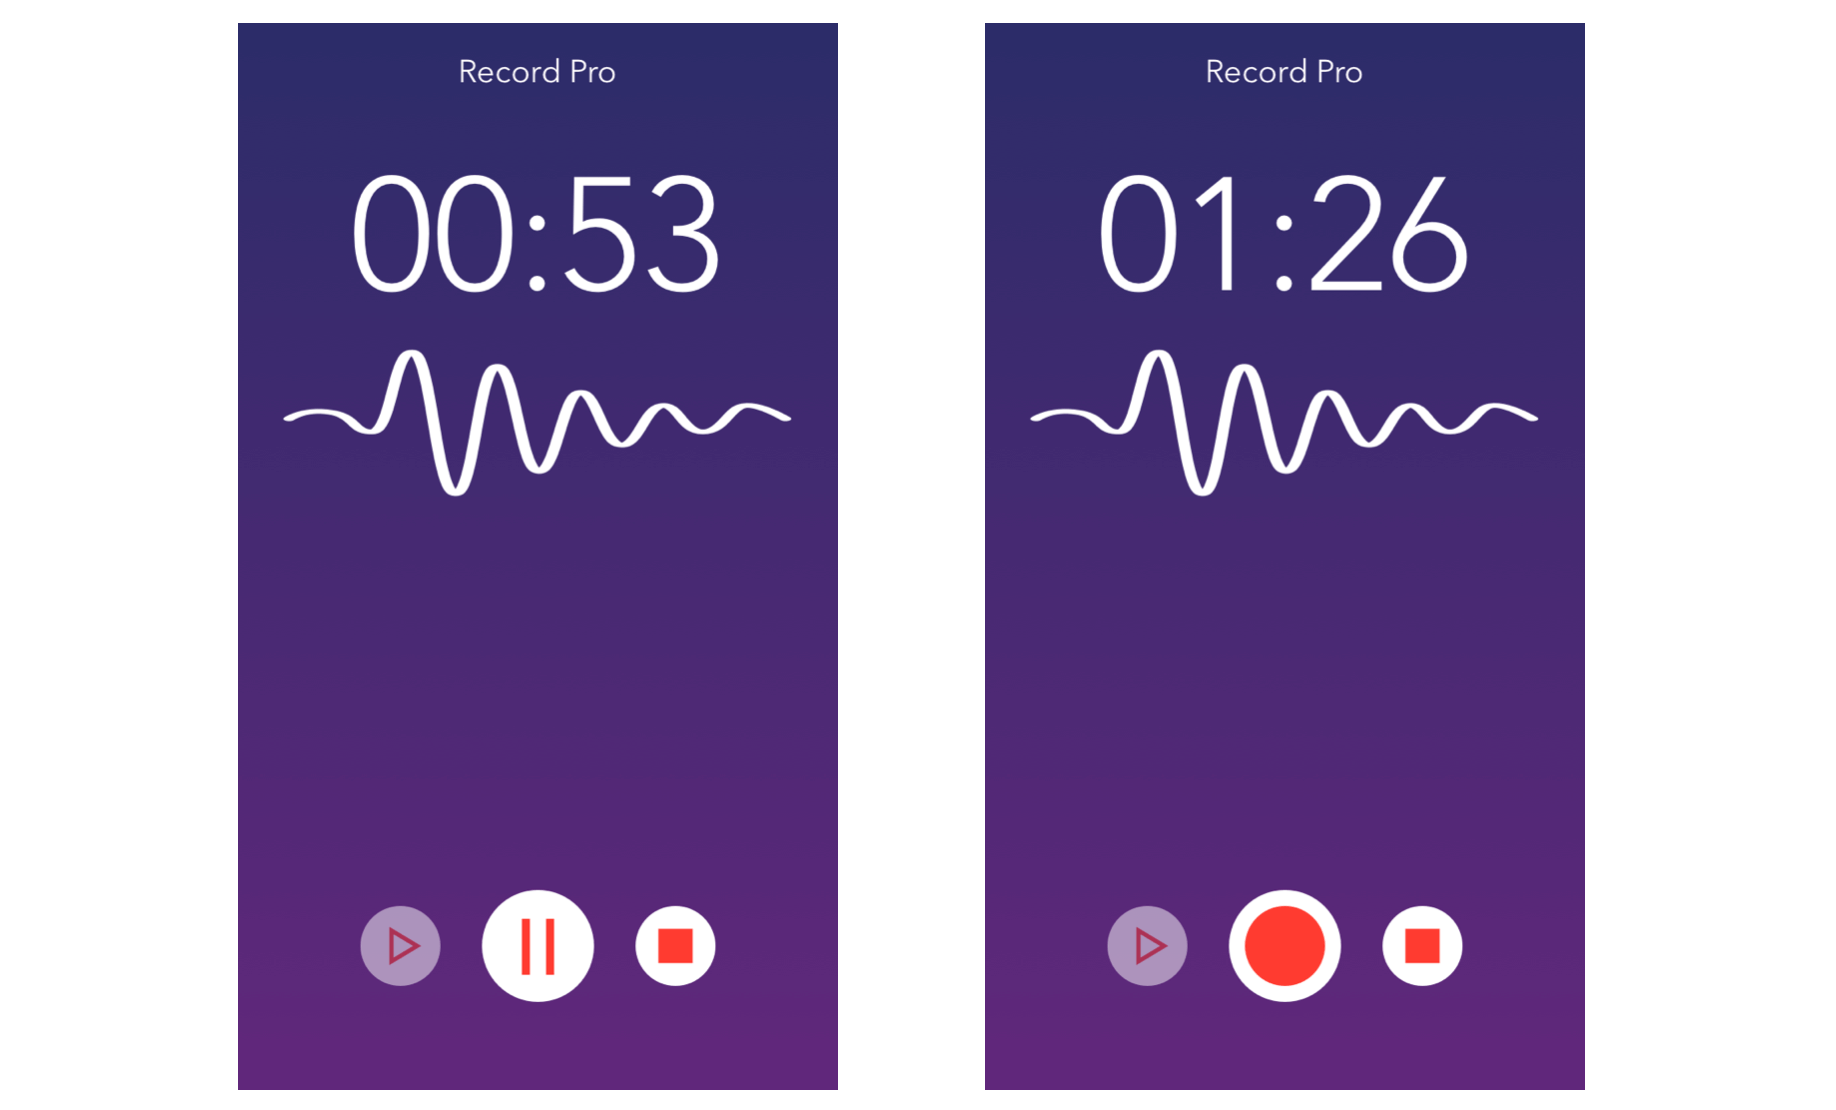
When a user taps the Record button, the app will start recording. The Record button will be changed to a Pause button. If the user taps the Pause button, the app will pause the audio recording until the button is tapped again. The audio recording will stop when the user taps the Stop button.
Now, update the record method like this:
@IBAction func record(sender: UIButton) {

    // Stop the audio player before recording
    if let player = audioPlayer, player.isPlaying {
        player.stop()
    }

    if !audioRecorder.isRecording {
        let audioSession = AVAudioSession.sharedInstance()

        do {
            try audioSession.setActive(true)

            // Start recording
            audioRecorder.record()

            // Change to the Pause image
            recordButton.setImage(UIImage(named: "Pause"), for: UIControl.State.normal)
        } catch {
            print(error)
        }

    } else {
        // Pause recording
        audioRecorder.pause()

        // Change to the Record image
        recordButton.setImage(UIImage(named: "Record"), for: UIControl.State.normal)
    }

    stopButton.isEnabled = true
    playButton.isEnabled = false
}
In the above code, we first check whether the audio player is playing. You definitely don't want to play an audio file while you're recording, so we stop any audio playback by calling the stop method.
If audioRecorder is not in the recording mode, the app activates the audio sessions and starts the recording by calling the record method of the audio recorder. To make the recorder work, remember to set audio session to active. Otherwise, the audio recording will not be activated.
try audioSession.setActive(true)
Once the recording starts, we change the Record button to the Pause button (with a different image). In case the user taps the Record button while the recorder is in the recording mode, we pause it by calling the pause method.
As you can see, the AVFoundation API is pretty easy to use. With a few lines of code, you can use the built-in microphone to record audio.
In general, you can use the following methods of AVAudioRecorder class to control the recording:
record– start/resume a recordingpause– pause a recordingstop– stop a recording
Using Microphone Without Users' Permission
If you can't wait to test your app, deploy and run it on a real iOS device. However, you will end up with an error. The app can't even start up properly. If you look into the console, the error message will give you some hints about the issue:
RecordPro[66275:16149656] [access] This app has crashed because it attempted to access privacy-sensitive data without a usage description. The app's Info.plist must contain an NSMicrophoneUsageDescription key with a string value explaining to the user how the app uses this data.
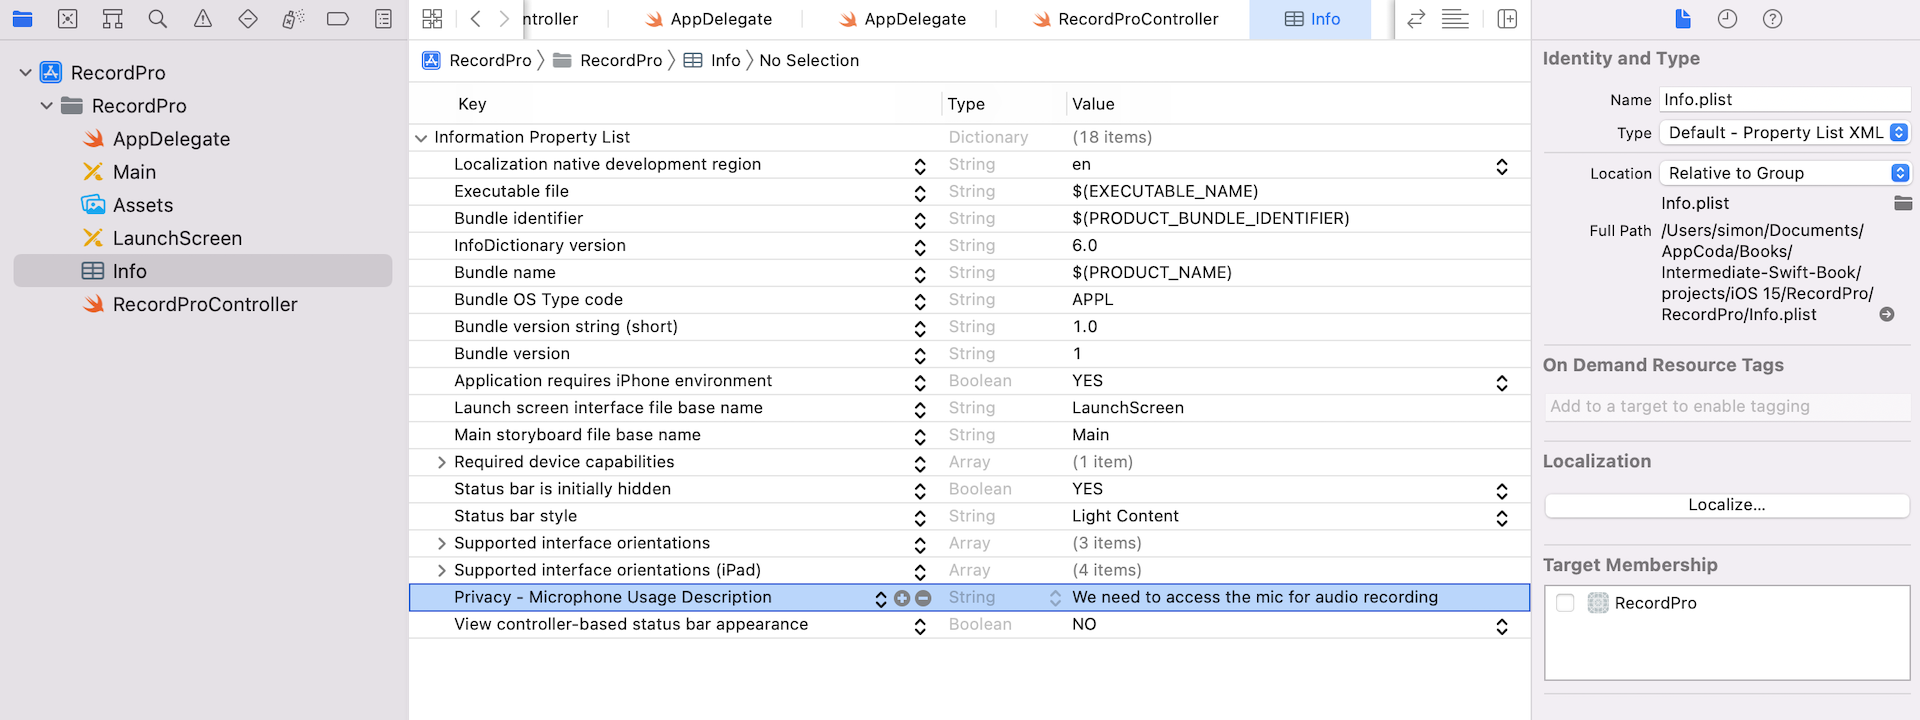
Since iOS 10, you can't access the microphone without asking for the user's permission. To do so, you need to add a key named NSMicrophoneUsageDescription in the Info.plist file and explain to the user why your app needs to use the microphone.
Now, open Info.plist, and then right click any blank area to open the popover menu. Choose Add Row to add a new entry. In the value field, you specify the reason why you need to use the microphone.
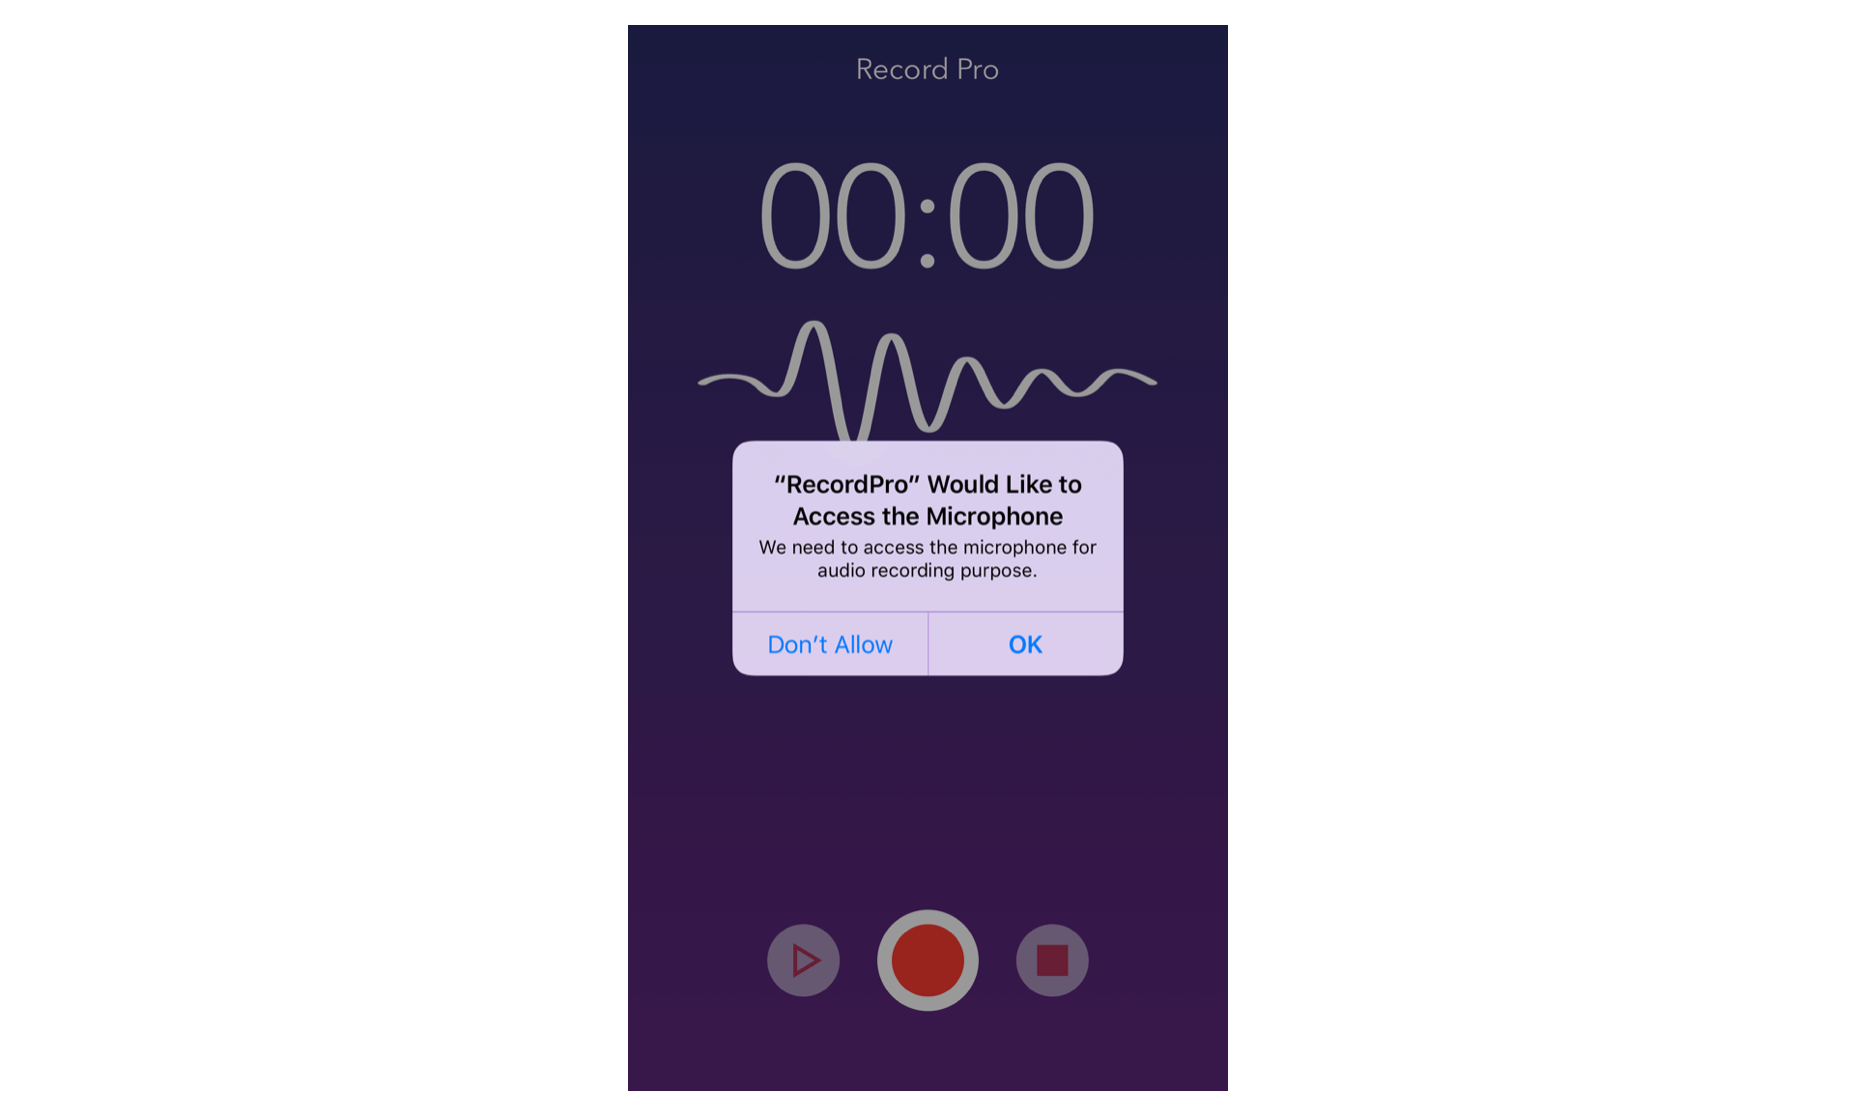
Once you add the reason, you can test the app on your device again. This time, the app should display a message (with the explanation you added before) asking for the user's permission for accessing the microphone. Remember to choose OK to authorize the access.
Implementing the Stop Button
Let's continue to implement the rest of the action method.
The stop action method is called when the user taps the Stop button. This method is pretty simple. We first reset the state of the buttons and then call the stop method of the AVAudioRecorder object to stop the recording. Lastly, we deactivate the audio session. Update the stop action method to the following code:
@IBAction func stop(sender: UIButton) {
    recordButton.setImage(UIImage(named: "Record"), for: UIControl.State.normal)
    recordButton.isEnabled = true
    stopButton.isEnabled = false
    playButton.isEnabled = true

    // Stop the audio recorder
    audioRecorder?.stop()

    let audioSession = AVAudioSession.sharedInstance()

    do {
        try audioSession.setActive(false)
    } catch {
        print(error)
    }
}
Implementing the AVAudioRecorderDelegate Protocol
You can make use of the AVAudioRecorderDelegate protocol to handle audio interruptions (say, a phone call during audio recording) as well as to complete the recording. In the example, RecordProController is the delegate. The methods defined in the AVAudioRecorderDelegate protocol are optional. For demo purpose, we'll only implement the audioRecorderDidFinishRecording(_:successfully:) method to handle the completion of recording. Update the RecordProController extension like this:
extension RecordProController: AVAudioRecorderDelegate {
    func audioRecorderDidFinishRecording(_ recorder: AVAudioRecorder, successfully flag: Bool) {
        if flag {
            let alertMessage = UIAlertController(title: "Finish Recording", message: "Successfully recorded the audio!", preferredStyle: .alert)
            alertMessage.addAction(UIAlertAction(title: "OK", style: .default, handler: nil))
            present(alertMessage, animated: true, completion: nil)
        }
    }
}
After the recording completes, the app displays an alert dialog with a success message.
Playing Audio Using AVAudioPlayer
Finally, we come to the implementation of the Play button. AVAudioPlayer is the class which is responsible for audio playback. Typically, there are a few things you have to implement in order to use AVAudioPlayer:
- Initialize the audio player and assign the sound file to it. In this case, it's the audio file of the recording (i.e. MyAudioMemo.m4a). You can use the URL property of an
AVAudioRecorderobject to get the file URL of the recording. - Designate an audio player delegate object, which handles interruptions as well as the playback-completed event.
- Call the
playmethod to play the sound file.
In the RecordProController class, edit the play action method using the following code:
@IBAction func play(sender: UIButton) {

    if !audioRecorder.isRecording {
        guard let player = try? AVAudioPlayer(contentsOf: audioRecorder.url) else {
            print("Failed to initialize AVAudioPlayer")
            return
        }

        audioPlayer = player
        audioPlayer?.delegate = self
        audioPlayer?.play()
    }

}
The above code is very straightforward. We first initialize an instance of AVAudioPlayer with the URL of the audio file (audioRecorder.url). To play the audio, you just need to call the play method. In the viewDidLoad method, we configured the audio session to use the built-in speaker. Thus, the player will use the speaker for audio playback.
You may wonder what the keyword try? means. The initialization of AVAudioPlayer may throw an error. Normally, you can use the do-try-catch block when initializing the AVAudioPlayer instance like this:
do {
  ...

  audioPlayer = try AVAudioPlayer(contentsOf: recorder.url)

  ...
} catch {
  print(error)
}
In some cases, we may just want to ignore the error. So you can use try? to make things simpler without wrapping the statement with a do-catch block:
audioPlayer = try? AVAudioPlayer(contentsOf: recorder.url)
If the initialization fails, the error is handled by turning the result into an optional value. Hence, we use guard to check if the optional has a value.
Implementing the AVAudioPlayerDelegate Protocol
The delegate of an AVAudioPlayer object must adopt the AVAudioPlayerDelegate protocol. Again, RecordProController is set as the delegate, so create an extension of RecordProController to adopt the protocol:
extension RecordProController: AVAudioPlayerDelegate {
    func audioPlayerDidFinishPlaying(_ player: AVAudioPlayer, successfully flag: Bool) {
        playButton.isSelected = false

        let alertMessage = UIAlertController(title: "Finish Playing", message: "Finish playing the recording!", preferredStyle: .alert)
        alertMessage.addAction(UIAlertAction(title: "OK", style: .default, handler: nil))
        present(alertMessage, animated: true, completion: nil)
    }
}
The delegate allows you to handle interruptions, audio decoding errors, and update the user interface when an audio file finishes playing. All methods in the AVAudioplayerDelegate protocol are optional, however.
To demonstrate how it works, we'll implement the audioPlayerDidFinishPlaying method to display an alert message after the completion of audio playback. For usage of the other methods, you can refer to the official documentation of AVAudioPlayerDelegate protocol.
Compile and Run Your App
You can test audio recording and playback using a real device or the simulator. If you test the app using an actual device (e.g. iPhone), the audio being recorded comes from the device's built-in microphone. On the other hand, if you test the app by using the simulator, the audio comes from the system's default audio input device as set in the System Preferences.
Go ahead to compile and run the app! Tap the Record button to start recording. Say something, tap the Stop button and then select the Play button to playback the recording.
Implementing the Timer
Now that the audio recording and playback should work, there is still one thing missing. We haven't implemented the timer yet.
The time label should be updated every second to indicate the elapsed time of the recording and playback. To do so, we utilize a built-in class named Timer for the implementation. You can tell a Timer object to wait until a certain time interval has elapsed and then run a block of code. In this case, we want the Timer object to execute the block of code every second, so we can update the time label accordingly.
With some ideas about the implementation, insert the following code in the RecordProController class:
private var timer: Timer?
private var elapsedTimeInSecond: Int = 0

func startTimer() {
    timer = Timer.scheduledTimer(withTimeInterval: 1.0, repeats: true, block: { (timer) in
        self.elapsedTimeInSecond += 1
        self.updateTimeLabel()
    })

}

func pauseTimer() {
    timer?.invalidate()
}

func resetTimer() {
    timer?.invalidate()
    elapsedTimeInSecond = 0
    updateTimeLabel()
}

func updateTimeLabel() {

    let seconds = elapsedTimeInSecond % 60
    let minutes = (elapsedTimeInSecond / 60) % 60

    timeLabel.text = String(format: "%02d:%02d", minutes, seconds)
}
Here, we declare four methods to work with the timer. Let's begin with the startTimer method. As mentioned before, we utilize Timer to execute certain code every second. To create a Timer object, you can use a method called scheduledTimer(withTimeInterval:repeats:block). In the above code, we set the time interval to one second and create a repeatable timer. In other words, the timer fires every second.
We have a elapsedTimeInSecond variable to keep track of the recording/playback time in second. Every time when the timer fires, the code block is executed. We increase the variable by one second and then call the updateTimeLabel method to update the label.
For a repeating timer, it is required to explicitly call the invalidate() method to disable it. Otherwise, it will run forever. When the user taps the Pause button during recording, we will invalidate the timer. Therefore, we create a method called pauseTimer().
As soon as the user finishes a recording, he/she taps the Stop button. In this case, we have to invalidate the timer. At the same time, the elapsedTimeInSecond should be reset to zero too. This is what we have implemented in the resetTimer() method.
Now that you understand the timer implementation, it is time to modify some code to use the methods.
When the app starts to record an audio note, it should start the timer and update the timer label. So locate the following line of code in the record action method and insert the startTimer() method after it:
// Start recording
audioRecorder.record()
startTimer()
The same applies to audio playback. When you start to play the audio file, the app should start the timer too. In the play action method, call the startTimer() method right after the line below:
audioPlayer?.play()
When the user pauses a recording, we should call pauseTimer() to invalidate the timer object. In the record action method, locate the following line of code and insert pauseTimer() after it:
audioRecorder.pause()
Lastly, we need to stop and reset the timer when finishing an audio recording or playback. Locate the following line of code in the stop action method and insert resetTimer() after that:
audioRecorder?.stop()
For audio playback, it calls the audioPlayerDidFinishPlaying method when complete. So add resetTimer() in the method to reset the timer.
Great! You're ready to try out the app again. Now, the timer is ticking.
For reference, you can download the Xcode project from http://www.appcoda.com/resources/swift55/RecordPro.zip.